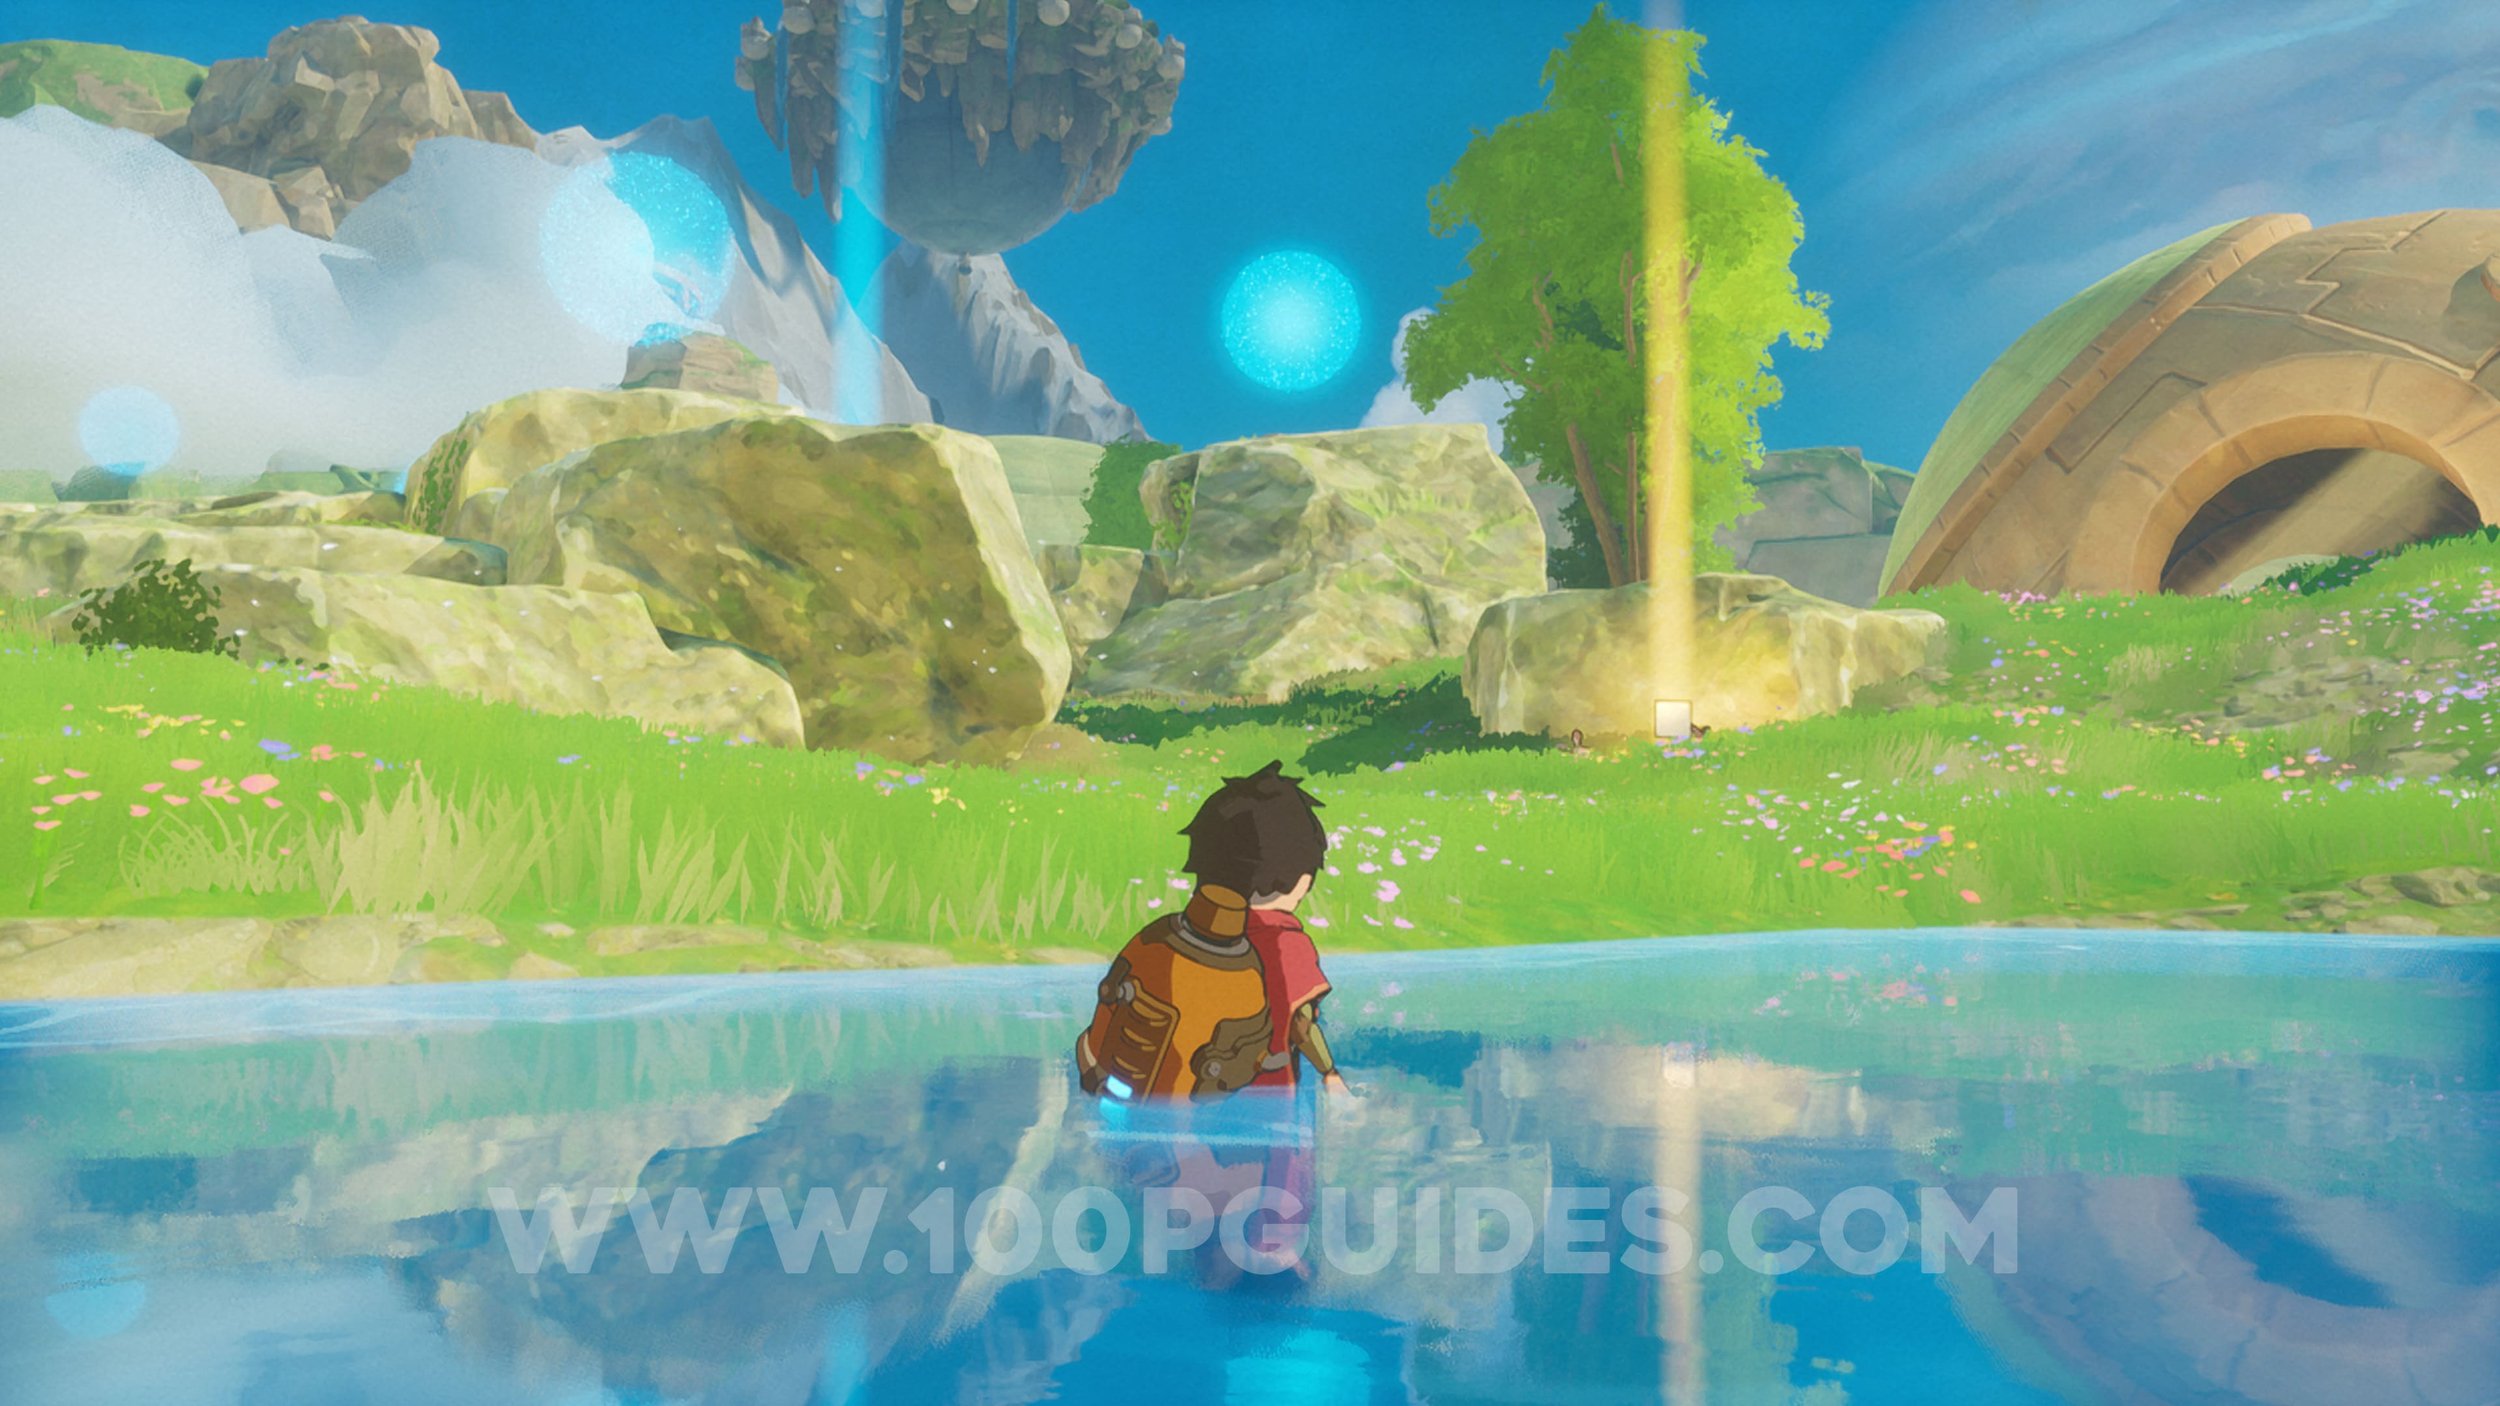
Europa All Collectible Locations
This guide will show you where to find every collectible in Europa.
🎮 Find more Europa guides here.
In this guide, we will cover the location of every collectible in Europa. There are a total of 159 Collectibles. These are:
40 Emeralds
39 Gardener Sketches
37 Journal Pages
28 Zephyr Upgrade
15 Stone Chests
If you miss anything you can use the Chapter Select option on the main menu after finishing the game at least once.
Index
Chapter 1. Leaving Home
Chapter 2. Saga Begins
Chapter 3. Ancient Battlefield
Chapter 4. Amber Horizon
Chapter 5. Lost Island
Chapter 6. Deep Ruins
Chapter 7. The Bowl
Chapter 8. Twilight
Chapter 9. Wild Depths
Chapter 10. Crisp Embrace
Chapter 11. Flying High
Chapter 12. Island Ascent
Chapter 13. Golden Plains
Chapter 14. Climbing Escape
Chapter 15. Riding High
Chapter 1. Leaving Home
Journal Page #1. Found on the table just outside of the house with the waterwheel you see in plain sight just after the chapter title card.


Emerald #1. Behind the same house as the previous Journal Page.


Journal Page #2. On the stone platform just left of the path after the house with the previous collectibles.
Emerald #2. Soon after the previous collectibles you will have to get across a gap by jumping and then gliding. Once you are on the other side, look for a house on your right with a green dome on the roof. The emerald can be found inside.
Journal Page #3. Exit the building with the previous collectible and slide down the hill to find the page in plain sight.
Emerald #3. Found to the left of the platform with the torch on it (same area as the previous collectible).


Chapter 2. A Saga Begins
Zephyr Upgrade #1. Found in front of you in plain sight as soon as you get to the big open area.
Zephyr Upgrade #2. From the start of the big open area, look left to find the upgrade in the bullet shaped building.
Zephyr Upgrade #3. Found above the centre of the lake in the big open area. Get it by hovering through the blue balls of energy.
Journal Page #4. In plain sight on the other side of the lake.
Zephyr Upgrade #4. In the round “building” to the right of the previous collectible.


Emerald #4. Once you have 4 Zephyr levitate upgrades, return to the start and look for the bullet-shaped building on your left. The emerald can be found on the roof of this building. You can get up by standing on the rock with the blue energy sphere and levitating up from there (the same building containing Zephyr Upgrade #2).
Emerald #5. After crossing the first lake in the middle of the open area you will find a little stone ramp. At the top you will be overlooking another smaller body of water and the game will tell you to levitate to get to the other side. Before doing this, look for a small round “building” on your left. The emerald will be inside.


Journal Page #5. Continue to the next area by levitating and gliding across to the building on the side of the cliff. You will then find the Journal Page in plain sight before climbing the ramp made of ruins.


Zephyr Upgrade #5. Behind the building at the top of the ramp made of ruins.
Journal Page #6. Continue on the path after the previous collectible, past the trigger that you can’t activate yet and up the second ramp of columns and ruins. You will find the journal in plain sight at the top.
Emerald #6. Collect the 3 wisps and use the trigger to get to the next area. Here, stick to the right side to find a tower with a Zephyr Upgrade on the top of it and 2 blue cubes that are used to get it. The Emerald can be found under the blue cubes.
Zephyr Upgrade #6. On top of the tower with the two blue cubes above the previous collectible. Use the cubes of just levitate and glide to get it.
Zephyr Upgrade #7. On another tower close to the central path through this same area. If you look to the left from the previous collectible you will see it.
Emerald #7. From the tower where the previous collectible is found, look around to find a round building on the left side of the area. The emerald can be found inside.
Chapter 3. Ancient Battlefield
Gardener Sketch #1. At the very start of the chapter, look for the green beam of light on the platform to your left (this is actually the book that will allow you to collect the sketches).
Journal Page #7. Follow the main path to find the page in plain sight just after 2 blue cubes.
Gardener Sketch #2. Press the Y/Triangle button when standing next to the big mechanical snake once you get to the open area.


Zephyr Upgrade #8. Found on top of the tower close to the mechanical snake. You can get to the top by levitating from the cliff on the right.
Gardener Sketch #3. On the other side of the tower you will find a building with 2 green domes on the roof. Just before this building you should see a deer walking around. Press Y/Triangle close to it to get the sketch.


Emerald #8. On the broken bridge to the left of the building with the 2 green domes on the roof. Levitate from the rooftops to get up there.
Gardener Sketch #4. Under the bridge where you picked up the previous emerald you will find multiple destroyed metal creatures. Get close to one of them and press Y/Triangle to collect the sketch.


Gardener Sketch #5. Once you get to the trigger where you need the 3 wisps, go left and through the purple barrier. In this area look for a small rock with some butterflies around it. Press Y/Triangle to collect the draw the sketch.


Journal Page #8. In plain sight in the same area as the previous sketch.
Gardener Sketch #6. Also found in the area past the left purple barrier are some little rock creatures. Stand close to one of them and press Y/Triangle.


Gardener Sketch #7. Go up the stairs in the same area as the previous sketch to find small yellow flying orbs. Press Y/Triangle next to them to collect the sketch.

Journal Page #9. Return to the trigger that requires the 3 wisps to activate and go through the other purple barrier (should be on your left if you are returning from the first barrier). On the other side of the barrier you arrive in an area with water and lots of flying orbs. The page will be here in plain sight.
Gardener Sketch #8. After using the wisps and activating the trigger you will get to the next open area. As soon as you arrive you will see a massive destroyed robot. Stand next to it and press Y/Triangle to sketch it.


Gardener Sketch #9. Continue on forward on the main path until a turret starts shooting at you. Deactivate it by pressing the switch. Then walk up to the turret and press Y/Triangle.


Zephyr Upgrade #9. Look for a building on the hill to the left of the turret. The upgrade can be found inside.


Emerald #9. Found on top of the tower next to the first turret. You should be able to get to the top if you go behind the tower and levitate from the highest point of terrain (you will need all 9 Zephyr upgrades that we have covered so far in this guide).
Gardener Sketch #10. Just before the switch that deactivated the 2nd turret you will find a new type of destroyed robot. Stand next to it and press Y/Triangle.


Zephyr Upgrade #10. After the second turret you will see another tower. The upgrade can be found on top of this tower. You can reach the top by levitating to the floating energy and then levitate to the top.
Emerald #10. Found behind the 3rd turret.
Emerald #11. After deactivating the 4th turret you will see a big building. The emerald can be found in the left most room of this building.


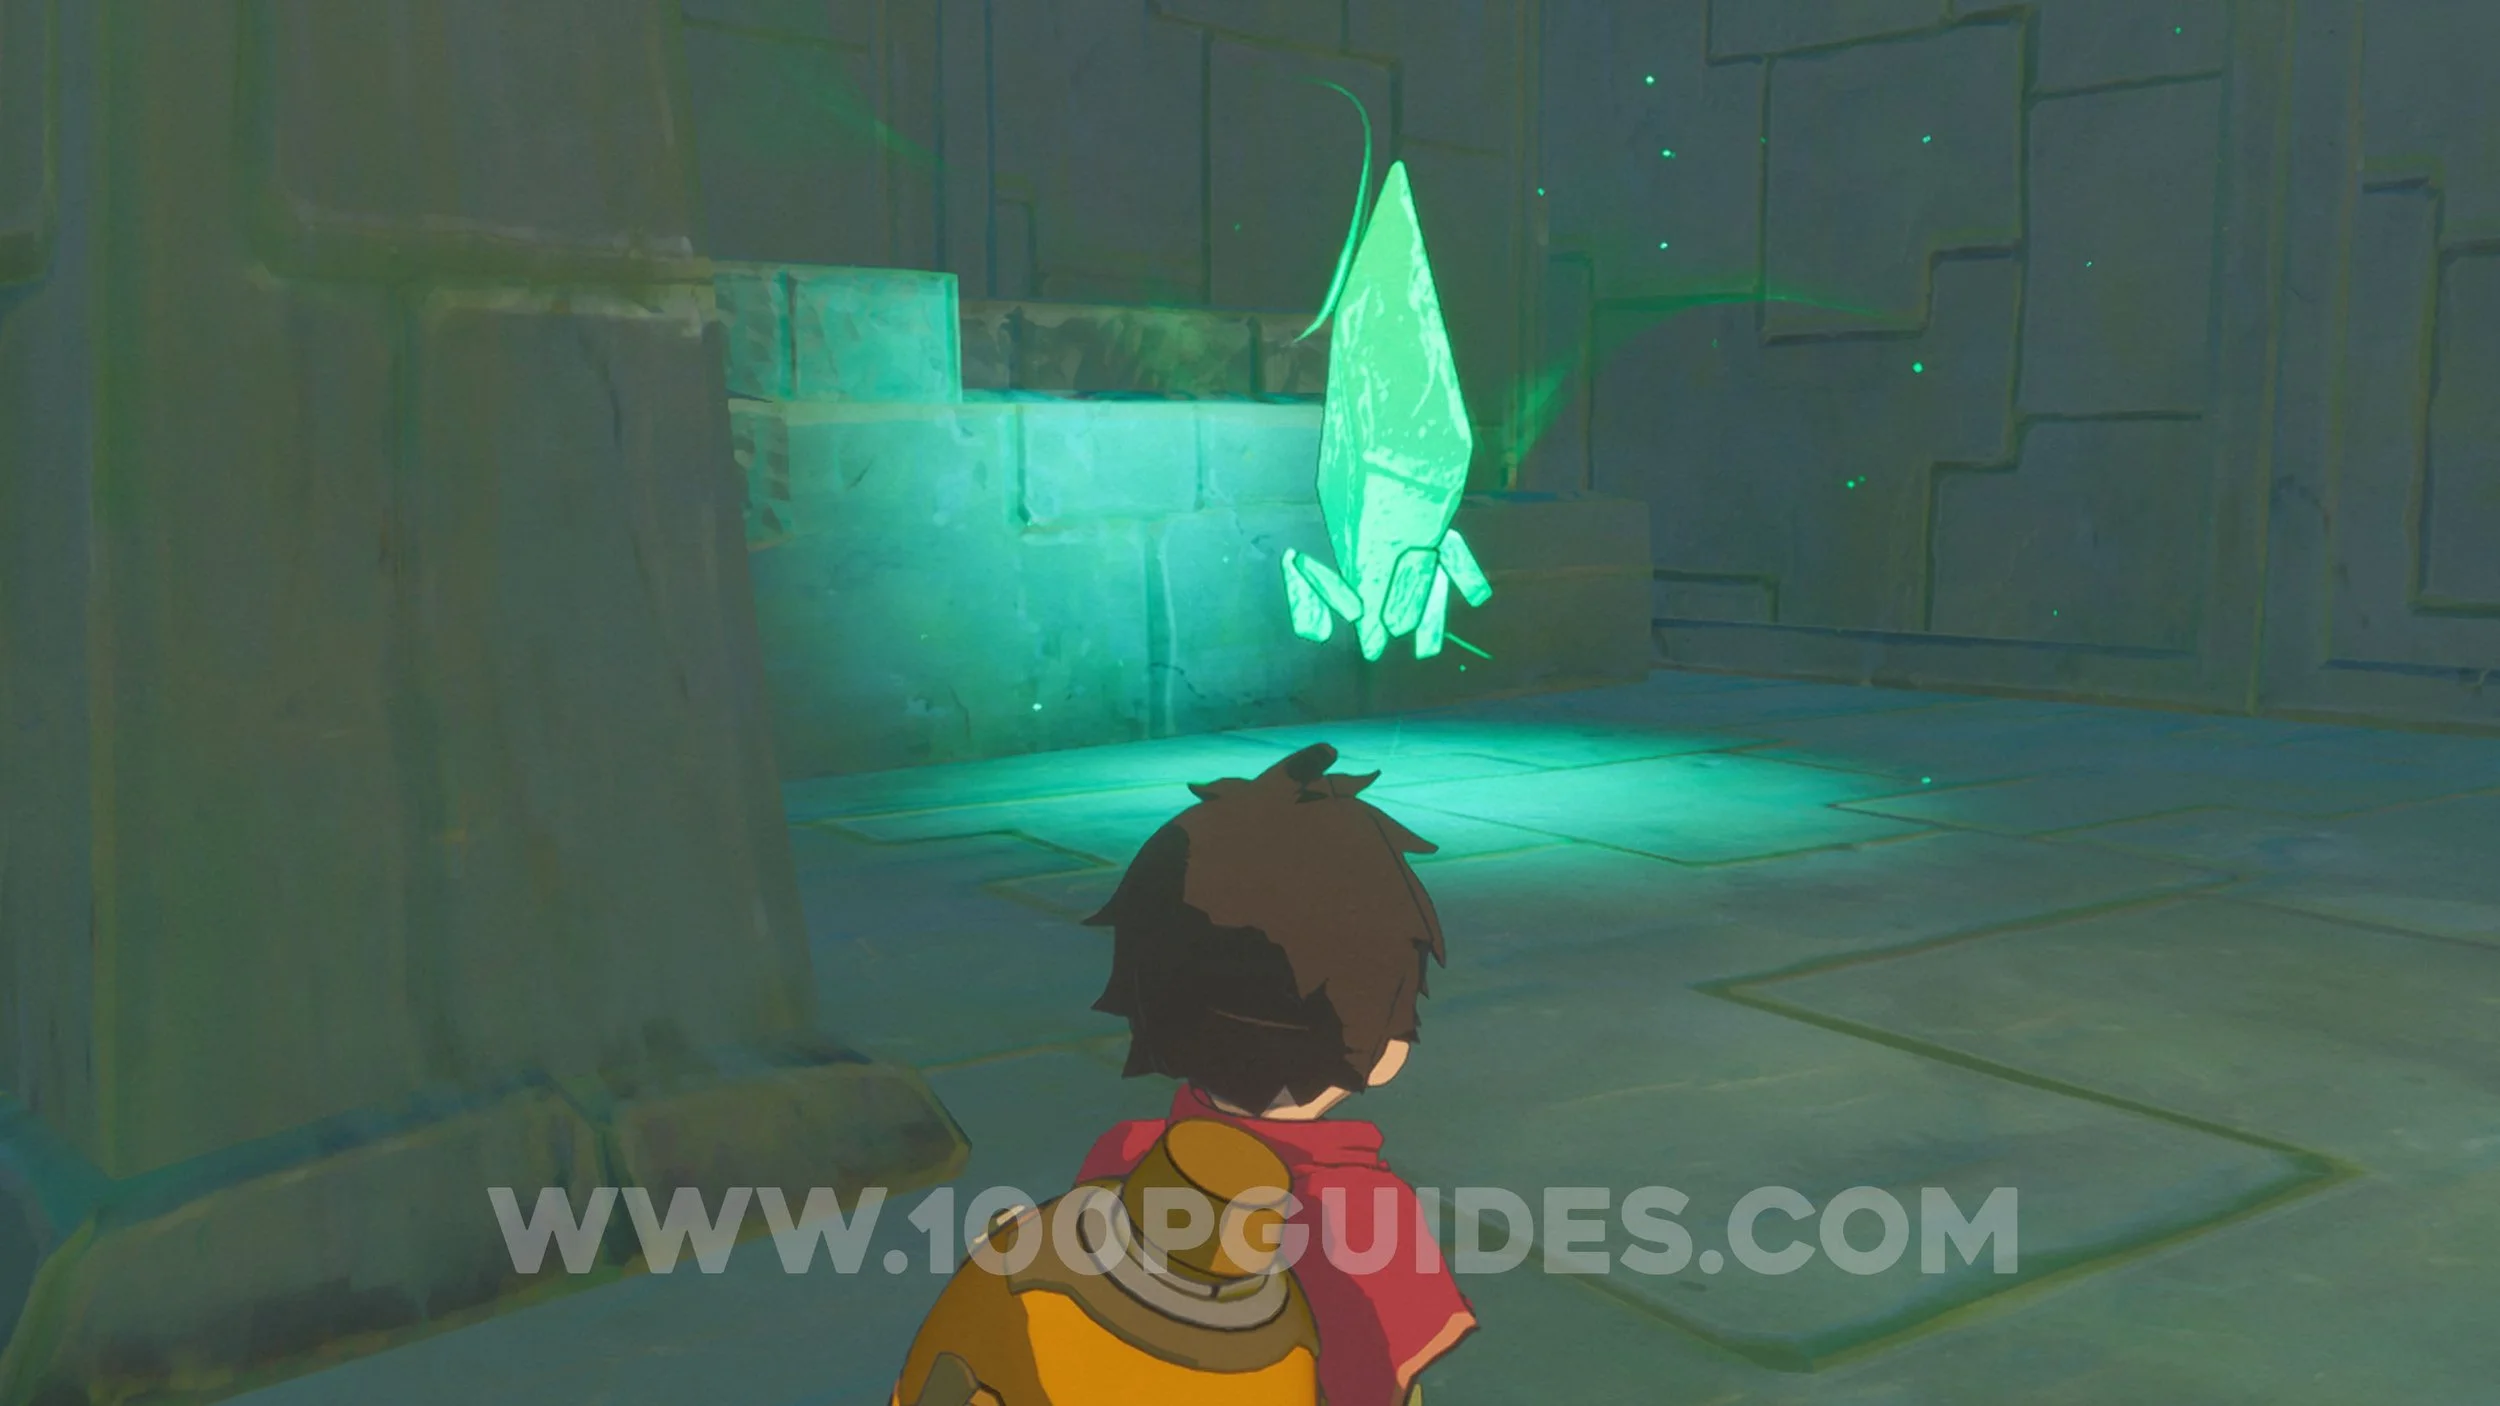
Zephyr Upgrade #11 & Stone Chest #1. Follow the main path until you get to the blue beam of light. Here you will see a stone orb with an upgrade inside. Open it by stomping on it (jump and then press X/Square).
Gardener Sketch #11. After getting the previous upgrade, go through the arch to the next area. Here you will find a new type of creature with a stone on their heads. Stand next to one and press Y/Triangle.


Journal Page #10. After the previous collectible, continue on the only possible path until you see some purple crystals on a platform. You can find the page on this same platform.
Chapter 4. Amber Horizon
Gardener Sketch #12. As soon as you start the chapter you will see a new type of creature. A type of robot with a mound on it’s back. Press Y/Triangle next to it.


Gardener Sketch #13. Follow the main path until you start going up a hill with 2 columns left from a broken arch at the top. Just before you get to the top you will see some rocks on your right with lizards running around. Stand next to them and press Y/Triangle.


Journal Page #11. Continue forward until you get to the top of the hill and the game tells you about the flying creatures that zap the energy out of the sky. From here you will see the page in plain sight.
Zephyr Upgrade #12 & Stone Chest #2. In the area to the left of the previous journal page near a waterfall.
Gardener Sketch #14. Walk around the area where you picked up the previous page until you get the prompt to press Y/Triangle to sketch the flying creatures.


Emerald #12. Found on top of the tower in the area with the flying creatures. You can get there by levitating and gliding from the top of the hill where you found the lizards. Just watch out for the flying creatures, they will zap your energy if they touch you.
Gardener Sketch #15. Follow the blue beam of light until you enter a building with water on the floor, rocks and another version of the mound creatures. Stand close to one of them and press Y/Triangle.


Zephyr Upgrade #13. Continue through the level until you get back outside. Here you will see some ruins with a turret shooting at you. The upgrade can be found in plain sight to the right of the turret.
Journal Page #12. Also in plain sight just past the turret.
Emerald #13. After climbing the next tower by using the air currents (main path) you will be overlooking the next open area. From here, glide to the top of the tower on your right to get the Emerald.
Journal Page #13. In plain sight at the start of the new open area.
Emerald #14. Found on top of the large building in the middle of the open area. You can get to the top by using the floating energy orb to the right of the building.


Zephyr Upgrade #14 & Stone Chest #3. To the left of the large building in the middle of the open area you will find a round ruin with an orb on it. Ground slam it (jump and then press X/Square) to open it and get the upgrade.
Zephyr Upgrade #15 & Stone Chest #4. Found on another round ruin on the right side of the central building.
Zephyr Upgrade #16. From the area with the big round tower and the previous collectibles you will have multiple paths that you can use to proceed to the next area. You will see two ruins with massive holes with wind currents (one on the right and one on the left side of the area) and a ruin in the middle with “keyhole” shaped windows. For this collectible we want to go to the ruin in the middle with the keyhole-shaped windows. and stomp the square on the ground. You will find the upgrade inside.


Emerald #15. In the next area you will come to a massive structure with towers and bridges. The emerald can be found on the destroyed bridge to the right. You can glide there by using the air currents half way up the tower.


Journal Page #14. Found on the main path as you climb the massive structure.
Chapter 5. Lost Island
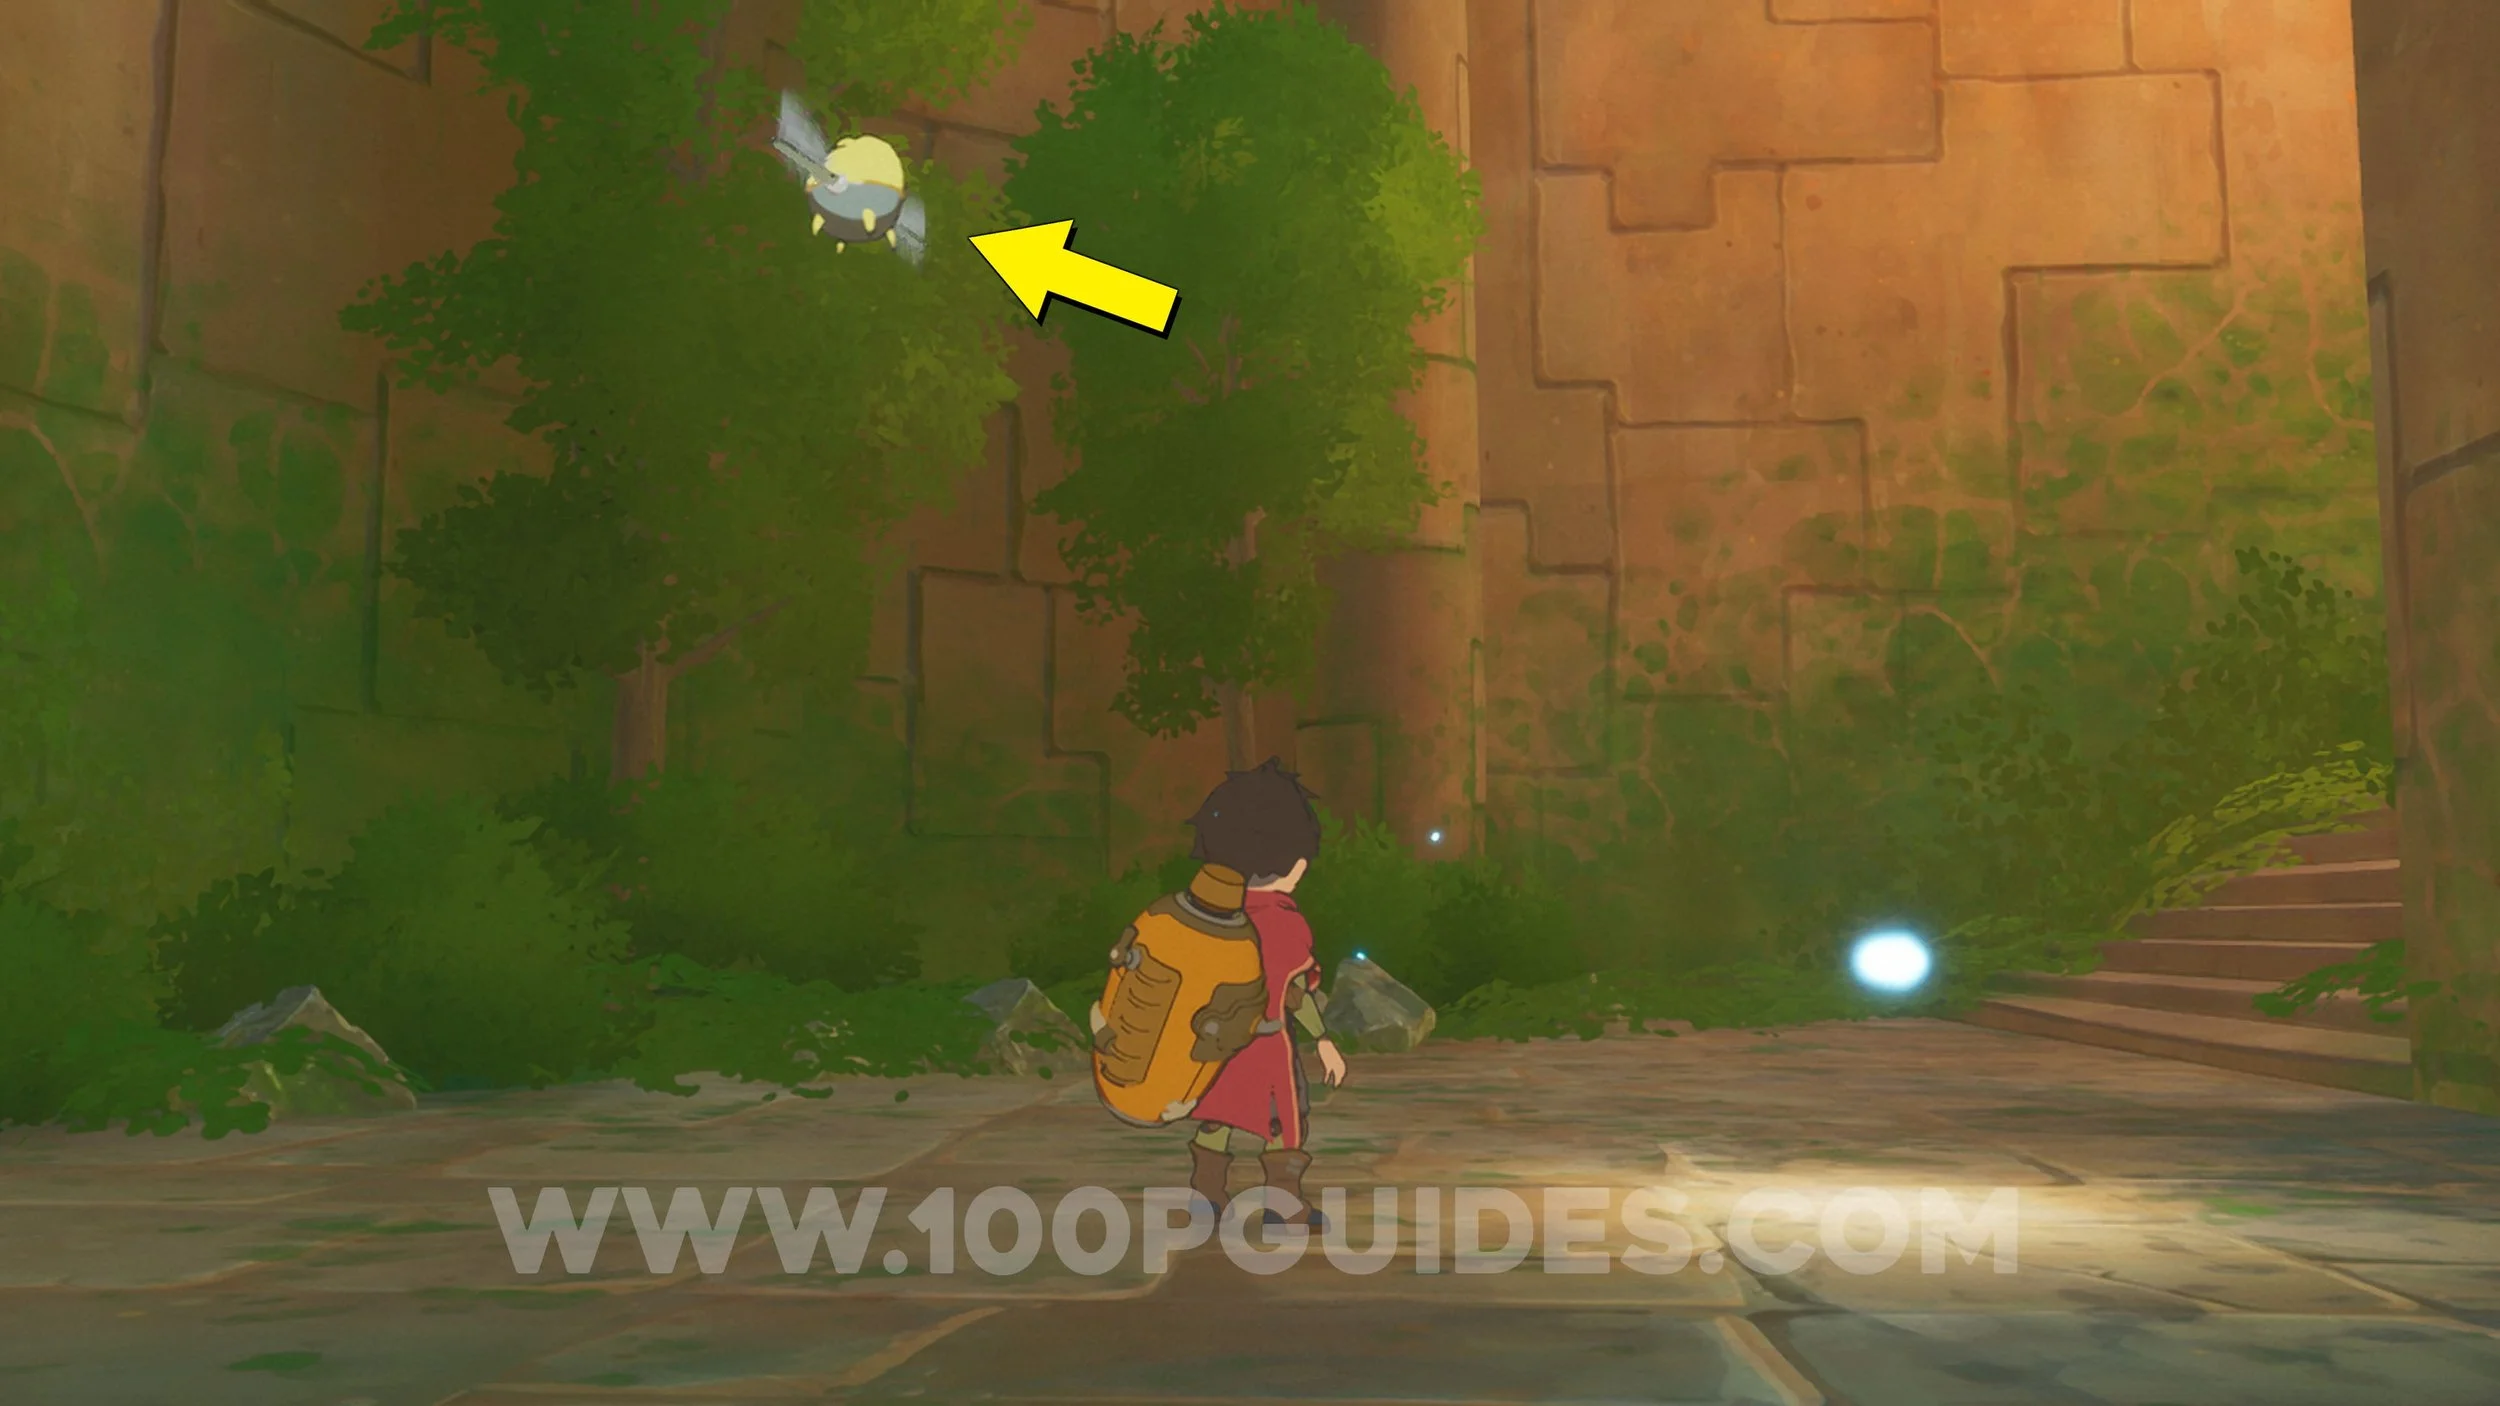
Gardener Sketch #16. At the very start of the chapter you will find some green flying creatures. Stand close to them and press Y/Triangle to sketch them.


Gardener Sketch #17. After going through the first door you will see a small pond with flying blue tadpole-type creatures just before the first turret. Stand close to them and press Y/Triangle.


Emerald #16. Stand in the tadpole pond to change your energy. Then levitate to the top of the structure above the first turret to find the emerald.
Gardener Sketch #18. Just past the button you use to deactivate the first turret you you come to a destroyed bridge with water below. Press the Y/Triangle button while on the bridge to sketch the fish.


Emerald #17. After you cross the destroyed bridge you will see a tower on your left. The Emerald is on top of this tower. You will have to go back to the pond of tadpoles to get the energy needed to get to the top.
Gardener Sketch #19. If you follow the main path you will cross a body of water with 2 blue cubes above it. After that, drop down to another area where you will have yet another body of water with blue cubes above it. Before crossing the second body of water, look for some Squirrels in the grass and press Y/Triangle next to one of them.


Journal Page #15. Found in plain sight on the main path after the next turret.
Emerald #18. Just after the 2nd turret you will be in an area with purple barriers, another turret and lots of bombs. Here you will see the emerald on top of the tower in front of you. Use the pond in the area below to get the needed energy.
Zephyr Upgrade #17 & Stone Chest #5. Found in an orb you have to stomp in the same area as the turret and pond you used to get to the top of the tower where the emerald was.
Emerald #19. After the area with the purple barrier and the turret, you will have to jump across some destroyed bridges with blue cubes while not hitting bombs. After this you will see a tower on your right. The emerald can be found on top of this tower. You can get the needed energy to levitate from the pond just down the next hill.


Gardener Sketch #20. Look for a rock formation next to the energy pond you used to get the previous emerald. On this rock you will see some yellow dragonflies. Stand close to the rock and press Y/Triangle.


Journal Page #16. Continue to the next area where you will find another purple barrier and another turret. The page can be found in plain sight behind the turret.
Chapter 6. Deep Ruins
Journal Page #17. In plain sight as you go around the first corner of the chapter.
Gardener Sketch #21. In the second room of the chapter you will encounter a new type of turret enemy. Get close to it and press Y/Triangle.


Chapter 7. The Bowl
Journal Page #18. In plain sight below you at the start of the chapter.
Gardener Sketch #22. As soon as you start chapter 7, drop down to find the new type of creature/robot. Get close to it and press Y/Triangle.


Zephyr Upgrade #18 & Stone Chest #6. As soon as you drop down at the start of the chapter, look for a stone chest in a round ruin on your right. The upgrade can be found inside.
Emerald #20. On top of the tower on your right in the open area at the start of the chapter.
Journal Page #19. Found to the right in the open area at the start of the chapter next to one of the blue torches you have to activate.
Journal Page #20. Found in plain sight next to one of the torches you have to light on the left side of the open area at the start of the chapter.
Emerald #21. Found on top of the tower to the far left in the same open area as the previous collectibles.
Zephyr Upgrade #19 & Stone Chest #7. Inside a Stone Chest in the same open area at the start of the chapter as the previous collectibles. You can find the chest under the ruins on the opposite side from where you entered.
Emerald #22. Found behind one of the waterfalls on the right side of the open area at the start of the chapter. Collecting this emerald will also get you the “Waterfall Whisperer” achievement.
Chapter 8. Twilight
Gardener Sketch #23. Make your way down the hill at the start of the chapter and stick to the right side. You will soon see some boards next to a ruin. Press Y/Triangle next to them.


Zephyr Upgrade #20 & Stone Chest #8. In a stone chest inside the ruins next to the boars.
Gardener Sketch #24. Once you get to the bottom of the hill you will see some frogs and boars around some water. Walk up to a frog and press Y/Triangle.


Journal Page #21. In plain sight at the bottom of the hill where the frogs and boars are.
Emerald #23. On the tower above the page.
Emerald #24. After opening the door with the blue sphere, continue down the hill by using the wind currents until you see a tower on your left. The emerald can be found on top of it.
Zephyr Upgrade #21 & Stone Chest #9. Found in a stone chest inside the tower below the previous emerald.
Journal Page #22. Open the door with the blue spheres and get to the bottom of the next hill to find another door that has to be opened with blue spheres. The page will be near the blue sphere puzzle in plain sight.
Zephyr Upgrade #22 & Stone Chest #10. After you open the next blue sphere door, make your way down the hill until you see a round ruin on top of two thin columns. Enter this building through the top to find the upgrade in a stone chest.
Emerald #25. Continue down the hill until you start to see mist. You will find the emerald on top of the next tower.
Chapter 9. Wild Depths
Gardener Sketch #25. Slide down the hill until you see a massive flying creature. Press Y/Triangle to sketch it.


Zephyr Upgrade #23 & Stone Chest #11. Inside a stone chest on your left as you see the massive flying creature.
Emerald #26. Once you get to the area with seaweed and tall flowers you will see water currents as you make your way forwards. Use the 3rd current to get to the top of the tall mushroom above to get the emerald.


Journal Page #23. Soon after the previous collectible you will get to an area with purple crystals. You will see the page here in plain sight.
Zephyr Upgrade #24 & Stone Chest #12. Found in a stone chest on your right in the same area as the purple crystals and the journal page.
Emerald #27. On one of the tall plants above the previous zephyr upgrade.
Gardener Sketch #26. Continue forward until you go through some ruins. Once you come out the other side you will find some purple jellyfish. Get close to them and press Y/Triangle.


Gardener Sketch #27. Continue forward until you get to an area with snow, a light in the middle and some whale type creatures. As soon as you get to this area, press Y/Triangle to draw the whales.


Gardener Sketch #28. In the same location as the whales, drop down below to sketch the small flying robots.


Zephyr Upgrade #25. Also found in the area below the whales.
Journal Page #24. Press the switch on the right hand side of the area below the whales to open the door above. Go through that door to see the page in plain sight.


Emerald #28. Found on top of a column in the same area as the whales and the previous collectibles.
Journal Page #25. In plain sight after the chase scene with the whales.
Gardener Sketch #29. Continue through the next open area until you get to the end where you have to light 4 torches to open a door. Here you will see some manta rays floating around. Get close to them and press Y/Triangle.


Emerald #29. From the where the Manta Rays are, turn the round to see an emerald near the top of one of the buildings.
Chapter 10. Crisp Embrace
Gardener Sketch #30. Stand close to the edge where the balloon robots are at the start of the chapter and press Y/Triangle.


Gardener Sketch #31. At the start of the chapter, jump down to the icy area below and look for a mountain goat (not to be confused with the deer). Stand next to it and press Y/Triangle.


Gardener Sketch #32. After leaving the first area by climbing the destroyed platforms and cubes you will drop down to a hill. On this hill you will find some rabbits. Walk up to them and press Y/Triangle.


Gardener Sketch #33. Just after the rabbits you will get a short cutscene with a fox in it. Walk up to the fox and press Y/Triangle.


Emerald #30. Just after the fox cutscene you will see a tower. The emerald can be found on top of that tower.
Journal Page #26. Follow the fox until you get to an open area with ice on the floor. The page will be in plain sight in the centre of this area.
Zephyr Upgrade #26 & Stone Chest #13. In a stone chest inside the building to the left of the previous page.
Emerald #31. In the top of the building that the fox takes you through after crossing the ice. You can get the needed energy in a building in the next area.
Zephyr Upgrade #27 & Stone Chest #14. On the other side of the building with the previous emerald in it you will be in another area with ice on the ground. The upgrade can be found in a stone chest in plain sight at the end of the ice.
Journal Page #27. After the area where you have to hide from the wind you will go through an arch with purple crystals. On the other side you will see the page in plain sight.
Gardener Sketch #34. Continue on the main path by using the small air currents until you get to some stairs. On these stairs you will find some new flying robots.


Gardener Sketch #35. Continue to the top of the stairs to find a new type of balloon robot. Press Y/Triangle close to it.


Zephyr Upgrade #28 & Stone Chest #15 . After crossing a bridge while hiding from the wind you will get to an “L” shaped path where you also have to hind from the wind. Here, go down to the area below on your right to find the upgrade inside a stone chest.
Emerald #32. In the same area as the upgrade you will see the fox laying down next to the trigger to open the door to continue. Stand next to the fox, turn around and look up to see the emerald on top of some rocks.
Chapter 11. Flying High
No collectibles in this chapter.
Chapter 12. Island Ascent
Emerald #33. At the start of the chapter use the large wind currents and land on the first platform you see. Here, turn around a look for a smaller wind current in the centre of the room. Use it to get the emerald.
Emerald #34. As you get close to the top of the tower you will start to see green. Here, look to the centre again to find another smaller air current. Use it to get the emerald.
Journal Page #28. Found in plain sight at the top of the tower.
Journal Page #29. In plain sight just after the previous page.
Chapter 13. Golden Plains
Emerald #35. As soon as you see the first journal page at the start of the chapter, jump over the debris on your right to find the emerald.

Journal Page #30. In plain sight before going up the stairs at the start of the chapter.
Journal Page #31. In plain sight at the top of the stairs just after the first page.
Gardener Sketch #36. Stand close to the big fly enemies in the same area as the previous page and press Y/Triangle.


Journal Page #32. On the debris in the area with the large flies.
Gardener Sketch #37. Once you get to the outside area, walk up to one of the old egg shaped turret robots and press Y/Triangle.


Gardener Sketch #38. Once you get to the outside area, drop down to the small body of water below. Here you will see a tortoise walking around. Walk up to it and press Y/Triangle.


Journal Page #33. In plain sight as you make your way up the hill once you get to the outside area.
Emerald #36. Once you get to the top of the hill you will have a turret on your right, a small pond of water on your left and a building in front of you. The Emerald will be in the building in front of you.
Journal Page #34. After opening a door with 3 wisps you will get to another open area. The page will be in plain sight on the other side of this area.
Emerald #37. After opening another door by collecting 3 wisps you will get to yet another open area. Here look to your right to find a tower with the emerald on top of it.
Journal Page #35. Continue by opening another door by collecting 3 wisps. In the next area you will have to activate 4 green cubes to open the door. The page will be in plain sight next to that door.
Emerald #38. On top of the hill in the centre of the area where you have to collect the 4 green cubes to open the door.
Emerald #39. Found in the same area as the previous collectibles (the area where you have to activate 4 green cubes to open the door). Stand in front of the door the 4 cubes open and look left. You will see the emerald on top of the building (this building contains one of the cubes).
Gardener Sketch #39. Go through the door you opened by activating the 4 green cubes to see a new variation of the flying bots. Press Y/Triangle to draw them. This should be your final sketch to get the “Gardener’s Guide” achievement.


Emerald #40. Continue forward, and you will see a structure with two high, round buildings connected by a long bridge-like hall. The emerald can be found in the right-hand building.


Journal Page #36. To get to the next area you will have to open a door by collecting 3 wisps. On your way to one of the wisps you will find this page.
Journal Page #37. Found in plain sight on the other side of the door that you open by collecting the 3 wisps. This should be the last page to get the “Echoes Of Adam” achievement.
Chapter 14. Climbing Escape
No collectibles in this chapter.
Chapter 15. Riding Home
No collectibles in this chapter.
If you found this guide helpful and would like to support our work, you can do so by pressing the Ko-fi button below