Thymesia All Story Bit Locations


In this guide we will show you where to find every Story Bit in Thymesia.
🎮 Find more Thymesia guides here.
This guide will include all 94 Story Bits collectibles in Thymesia. Once you have them all you will get the Memory Waver trophy / achievement.
Hermes Fortress (Prologue)
Story Bit #1. On the wall behind you as soon as you start the game.
Story Bit #2. After the first few enemies of the game you will see a little building in the corner to your left. The collectible is on the ground insdie.


Story Bit #3. In the area with the fountain and the enemy where the game shows you about stealing weapons. The collectible is behind some wood.
Story Bit #4. After opening the gate behind the mini boss, you will be in a graveyard. Here look to your left to find the collectible.


Story Bit #5. Before you head up the stairs to the boss. Head down and go left. You will find the collectible next to an enemy in the corner.


Philosopher’s Hill
Story Bit #6. In the room where you wake up.
Story Bit #7. Just before you exit the room where you wake up, to the right.


Story Bit #8. Once outside you can find the collectible on the path to the right.
Story Bit #9. Once you leave the room with the bed, head straight to find the bit on the wall to the right of a locked gate.
Sea Of Trees (Main)
Story Bit #10. After the second bridge, to your left.
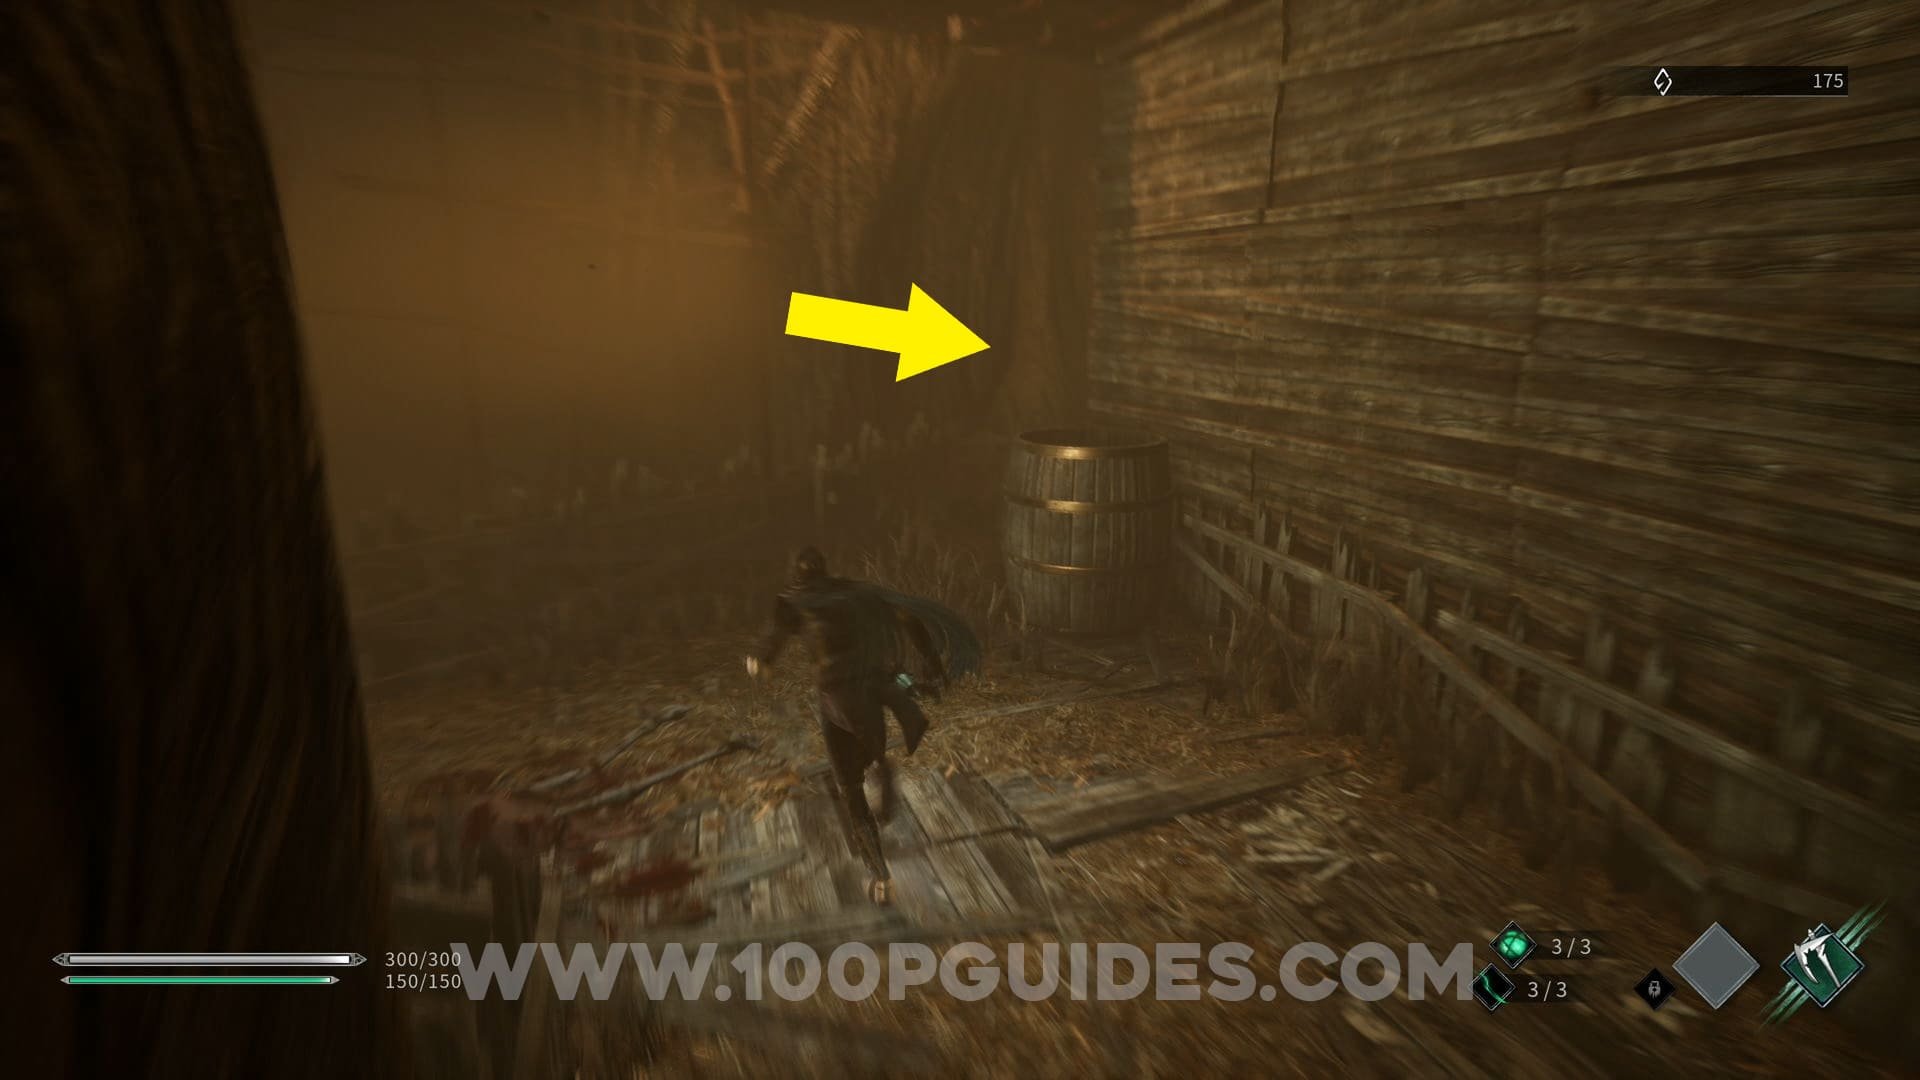
Story Bit #11. From the previous collectible, turn around and stay on the left side of the wall. Then break the barrels to your right to find a little area with a box you can break to reveal the collectible.

Story Bit #12. Continue through the level by climbing the ladder next to collectible #10. Continue on the only path possible and you will soon come to a collectible on a small table.


Story Bit #13. From the table head down through the room to the left. Continue until you see the collectible on your right just before a ladder that takes you to a shortcut.


Story Bit #14. Return to the table with collectible #12 on it. From here head across the brodge to the right of the table. Then drop down at the end of the path to find the collectible.


Story Bit #15. Now cross the bridge by heading to the left from the table. Once you enter the building stick to the wall on your left until you can go around it and find the collectible behind some barrels.


Story Bit #16. Soon after the previous collectible. On a wall to your left in plain sight.
Story Bit #17. Continue through the level until you see a ladder in front of you. Before you head up. look to your left to find another ladder. Climb this ladder to find the collectible.


Story Bit #18. Continue through the level passed a beacon and a rope bridge. As soon as you get off the rope bridge, look left to find this collectible.


Story Bit #19. On the opposite side of the area from the previous collectable.
Story Bit #20. Continue through the level by climbing 2 ladders. After getting to the top of the second ladder, turn left and then drop out the door to your right to find the collectible in a box that you can break.


Story Bit #21. After picking up the previous collectible you will have to climb back up the same 2 ladders. After the second ladder go right to get to an outside area. Here go up the short set of stairs on the right that will take you passed a big barrel. Here climb down to the leverl below. Then look out for another ladder on your right that will take you down to the collectible.


Story Bit #22. In the area where you fight the mini boss with the large arm.
Story Bit #23. Look for a corridor in the area where you fight the mini boss with the large arm. You will find the collectible at the end.

Story Bit #24. Once you reach the area with the final checkpoint. Turn right and do a U turn to find a path that goes up. Once you reach the top, head left and go up some more stairs to get the collectible.


Sea Of Trees (Sub Quest 1)
Story Bit #25. Close to the start of the level you will find a tent to your left, here you will see a female mini boss. Past her you can leave the tent though the door behind her. The collectible is here.


Story Bit #26. In plain sight after dropping down a ladder on the main path.
Story Bit #27. To the right after going down the hall past the beacon.
Story Bit #28. On a table to your left on the main path just before a bridge.
Story Bit #29. Soon after you cross the bridge, you will drop down a ladder. The collectible is just below.
Story Bit #30. Close to the end of the level, you will see two bridges. Take the left bridge and find the collectible in a small hut.


Story Bit #31. This time cross the bridge on the right and enter the small building to the right as soon as you cross to the other side. Here climb the ladder and cross another bridge to find a collectible in the next hut.


Sea Of Trees (Sub Quest 2)
Story Bit #32. After leaving the first hall, you can find it in the outside area to the left. There will be a poison cloud here at the start, to get rid of it you will have to find the cyst later on in the level.


Story Bit #33. In plain sight on the main path.
Story Bit #34. In the area where you fight an enemy with dual swords. Go past the big barrel and drop down to find a collectible in plain sight at the end.


Story Bit #35. From the previous collectible turn around 180º and drop down to find the collectible on a table.
Story Bit #36. Climb back up the ladder. Now drop off to your left and go though the hall to the beacon. Go through the door close to the beacon. Continue on this path until you come to a fork in the road. Take the left path and then another left under the stairs to find the collectible at the end.


Story Bit #37. Go up the stairs from the previous collectible. Then go up the stairs with the poison mist over them (just spam the dash button). Once up the first set of stairs head behind the wall in front of you to find the collectible at the end (this is also the objective for the side quest).


Story Bit #38. Head back out to the poison and enter the door on this same floor. At the end you can find a hole next to some stairs. The collectible is down the hole.

Sea Of Trees (God Of The Fools)
Story Bit #39. After reaching the second floor and destroying another cyst. You will se an axe enemy in the middle of the path. The collectible will be in a barrel in the small area to the right of this enemy.


Story Bit #40. Right next to the cyst that is found by staying on the middle floor after the female enemy. On this path you will climb a ladder and encounter a hammer enemy. Just past the hammer enemy will be a cyst with the collectible right next to it.


Royal Garden (Main)
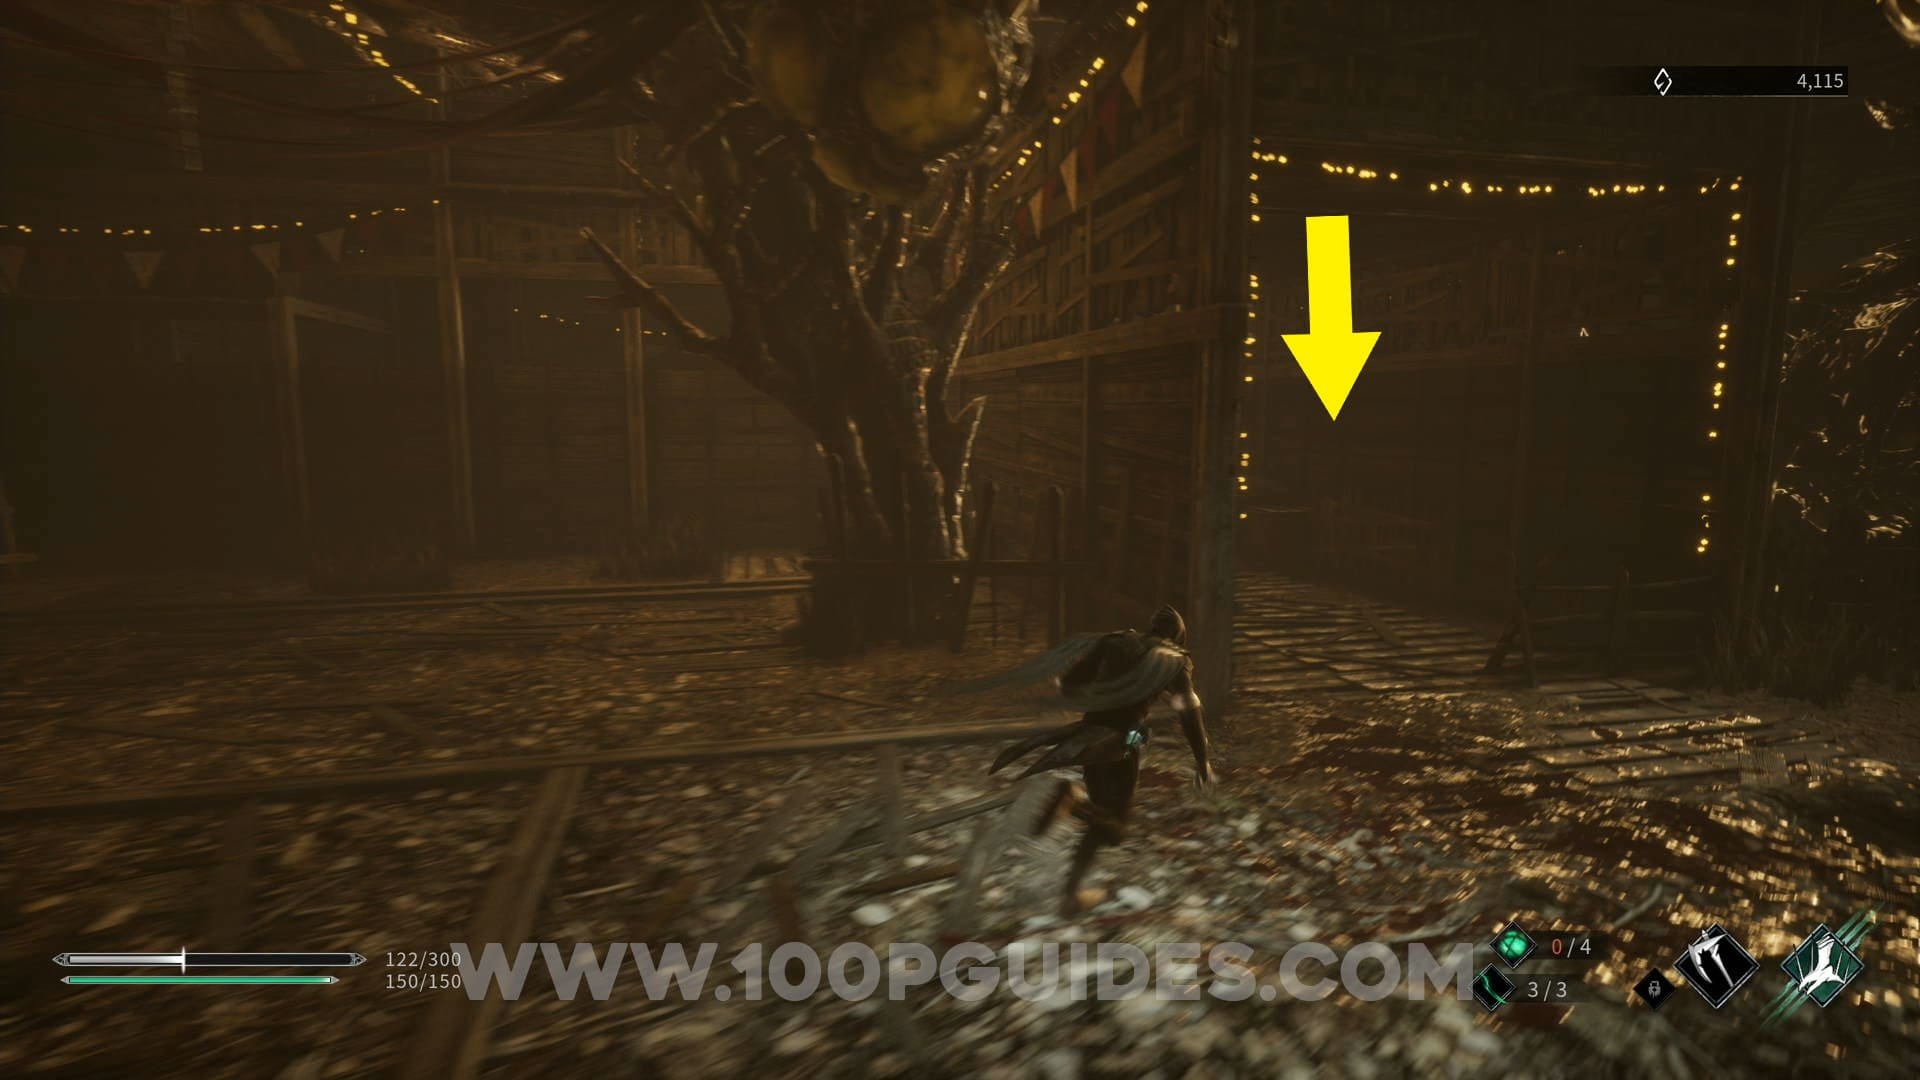
Story Bit #41. Close to the start of the level, the path will split at a tree. Here take the right path to find the collectible at the end.
Story Bit #42. This time take the stairs down where the paths split. Then, as soon as you go under a bridge take a left. COntinue up this path until you can cross some wood on your right. You will then find the collectible at the end of the bridge on your left.


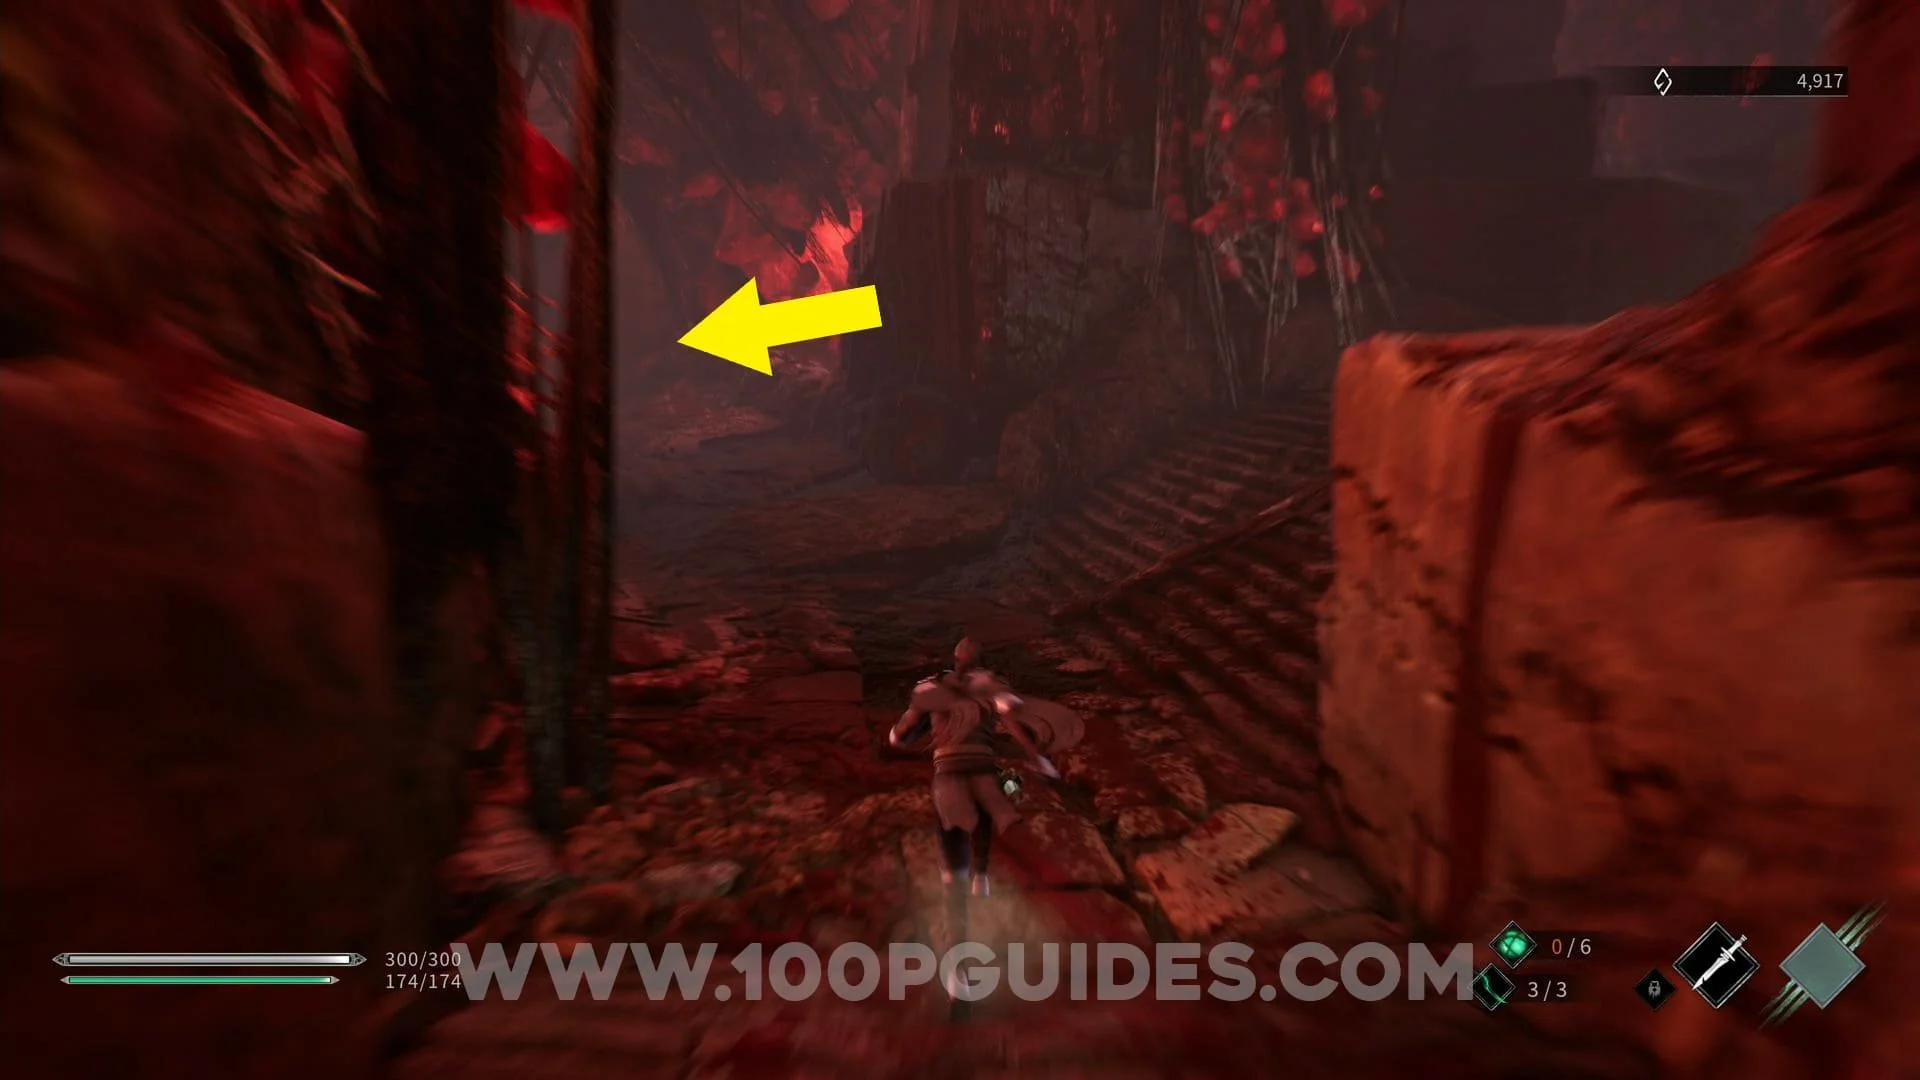
Story Bit #43. Go back across the wood. Then go down the stairs that are in front of you. Take the right path through the mountains until you find the collectible.


Story Bit #44. From the previous collectible, jump down and head down the left side path that is straight in front of you. Continue on this path until you find a greenhouse. The collectible will be inside in plain sight.


Story Bit #45. Once you pass the next beacon, take the left path to enter another greenhouse. The collectible will be inside.


Story Bit #46. Head back out of the greenhouse (through the same door that you used to enter) and continue straight on. Here you will find a collectible on a bookshelf to your left.
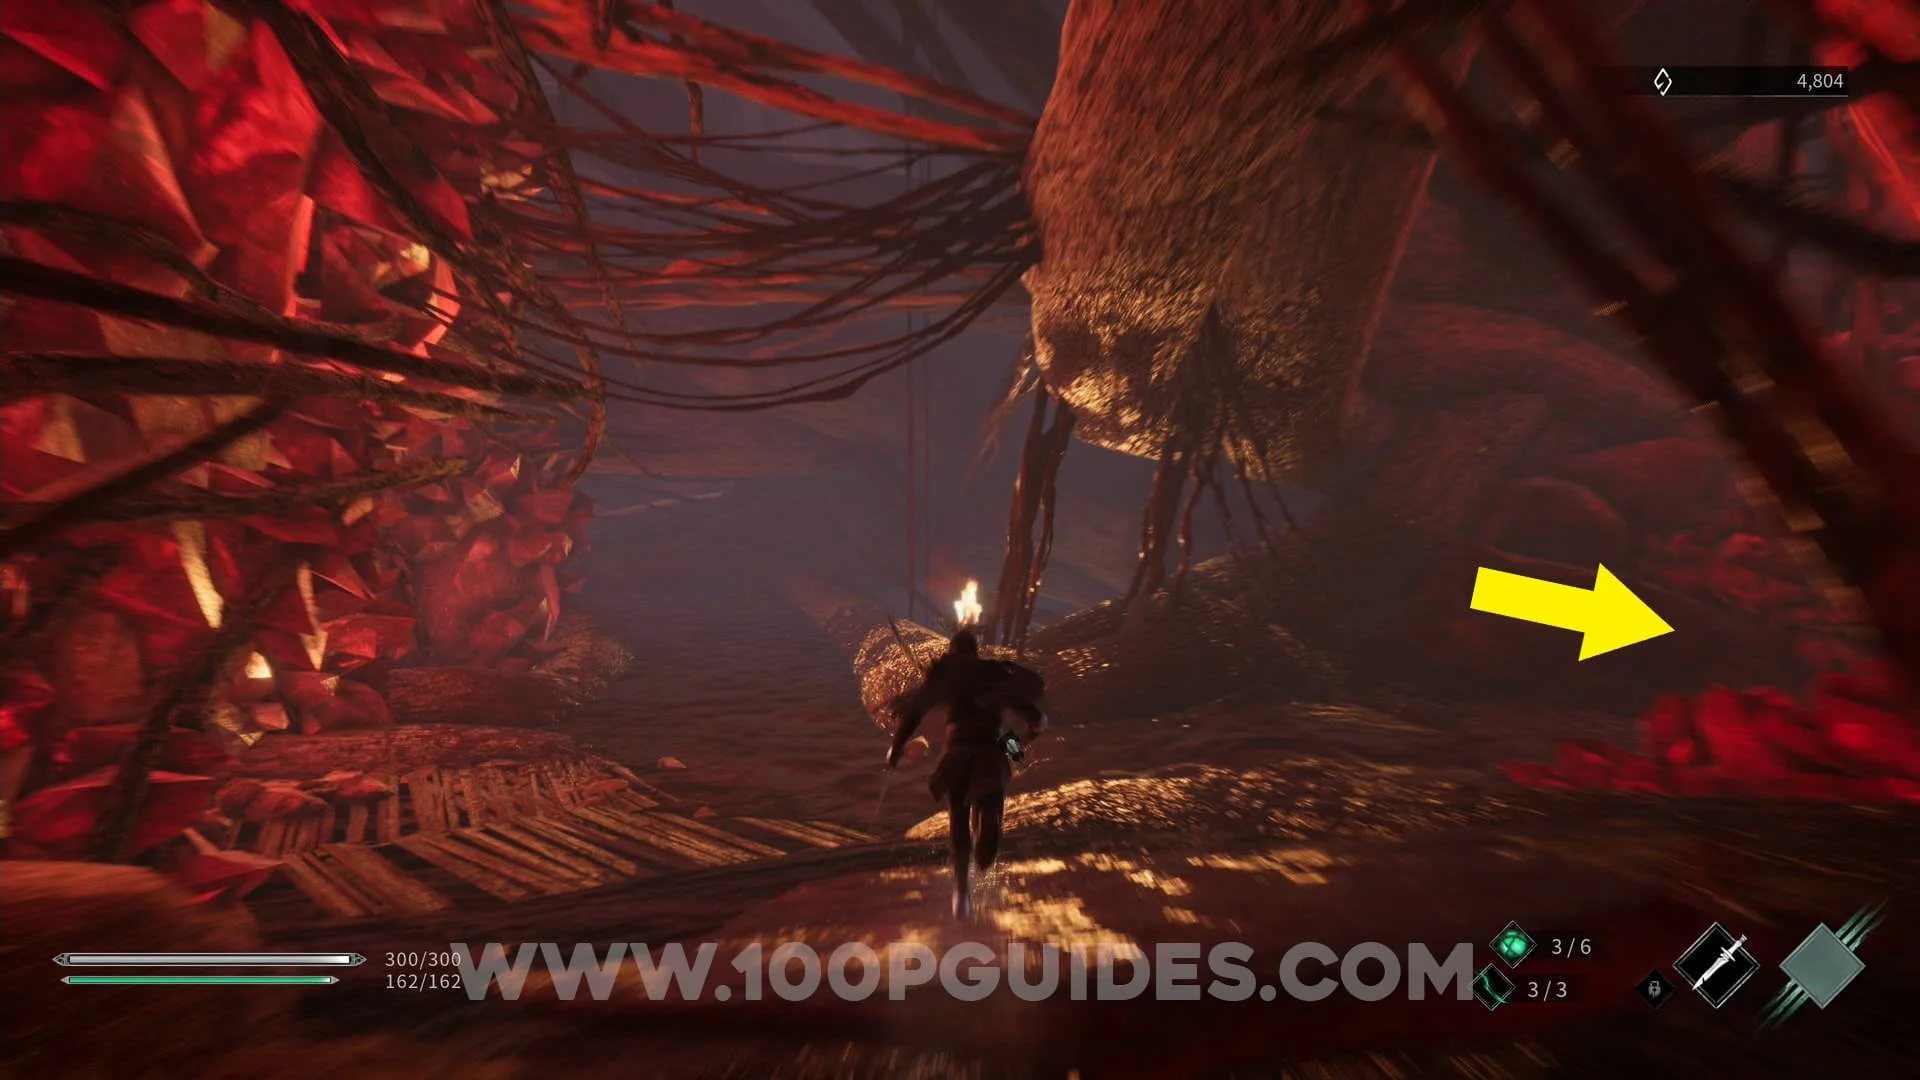
Story Bit #47. Continue on the main path until you see a gate in front of you with a massive red crystal behind it. Here look right to find the collectible.

Story Bit #48. On a bookshelf to your right in plain sight on the main path just before you enter the blood library.
Story Bit #49. On a bookshelf to your left in plain sight as you go down the first hall in the library.
Story Bit #50. Stick to the left bookshelf (the same one that you got the previous collectible from), until you find another collectible.
Story Bit #51. Go down the path to the left where the paths split close to a red tree (this is the main path that will take you to the boss). The collectible will be on some books to your right behind a shelf.


Royal Garden (Sub Quest 1)
Story Bit #52. From the start turn around and find the collectible in the boss room from the previous area.
Story Bit #53. After going through the first hall of bookshelves, continue right to find the collectible on a shelf to the right close to a wraith enemy.


Story Bit #54. Turn around and head towards the hall you came from. Now take the middle hall (the one to the right of the red structure). The collectible is at the end.


Story Bit #55. On a book shelf to your right in plain sight just before the next beacon.
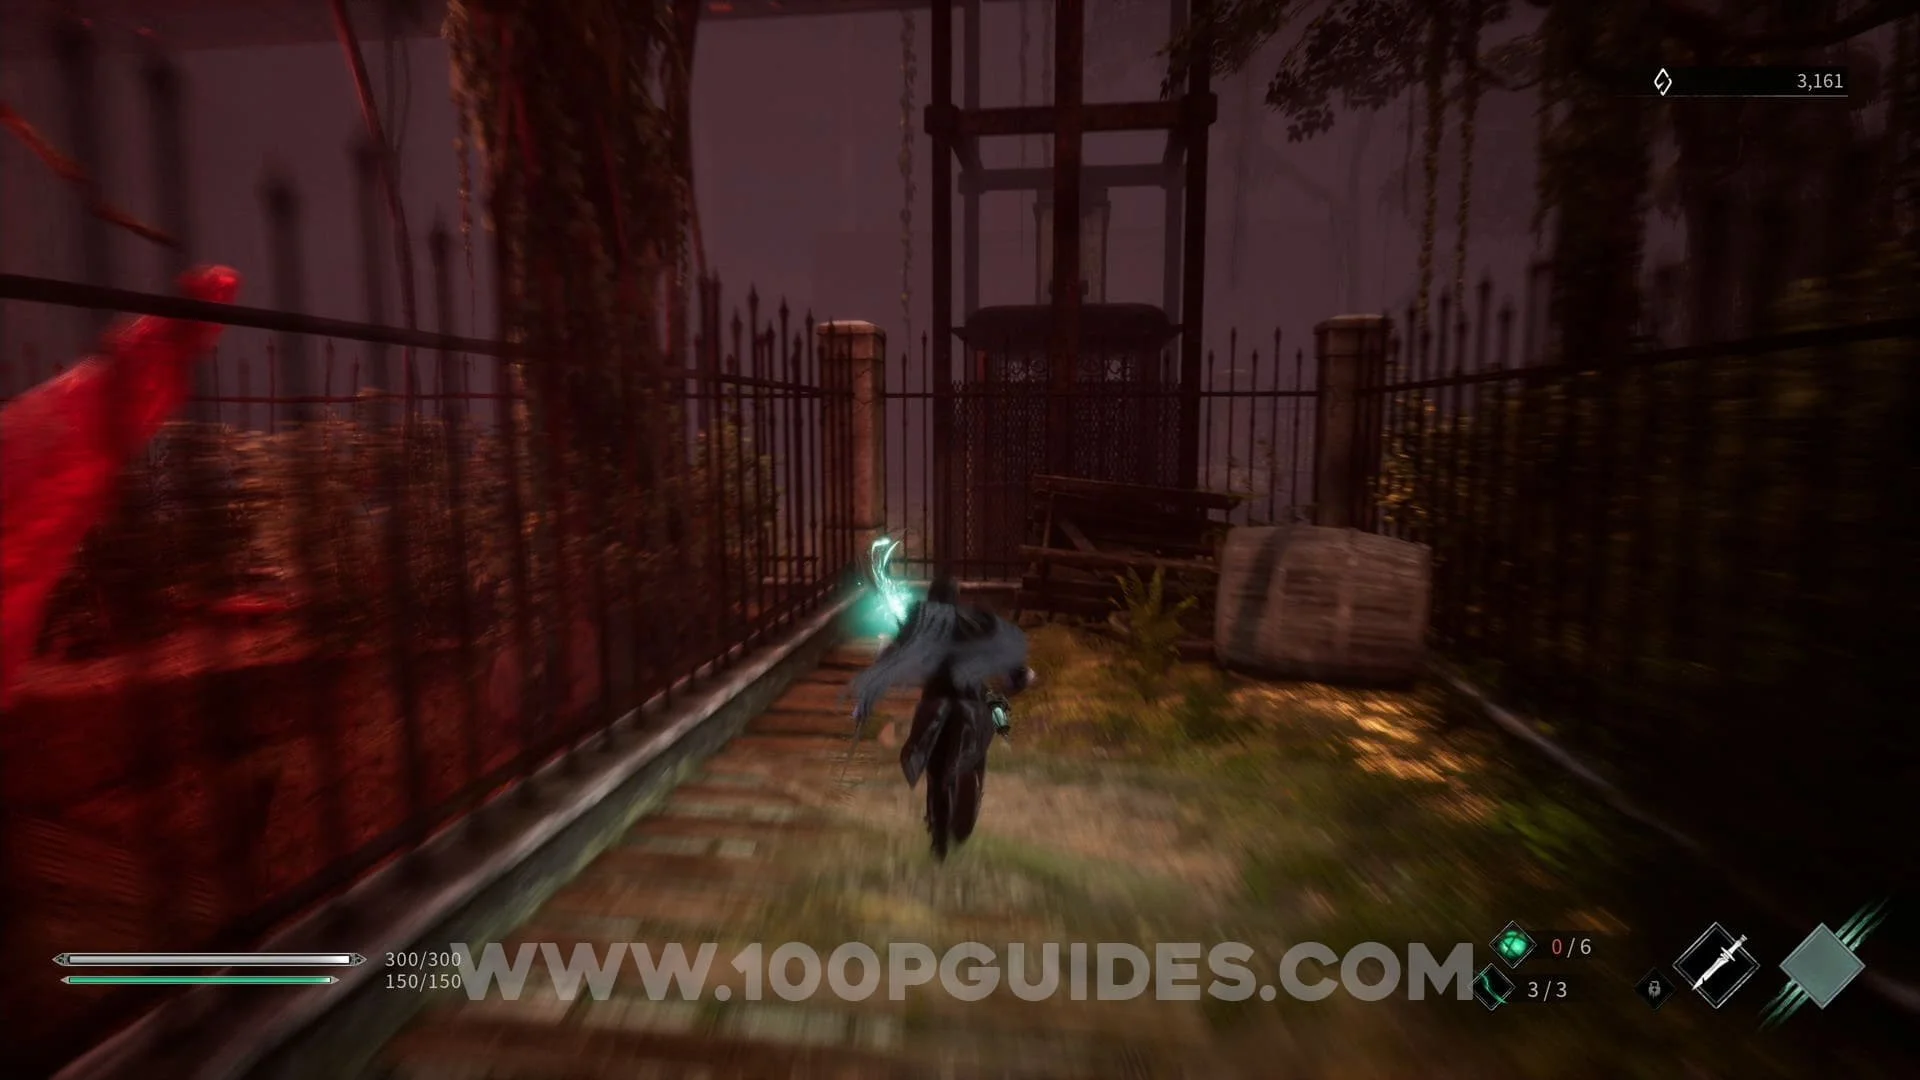
Story Bit #56. Continue through the level past the beacon. You will find the collectible behind a lift in the next open area.
Story Bit #57. From the lift area, take the path to the left that will take you to the second floor. You will soon find the collectible on the shelves to your right.


Story Bit #58. On another bookshelf soon after the previous collectible.
Story Bit #59-62. At the end of the area where the previous 2 collectibles are, you will get a key from one of the enemies. Now head all the way back to the hall just before the beacon at the very start of the level until you see a lift to your left. Take the lift to the upper floor. Here you will find 4 collectibles around the bookshelves.


Underground Laboratory
Story Bit #63. Take the path to the left at the first fork.
Story Bit #64. Now take the right path and look for a ramp to your right that you can use to get to the platform where the archer is (and the collectible).


Story Bit #65. Continue through the level until you get to the bottom of some steps. Here you will find a collectible to the left of the wall.
Story Bit #66. Continue through the level, past a beacon until you get to a big red enemy (that spawn the infinite little enemies) at a fork in the road. Take the right path to find the collectible.
Story Bit #67. COntinue through the level until you come to another fork in the path. Take the left path to find a collectible at the end.
Underground Laboratory (Sub Quest 1)
Story Bit #68. On the left in plain sight soon after the start of the level.
Story Bit #69. Continue through the level a little until you get to a fork in the road. Take the left path to find a collectible.
Story Bit #70. In plain sight, soon after the next beacon.
Story Bit #71. Continue until you see some stairs to your right and a path that goes straight on. Take the path that goes straight to find a collectible at the end (this is the same area that the arches was shooting you from).

Story Bit #72. You will soon get to an area where you can see the collectible on a platform to your right. To get it, look for some stairs at the far end to the right. Then drop down to it.


Story #73. In plain sight just before the end of the level.
Hermes Fortress (Main)
Story Bit #74. From the start of the level, you will go outside and climb a ladder. Then you will go up some stairs, as soon as you emerge outside look to your right and climb the ladder to find the collectible.
Story Bit #75. Drop back down and then look for a path that you can drop down to on your left. Here you will find a box at the end with the collectible.


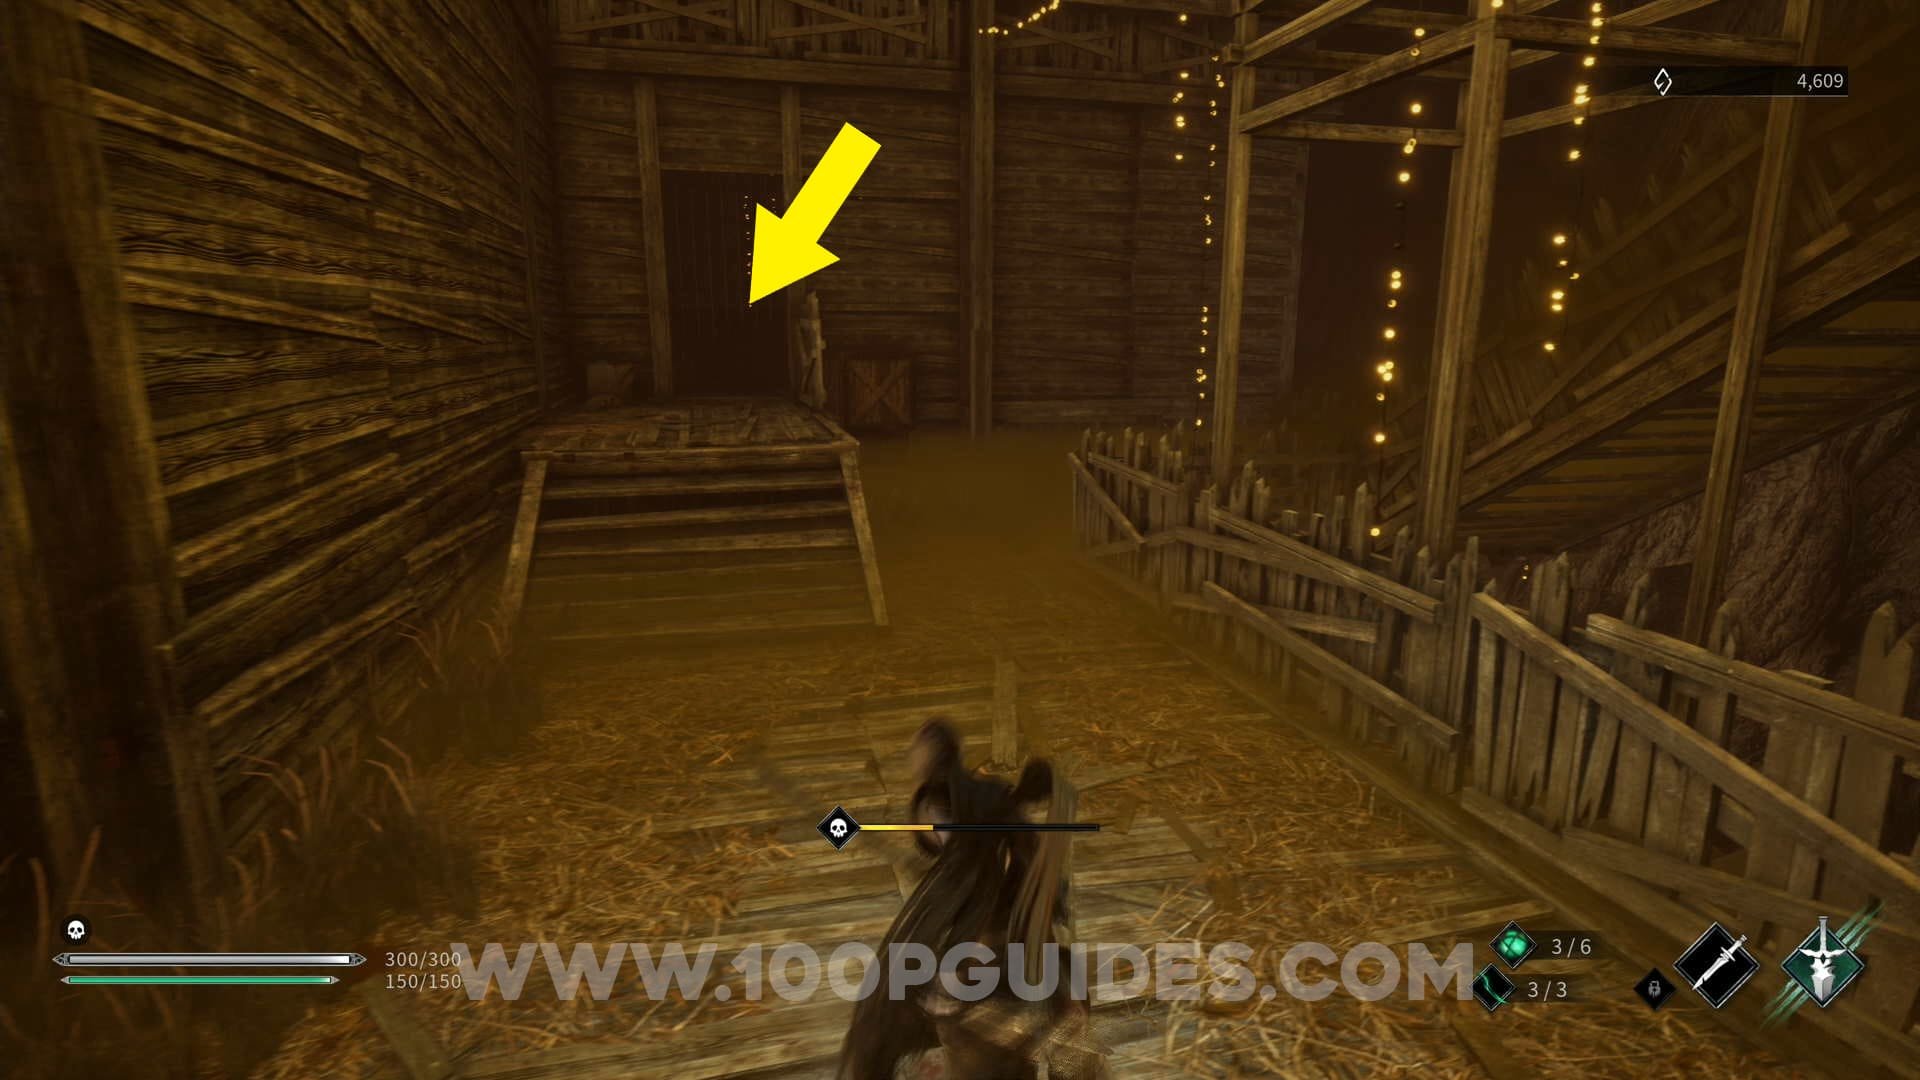
Story Bit #76. Continue on the only path possible from the previous collectible until you climb a ladder. After climbing the ladder, enter the room straight in front of you.


Story Bit #77. At the next beacon, use the ladder to go up to the 2nd floor. Here take the door on the right and climb the ladder that can be found on your right as you cross the door. Now continue straight until you enter a building. In the building exit through the left door to find the collectible.


Story Bit #78. From the previous collectible, turn around and enter the building, now drop down to you left (same place as where you can kick the ladder down). Here go through the metal gate (if it’s locked climb back up the ladder you just kicked down and go to the top of this building and kill the elite enemy at the top to get the key). Here go straight and climb the ladder, then continue on this path until you see a collectible close to the edge.


Story Bit #79. Turn around 180º after getting the previous collectible. Go up the ramp to your right and then drop down multiple times. Once at the bottom take the left path. Then look for a ladder on your right. After climbing the ladder, go down the hall to the left and then drop down the hole at the end. Here use the final exit on the right and find the collectible at the end.


Story Bit #80. Now go back to the ladder you climbed up. Drop back down and then go straight, then exit through the metal gate on your right. Once you get to an open area with some grass. You can find the collectible on the wall close to a big door.


Story Bit #81. From the previous collectible stick to the wall on your right as you exit the door area to enter the castle again. After climbing up a long ladder and entering a building, use the exit on your left to find a collectible in a box.


Story Bit #82. From the previous collectible, turn around and climb the ladder on the left of the door. Then climb another ladder to get to the top of the tower where you can find the collectible in a box.


Story Bit #83. Once you get to the cathedral in the garden area (where you fight the boss), head to the right at the side doors to find the collectible.
Hermes Fortress (Sub Quest 1)
Story Bit #84. Close to the start you will be able to enter the cathedral through the side door. Once inside go to the left all the way to the door to find the collectible.


Story Bit #85. Continue through the level until you see a gate that takes you outside (same gate used to get to collectible #80). This time DO NOT go throught it. Instead, continue inside until you get to the end where the collectible is.


Story Bit #86. Once outside you can find it close to the door that you can open with the lever (same location as collectible #80).
Story Bit #87. In the outside area where you got the previous location before opening the door, use the ladder to get to the upper area. Here enter a door on the right to find the collectible.


Story Bit #88. Soon after going through the big door that you open with the lever, you will see a building to your left with some barrels at the door. Destroy the barrels to go inside and find the collectible.


Story Bit #89. As soon as you leave the building with the next beacon, enter the building on your left to find the collectible.
Story Bit #90. To the left of the main path just after going past the fountain in the paza.
Hermes Fortress (Sub Quest 2)
Story Bit #91. After climbing a long ladder and entering a building, head out through the door on the left and turn around to find a ladder against the door. Climb to the top of this tower (you will now be in the same place as collectible #82). Here drop off the side to find the collectible.


Story Bit #92. On top of the tower where you fight the elite enemy to get the key in the main quest.
Story Bit #93. Exit the tower and continue through the level (towards the start of the main quest). Once outside in the area with a bow enemy in front of you on a platform, look for a place you can drop off to the right. Turn around and take another right before going down a ladder to find the collectible.


Story Bit #94. At the very end of the sub quest , after defeating the elite enemy.
Video Guide