Genshin Impact All Sacred Seal Locations


In this guide we will show you where to find every Sacred Seal available in Sumeru Desert.
🎮 Find more Genshin Impact guides here.
Below you can find the location of every Sacred Seal in Genshin Impact. I recommend you finish the "Golden Slumber" & “Old Notes & New Friends” questline first to have access to the areas / waypoints mentioned in some of the locations!
Sacred Seal #1. From the underground waypoint (unlocked during the first part of the "Golden Slumber" questline) go across the bridge to then find the slate below the right column.


Sacred Seal #2. From the previous slate, continue on the only path possible in the dungeon until you get to a room with 2 lifts. One of those lifts can only be activated once you have advanced through the "Golden Slumber" questline a little more. Activate this lift by interacting with the book. After going down the lif you will find the slate in the sand to the left.


Sacred Seal #3. From the previous slate, use the lift on the opposite side of the room. Once at the top, head right and use the lift to go down. Here follow the stairs straight up to reach a lift that will go up. Here you will find the slate next to a seelie resting point.


Sacred Seal #4. Continue forwards after the previous slate to find this one next to the Obelisk.
Sacred Seal #5. Return to the room with the first book lift (mentioned in slate #2). In this room go down the lift with the dendroculus on it. Then continue on the only path possible until you go through a long hall. At the end just past some shroom enemies go down the stairs to the right to find the slate (this will also be where the seelie resting post is if you follow it from the room with the torch puzzle in it).


Sacred Seal #6. From the waypoint that you unlock at the end of this tomb during the "Golden Slumber" questline, go back in to the tomb and take the first possible left in the cave. You will then reach the room where you had to solve a laser puzzle. The slate will be on the ground in this room.


Sacred Seal #7. On the floor in plain sight next to an enemy and chest.


Sacred Seal #8. In the tomb that you open during the "Golden Slumber" questline.


Sacred Seal #9. On the ground close to the waypoint.


Sacred Seal #10. Enter the tomb that you unlock during the "Golden Slumber" questline. Go down the hole and then continue through the tomb always sticking to the left wall. Continue until you can take a left and go down another hole. Once you go down, in the next room take a left and you should be in a room with a book in front of a cat statue. The slate is on the floor in this room.


Sacred Seal #11. Found at the bottom of the cliff.


Sacred Seal #12. Enter the tomb that is unlocked during the "Golden Slumber" questine. Then drop down the hole to find the slate on the floor in the big room.


Sacred Seal #13. In front of the cat statue on the left.


Sacred Seal #14. In plain sight next to the oasis.


Sacred Seal #15. Go to the mechanism close to the door in the area where the previous slate was found. Here select the first option. Now you will have to follow the female enemy around until she mentions the password. Once you know the password head back to the mechanism and select the first option for the door to open. Once inside take the first door on the right, in this room you will find the an obelisk as well as a slate.


Sacred Seal #16. Continue through the cave until you get to an area with the luxurious chest in it. head up the hill behind the chest and look to the right to find the slate.


Sacred Seal #17. From the previous slate, turn around and head up to the tent with the barrels next to it. Shoot the barrels to blow up the rock and reveal the slate.


Sacred Seal #18. Now continue through the cave until you see the slate on the floor in plain sight (just before you enter the little tomb that you can see on the map).
Sacred Seal #19. In plain sight under the ruins.


Sacred Seal #20. Once you have clearance level 1, open the first door on the left inside Khemenu Temple to find the slate.


Sacred Seal #21. From the waypoint in Khemenu Temple (unlocked during the "Golden Slumber" questline) take the hall on the left. Then drop down the hole and continue down the hall until you enter a room with the slate inside.


Sacred Seal #22. Outside in plain sight.


Sacred Seal #23. Enter Dune Of Magma and take the right path past the book, fall down to the floor below to find the seal.


Sacred Seal #24. Enter Dune Of Magma and this time go straight on (will only be available if you have done the little puzzle inside). Here go down the hole to find the slate.


Sacred Seal #25. From the previous slate, continue through the cave until you reach a massive open area. Here drop down to find a slate next to the hourglass.


Sacred Seal #26. From the previous slate, look for a cave that goes even deeper nearby. The slate will be on your left in the water.


Sacred Seal #27. Go back to the big open area and go towards the big door at the end. Before heading through, turn left to find the slate.
Sacred Seal #28. Now go through the massive door where the obelisk is found. From here head up the stairs to the right until you get to the end where the waypoint is to find the slate.


Sacred Seal #29. Outside the massive mausoleum.


Sacred Seal #30. Outside the building in plain sight.


Sacred Seal #31. Use the wind current to get to the top floor inside the Dune Of Carouses (you will need to solve the short puzzle inside to get up to the top floor).


Sacred Seal #32. In plain sight next to an enemy camp.


Sacred Seal #33. Behind the walls next to the domain.


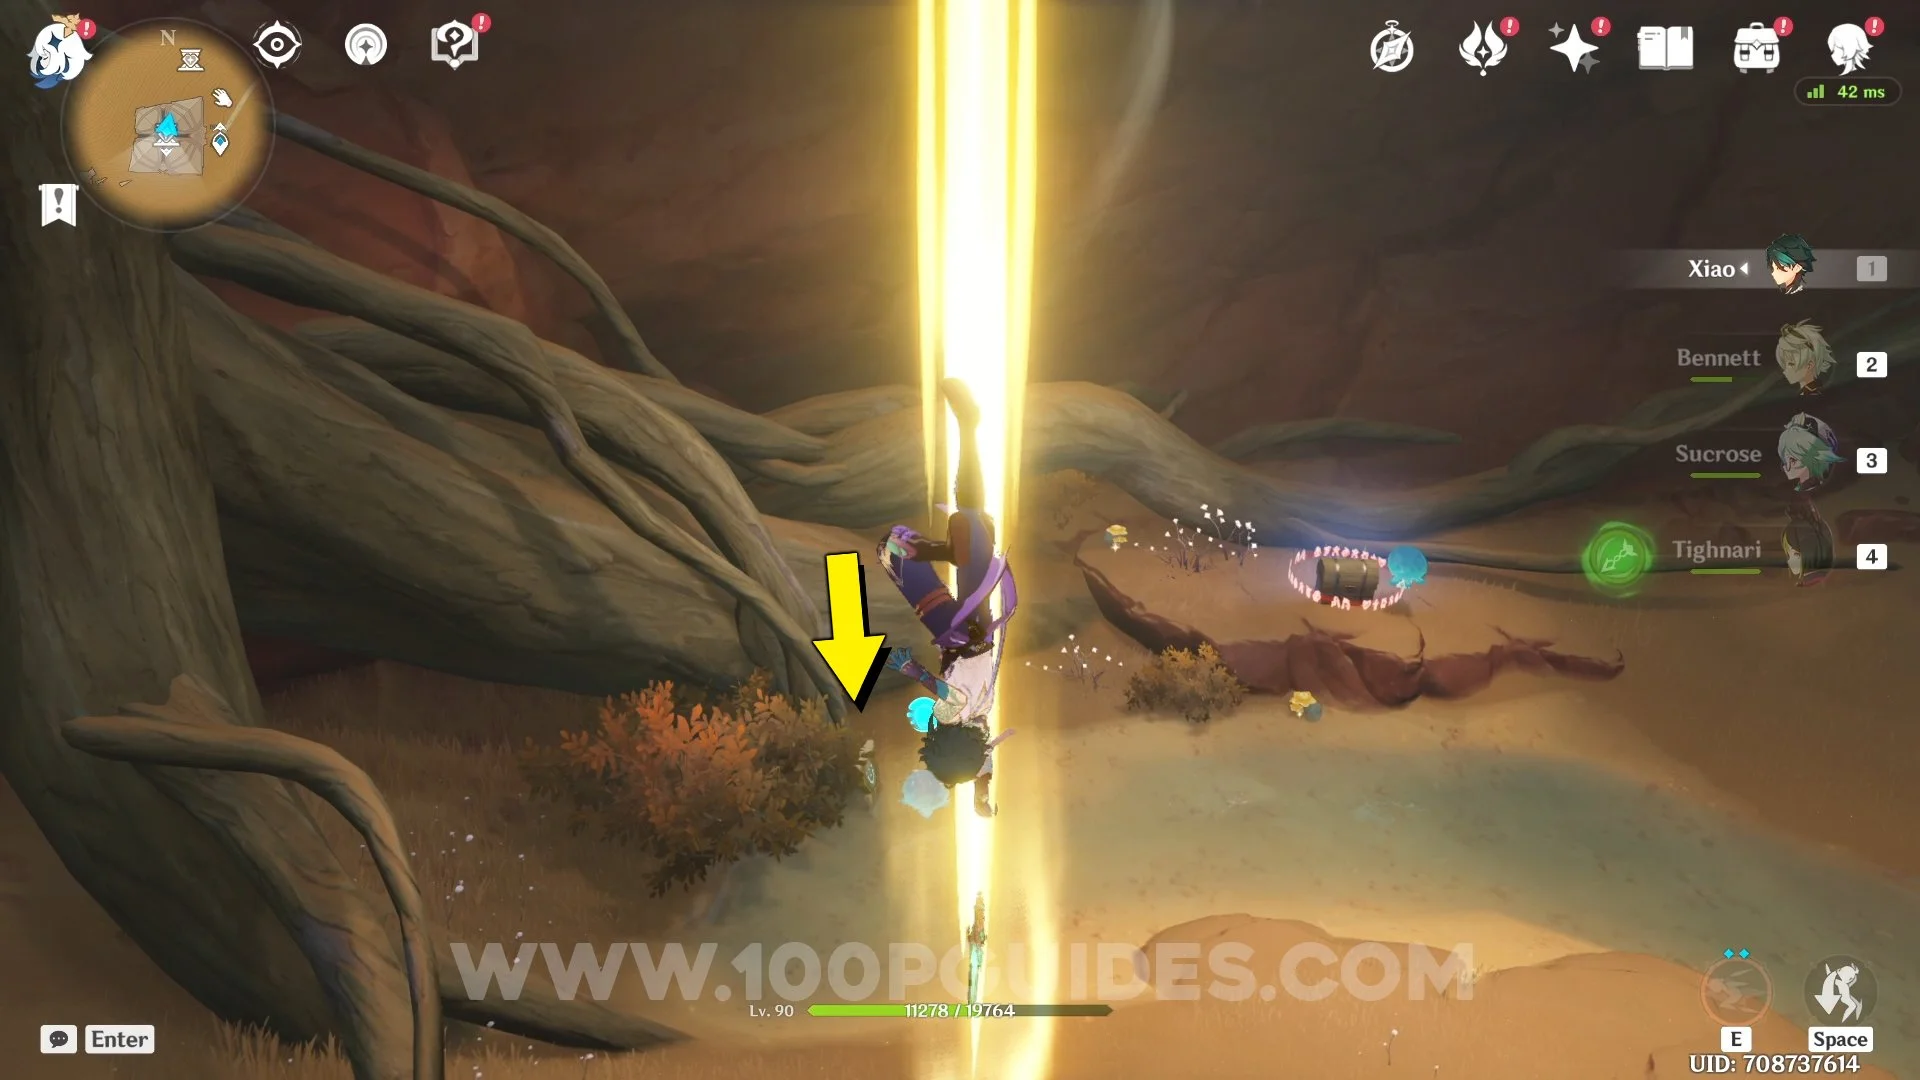
Sacred Seal #34. From the waypoint shown below, jump down the hole and take the path north below the giant statue (the first time you go through here you will have to follow a blue orb and solve some simple puzzles). Once you get to the temple you will have to complete the time trial in the middle of the room. With the time trial finished you will be able to use the elevator to get to the top floor where the slate is.


Sacred Seal #35. From the waypoint show below, head in to the next big room and take the door on the left. Then take the door to the right. After breaking some rocks and solving a simple puzzle you will get to a big room with a barrier at the end. Here jump down to the cave below. You will soon get to a spiral hill that heads up. A little way up the hill you will come across a bow time challenge. Activate it and finish it to find a slate that was hidden below the rocks that you destroy during the challenge.


Sacred Seal #36. From the previous slate, continue up the spiral hill all the way to the top where the triangle door is. Before heading in to the door, take the path on the left where you will find the slate.


Sacred Seal #37. On top of the wooden platform to the right just before you head in to the triangular door at the top of the spiral hill.
Sacred Seal #38. From the previous slate, head through the triangular door to find yourself in a massive room with 3 levels. First jump to your right while staying on the top floor. Enter the door on your right and go left until you see a barrier on your left with a slate behind it. You will be able to open this barrier if you have done the side quests mentioned at the start of the guide.


Sacred Seal #39. Exit back in to the massive blue room. Now exit through the door on the opposite side of the room from where you entered. Then drop down the hole to the right to find the slate at the end in a tent.


Sacred Seal #40. Return to the big blue room with 3 levels. Now move the blue crystals so that they are both aiming at the water totems. This will lower the water so you can collect the slate on the lowest level.


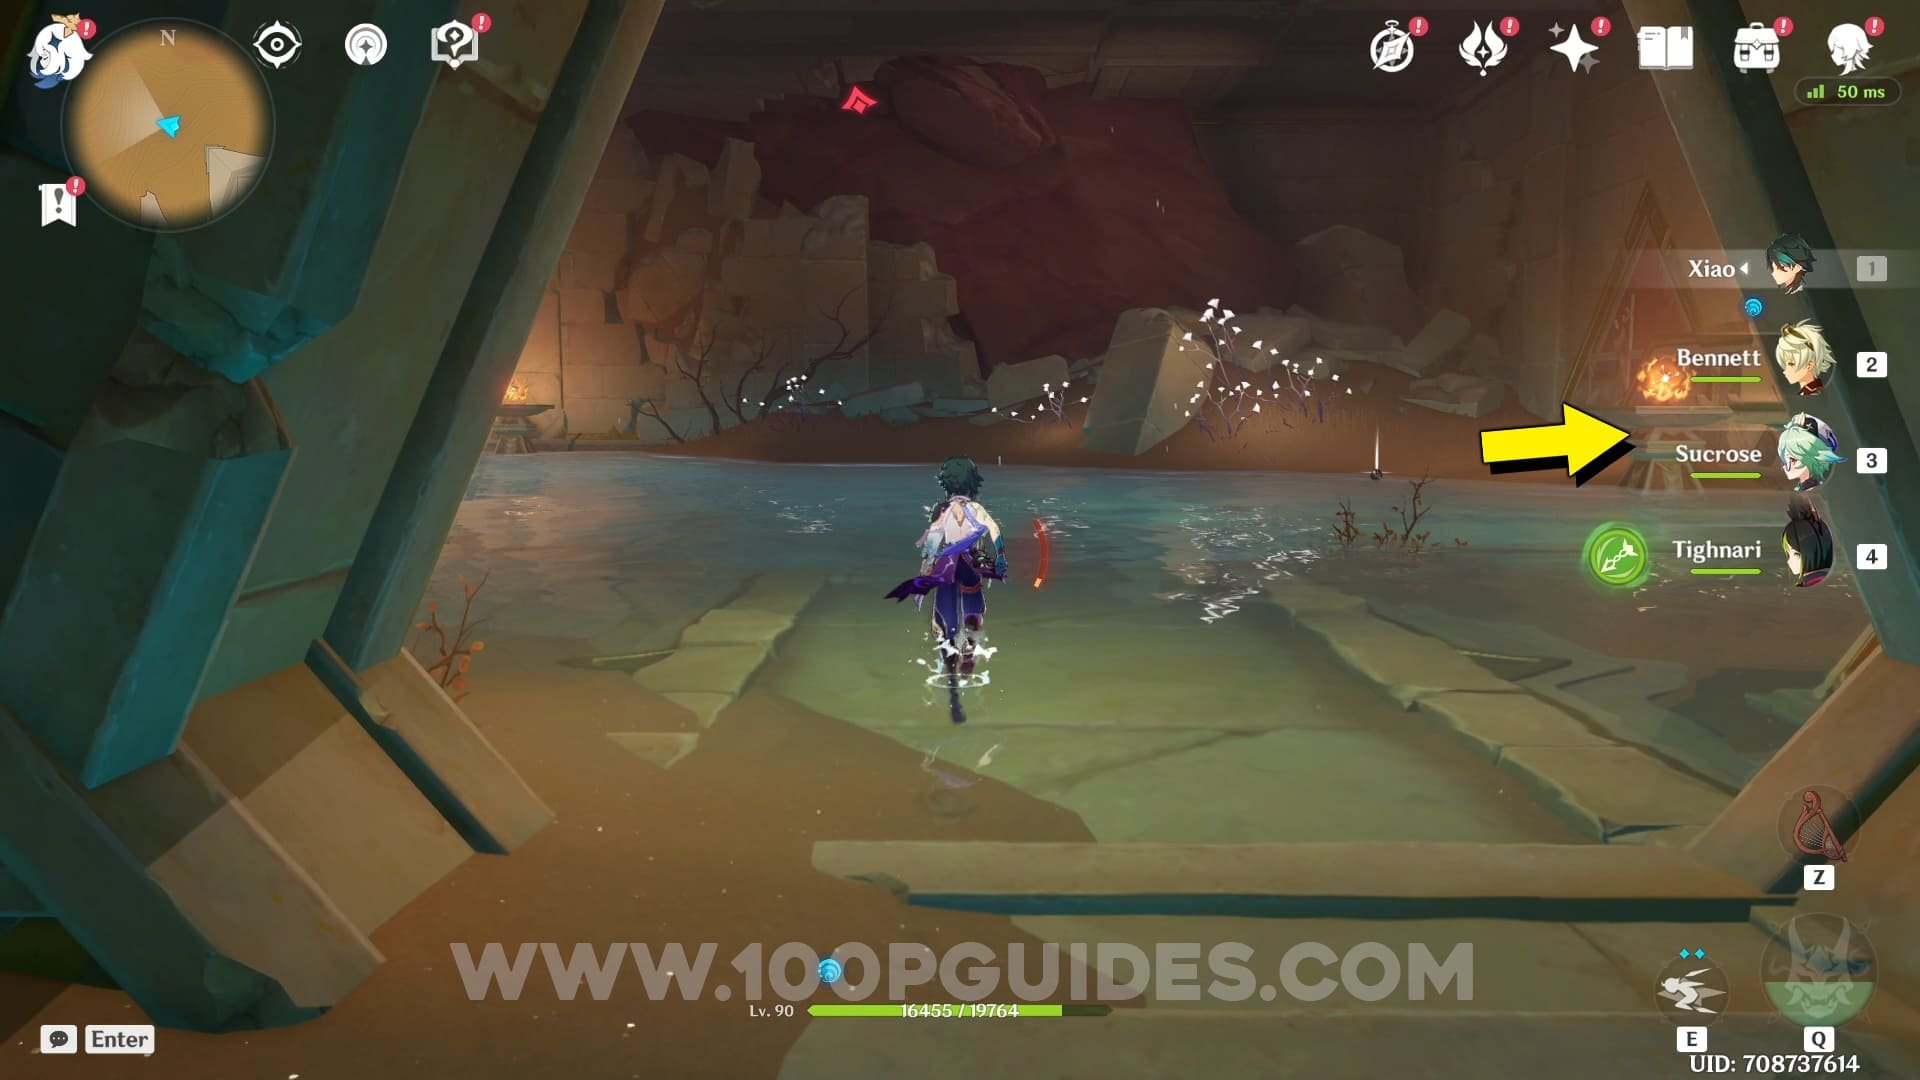
Sacred Seal #41. From the waypoint shown in the screenshot below, continue in to the next room. Here take the center lift down to the room where you will find the slate.


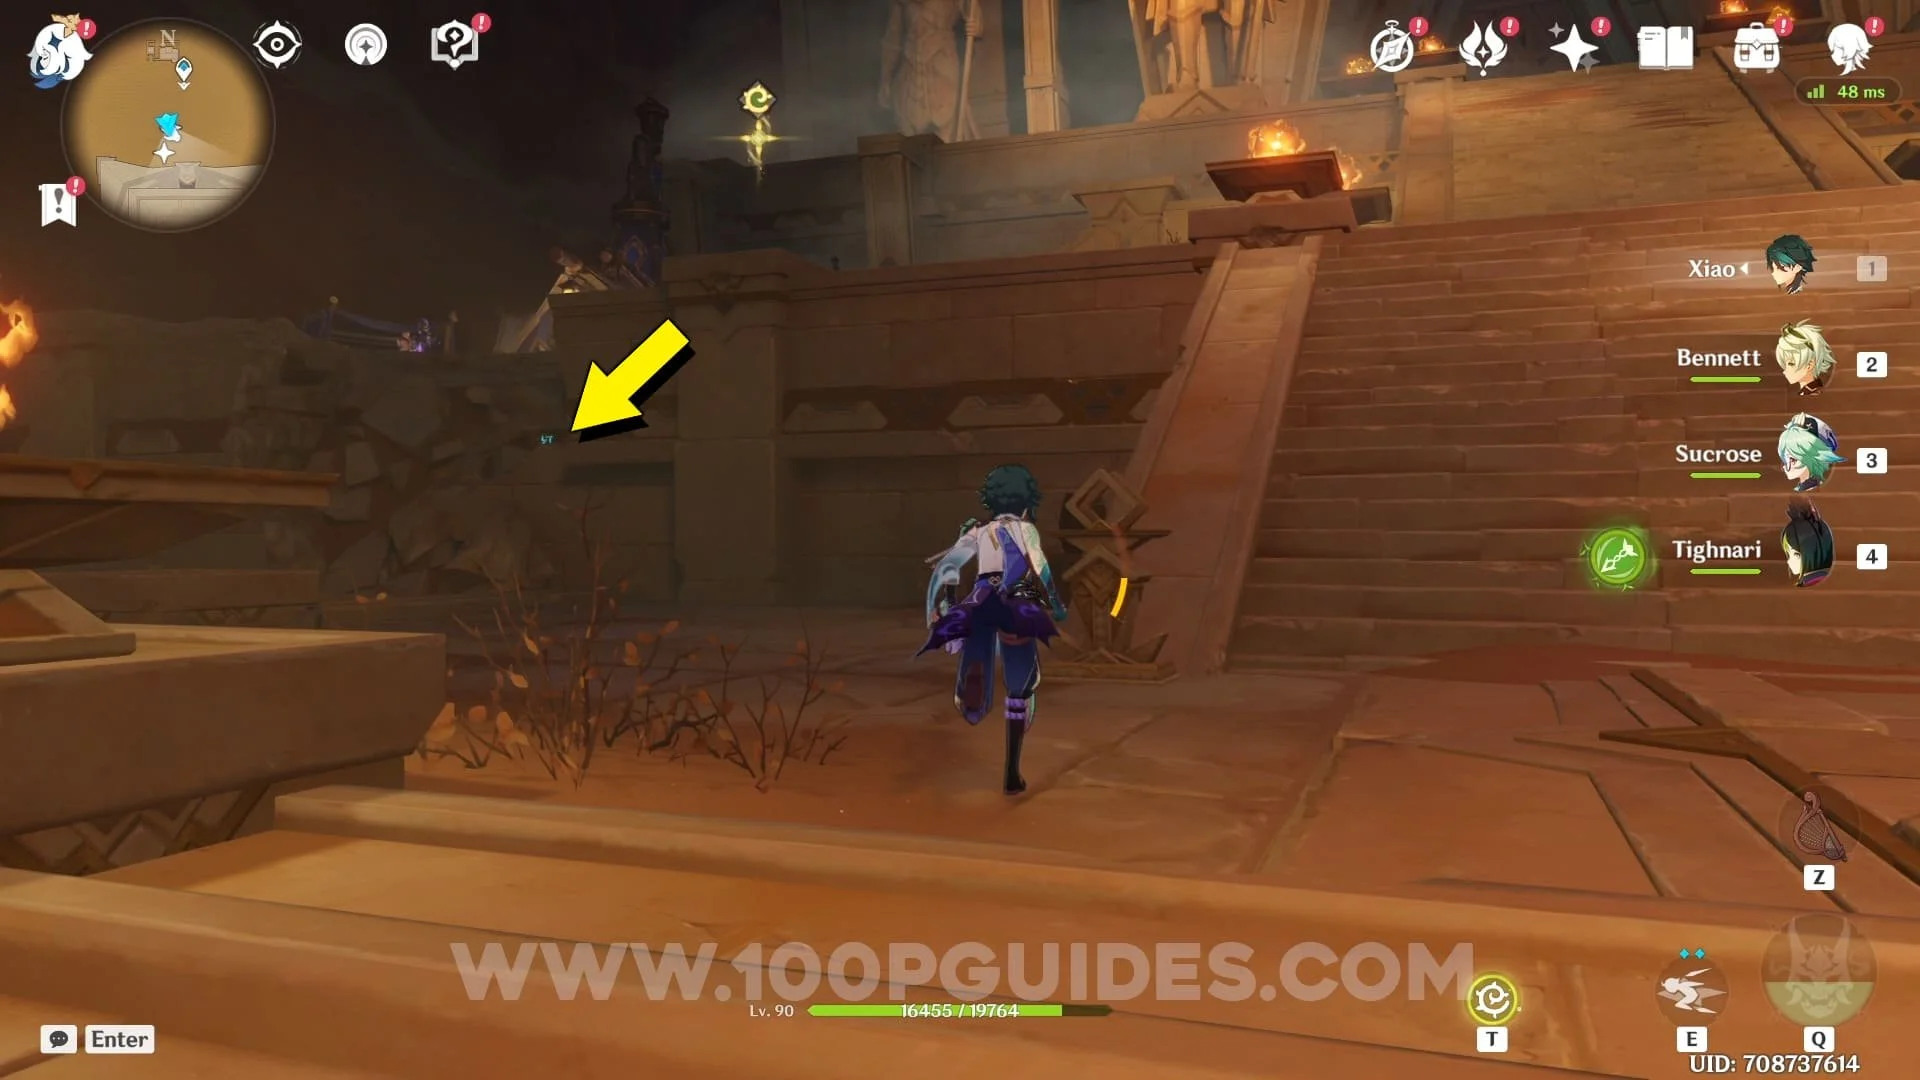
Sacred Seal #42. From the waypoint at the entrance of the Mausoleum, head forwards until you see a hall to your right. Halfway down the hall look for a grappling point above you to the right to reach the platform with the seal.


Sacred Seal #43. Return to the center area before the hall. Then head in to the main room with the sarcophagus and the gold. Take the door on the righ and continue straight to the wall on the far side. Look right to find the seal.


Sacred Seal #44. Head back to the room with the sarcophagus and use the door on the opposite side (left). Go to the far wall and go down the hall to the right until the end where you will be able to stand on a square platform that will vanish below you after a few seconds. The seal will be down here.


Sacred Seal #45. Climb back up to the top of the hole where you got the previous seal. Now head all the way down the hall to the east most corner where you will find a fan blowing you away. Activate the book to stop the fan and jump down the hole where you will then go down a hall to find the seal.


Sacred Seal #46. From the main room with the sarcophagus, head up the main lift to the top floor. Here go left to find the seal in the corner.


Sacred Seal #47. Go to the waypoint shown in the screenshots below. From here, go down to the lower part of the big open cave. Then go through the cave on the right and then take a left inside. In the next area get the blue triangle from the room on the left and take it to the room on the right. This will open up the room with the seal inside.


Sacred Seal #48. Return to the massive open cave and grapple up to the room with the 2 massive statues outside to find the seal inside.


Sacred Seal #49. Come out of the room where the previous seal was and exit the big area through the cave on yor right to get to an area with a tree in the middle. Here continue straight and exit through the cave on the opposite side from where you entered. In the next big area, drop down and enter the hole in the wall below 3 fire totems to find the seal.


Sacred Seal #50. Return to the area with the tree in the middle. Here exit by using the cave on your left. Once you come to a fan that you can use to go higher, look to the right of the fan to find another seal


Sacred Seal #51. Use the fan to go up to the next area. Once you see an enemy tent, go left to find a seal next to a door.


Sacred Seal #52. Turn back around and go to the tent to find another seal.

Sacred Seal #53. Drop down to the area below the tent and head to the east. Once you go up a spiral hill you will see a hole below. Drop down to get the seal.


Sacred Seal #54. Climb back up from the hole and continue forwards until you see a hole in the wall to your left. Enter the room through the hole to find another seal.
Sacred Seal #55. Soon after the previous seal, you will come to a big open area with a waypoint. First jump across the gaps and stay on the upper level. Look for a seal on your left just below an enemy tent.

Sacred Seal #56. Now drop down to the bottom floor and head towards the door at the end. Before the door you will see a small tent on the left with the seal inside.
Sacred Seal #57. Enter the door at the end and go right as soon as you go in to find a seal at the end of the hall.


Sacred Seal #58. Return to the entrance just before the previous seal. This time go up the stairs and take a right in the nex room. Then take another right and you should be in a room with a chest in the middle. Go through the door on the right to find the seal.


Sacred Seal #59. In plain sight outside in the location shown in the screenshot below.


Sacred Seal #60. On top op the Mausoleum. You will go to this area during the "Old Notes & New Friends" questline. If you need to go back you can follow the markers that the slate gives you by selecting the "Aaru's Shut" location.


Video Guide
If you found this guide helpful and would like to support our work, you can do so by pressing the Ko-fi button below