BONELAB All Collectible Locations (All Capsule Locations)

In BONELAB you will be able to find collectibles in form of gacha capsules. These can contain anything from weapons, props , avatars etc… Here are the locations.
DESCENT (STORY)
Gadget: Dice Avatar. Soon after the game shows you how to crouch, you will drop down to a lower level. Then you will break through some planks of wood next to 2 barrels. The collectible will be on another barrel straight in front of you after breaking the planks.


Weapon: Spiked Club. Under one of the tables in the area below the previous collectible. Same room as where you get and use the first key in the game.

Weapon: Axe Double. After the game shows you how to push the stone blocks over just after the first 3 skeletons, look to the left to find a plank of wood that you can break by throwing something at it (you can also just wait until you finish the game and climb up with the “Tall” avatar).


Weapon: Hatchet. Soon after you jump over some lava, you will be in a more modern area. As soon as you enter this area there will be some lockers to your left. The collectible will be in the orange locker.


Weapon: Crowbar. After you encounter the first spider robot enemy you will come to an open door that you can close with a red button on the wall to the right of the door. The collectible is in the small metal box on the wall to the right of the box.

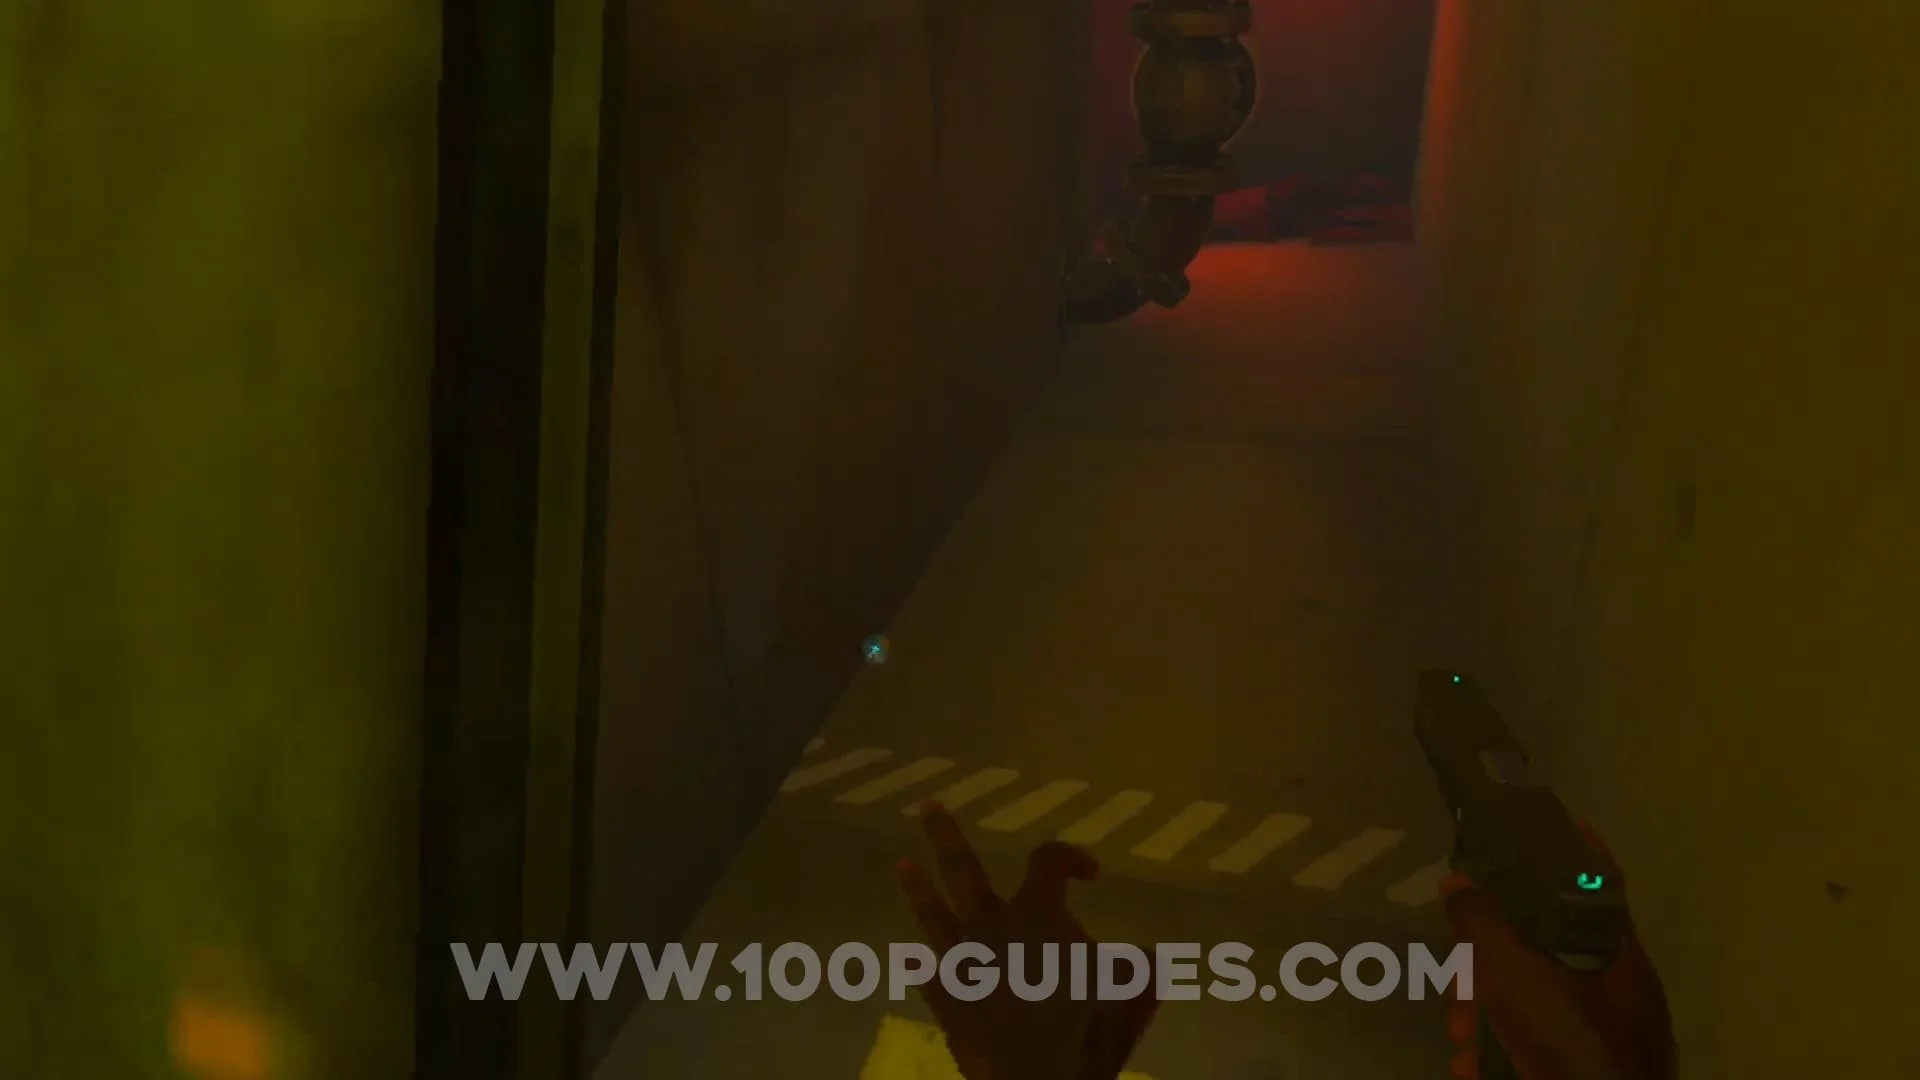
Weapon: Viking Shield. Soon after you get your first gun, you will enter a train station with square tiles on the floot. Here drop down to where the tracks would be to find the collectible at the end to the left.


Weapon: Shovel. After you go through the door with text “Wishing Well Lift” above it, look to the left to find the collectible on the table.


Prop: Hexagonal Container. After the room with 2 enemies and the wooden hut in it you will have to go up an escalator. The collectible can be found under the escalator.


Prop: Monitor. Soon after the previous collectible you will come to a room that overlooks the wooden hut. This room will have many monitors in it. The collectible is in the bin to the right as you enter.

Prop: Cardboard Box. After crossing the bridge where the massive MythOS sign is (in the area with infinite enemies), the collectible can be found under the escalators.


Descent Video Guide
BONELAB HUB (STORY)
Prop: Apollo. In the main Hub area, go around the wall to the right of the Exit (next to the sandbox and the experimental areas). Then look for an alley on the right with machine at the end. The collectible will be on top of the machine.


Avatar: Jimmy. On top of the elevator you used to get to the HUB area the very first time.

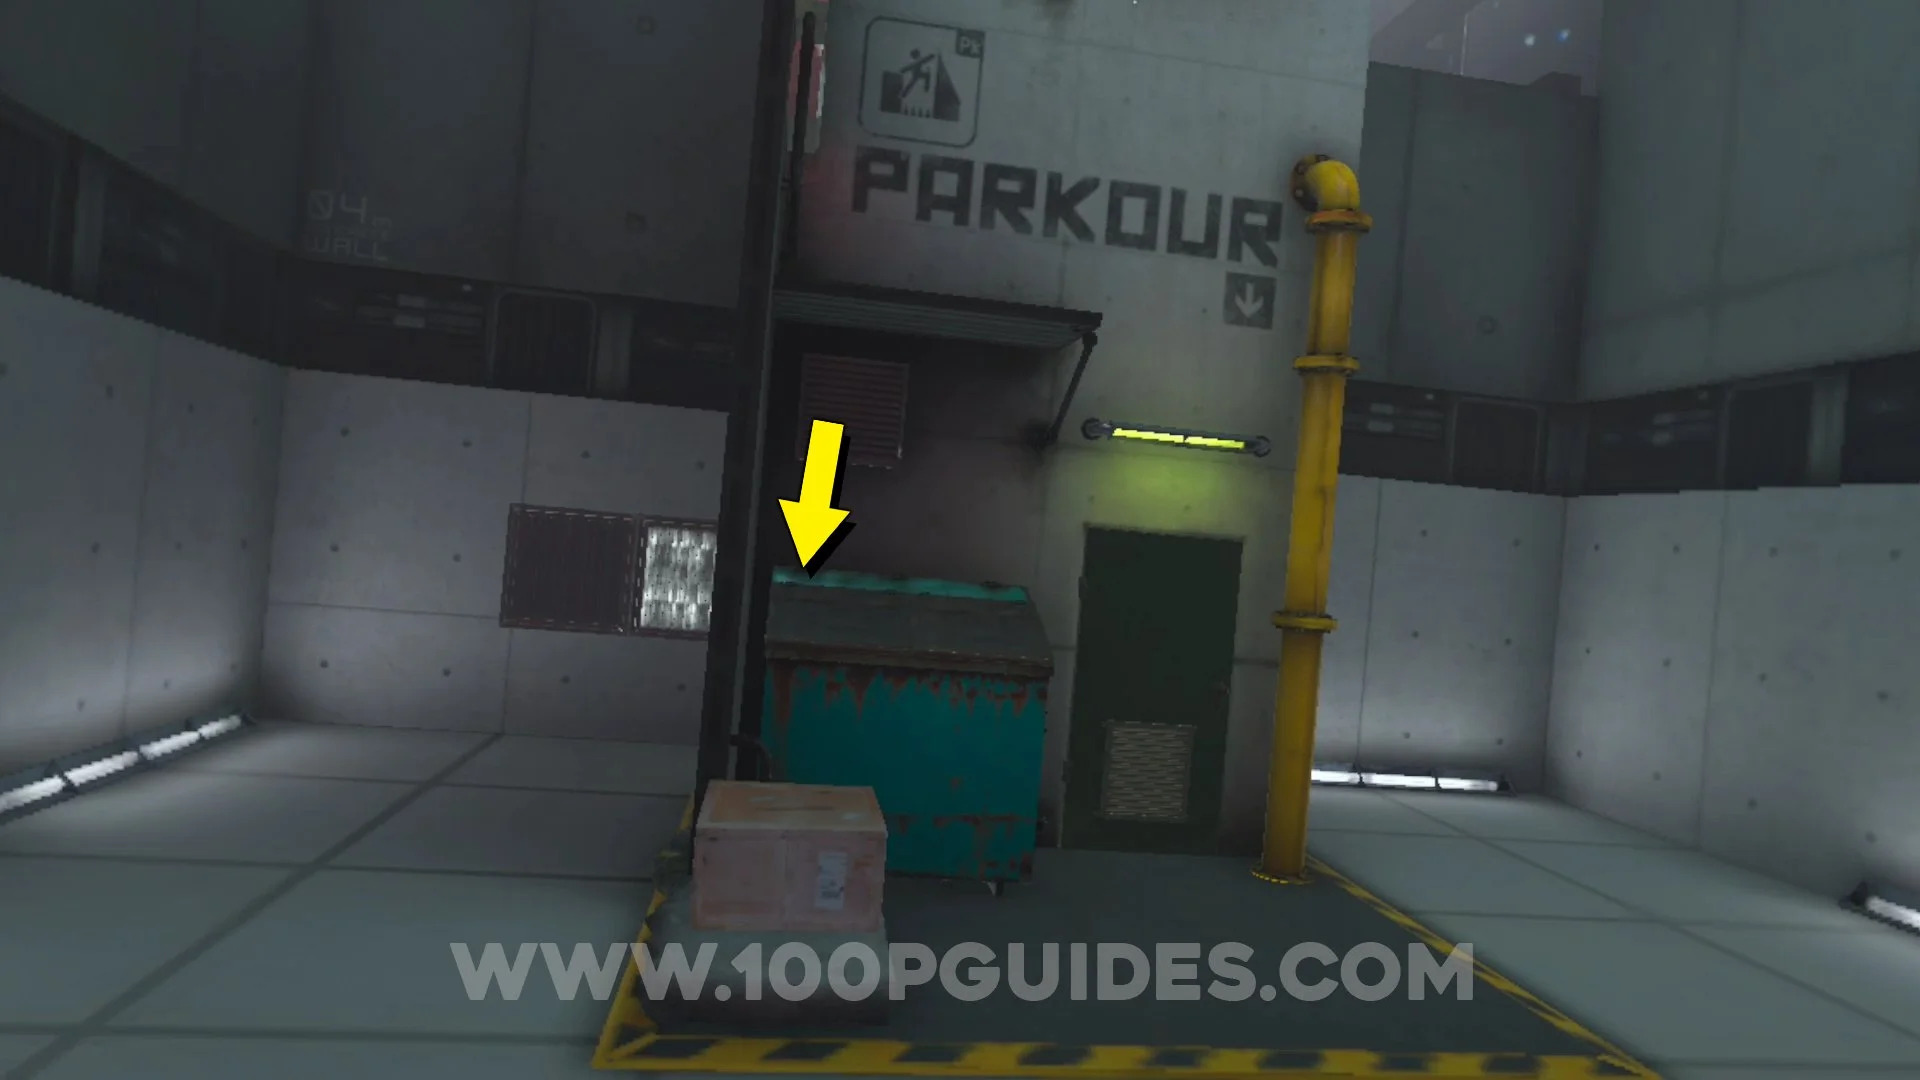
Avatar: Nullbody. In the rubish bin next to the “Parkour” door (only available after finishing the story).
Avatar: Ford. On the right column next to the door that takes you to the “Ascend” level (only available after finishin the story).
Gadget: Nimbus Gun. Found inside the bucket above the “Sandbox” door (only available after you finish the story).

Gadget: Spawn Gun. To the right of the crane (only available after finishing the story).
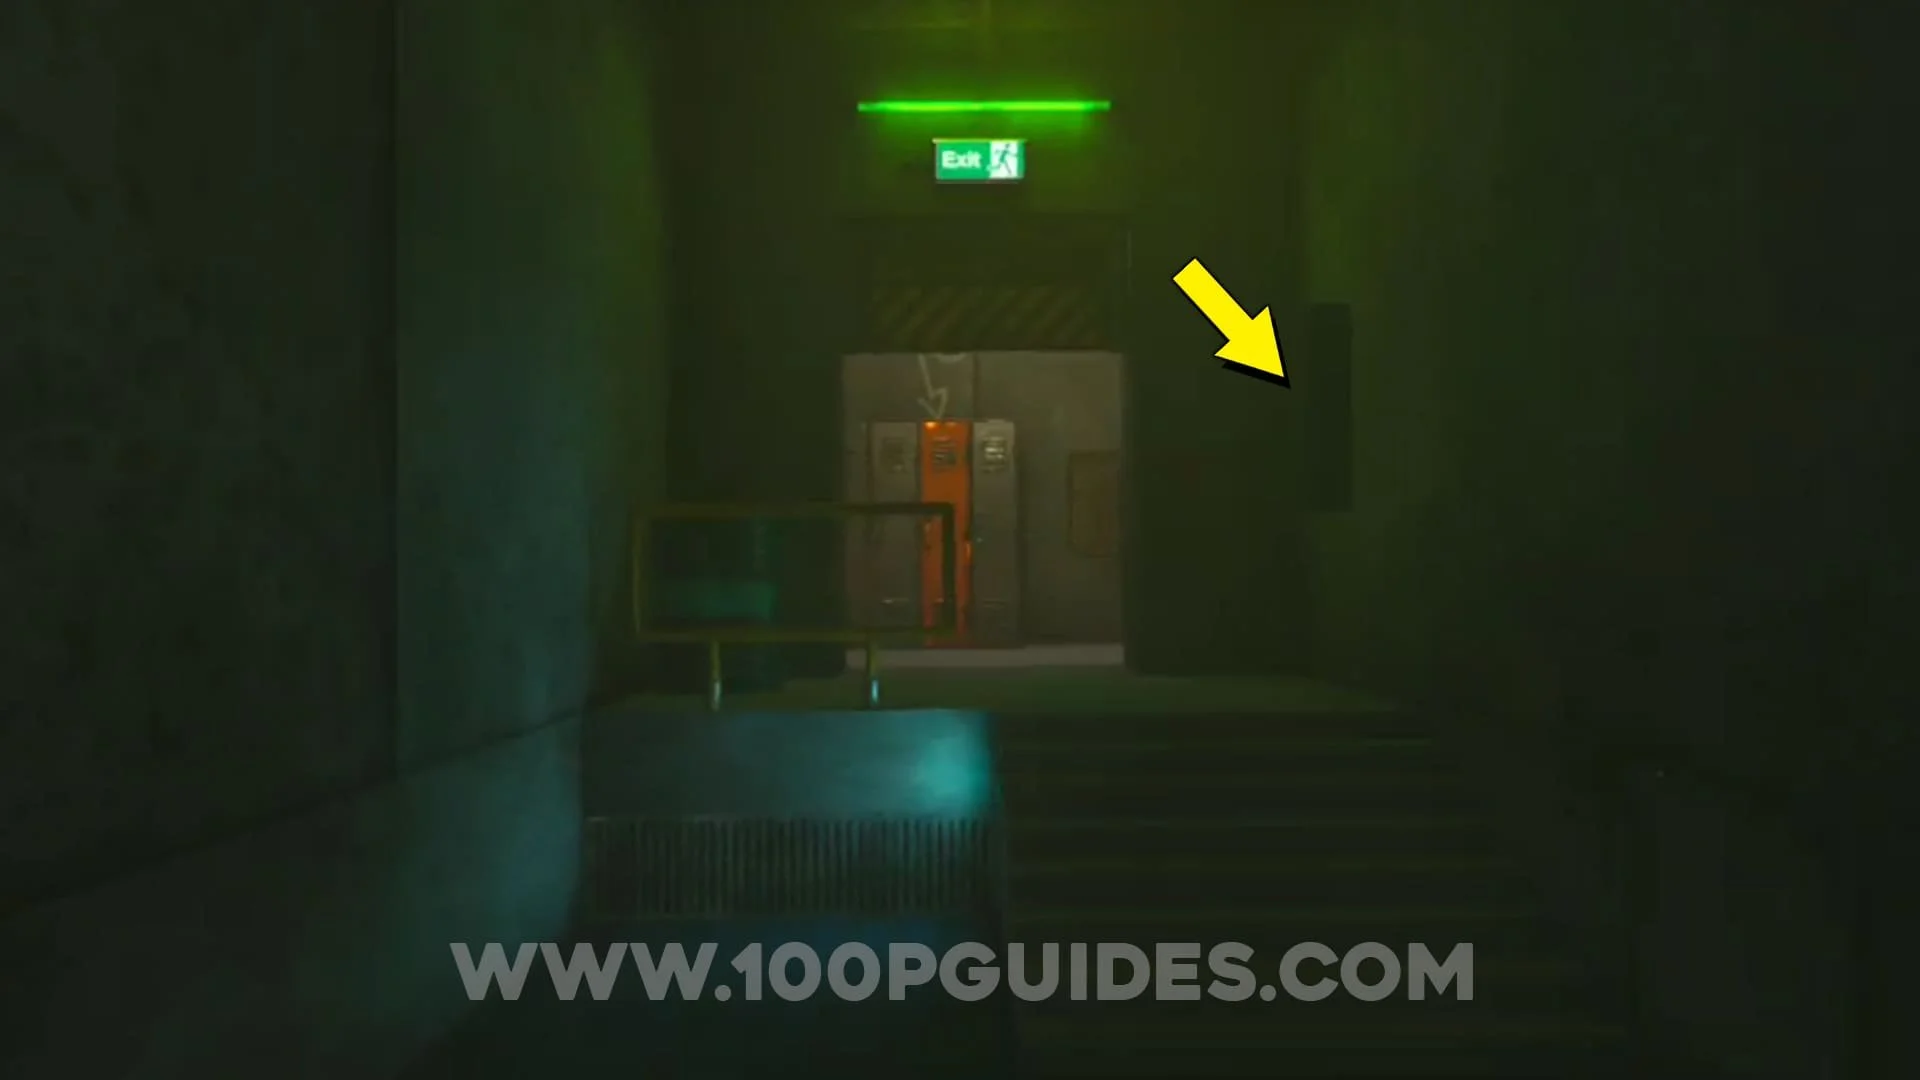
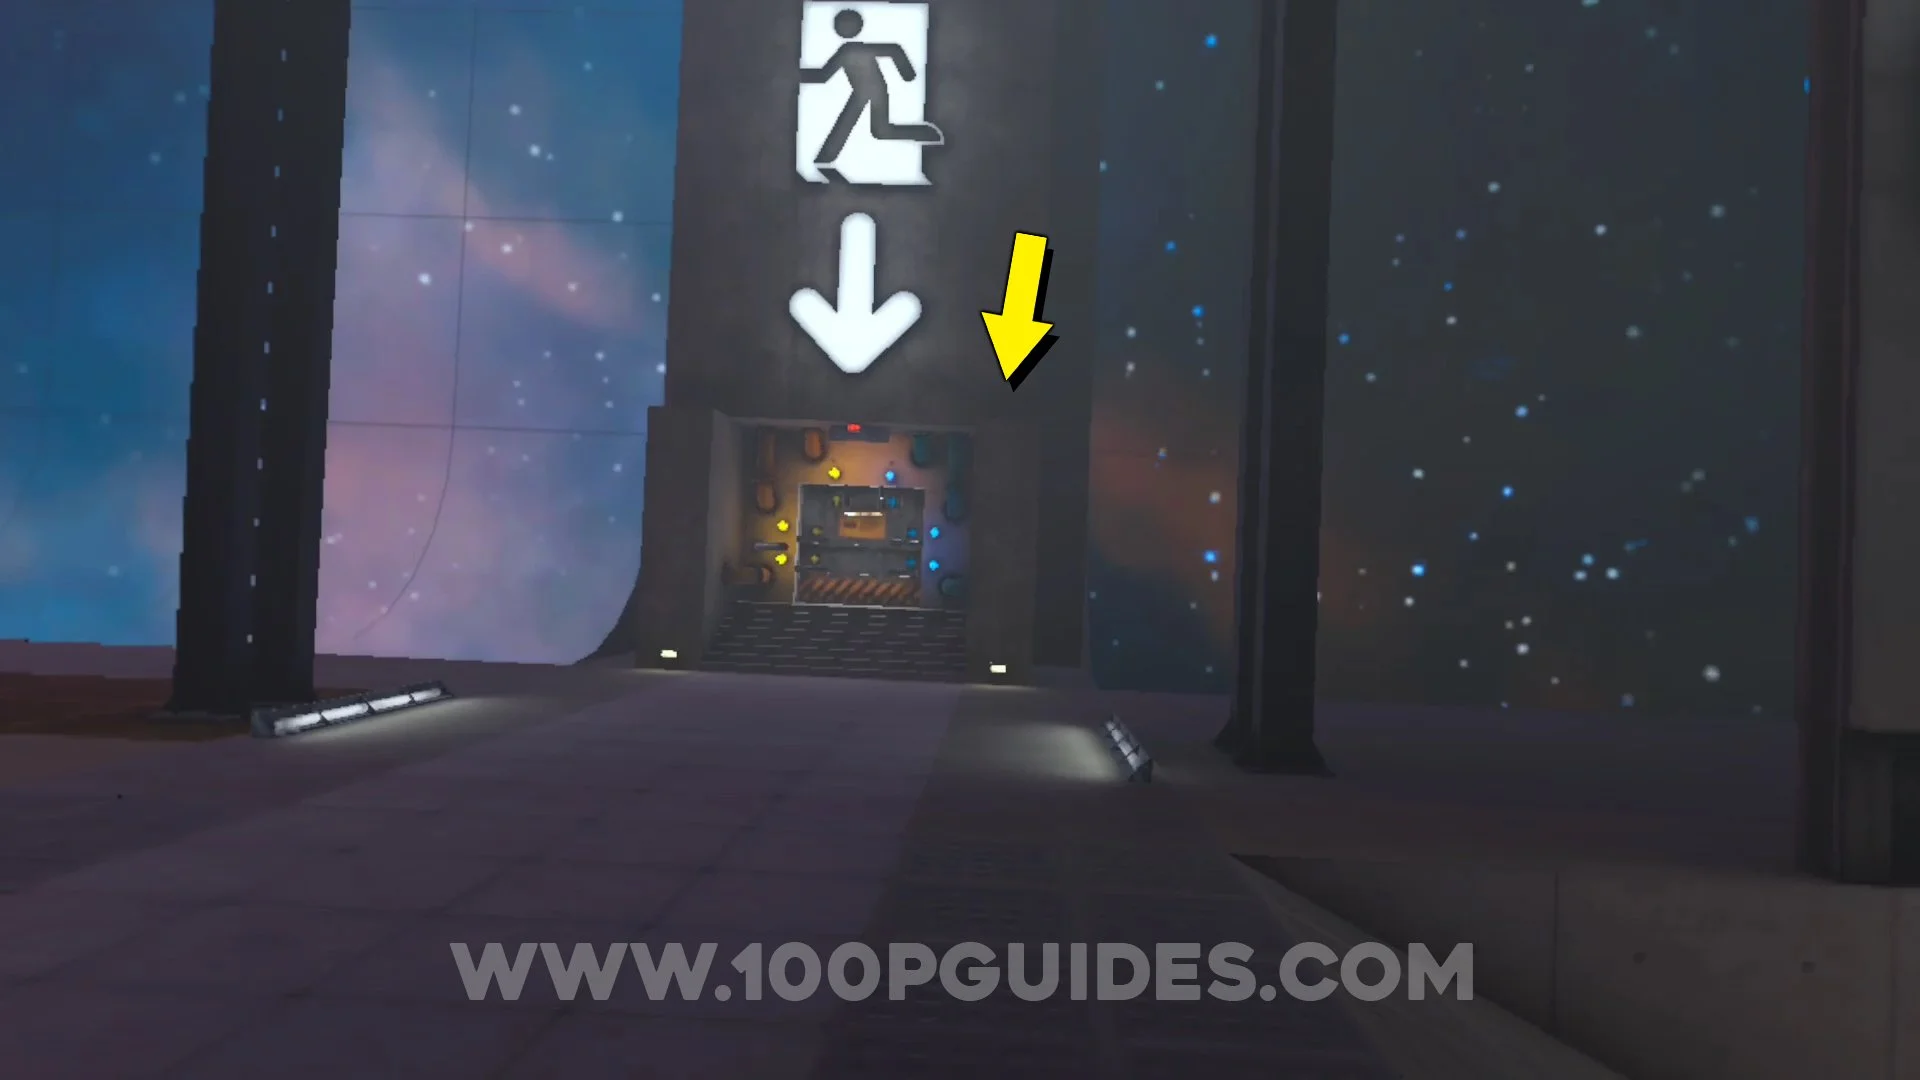
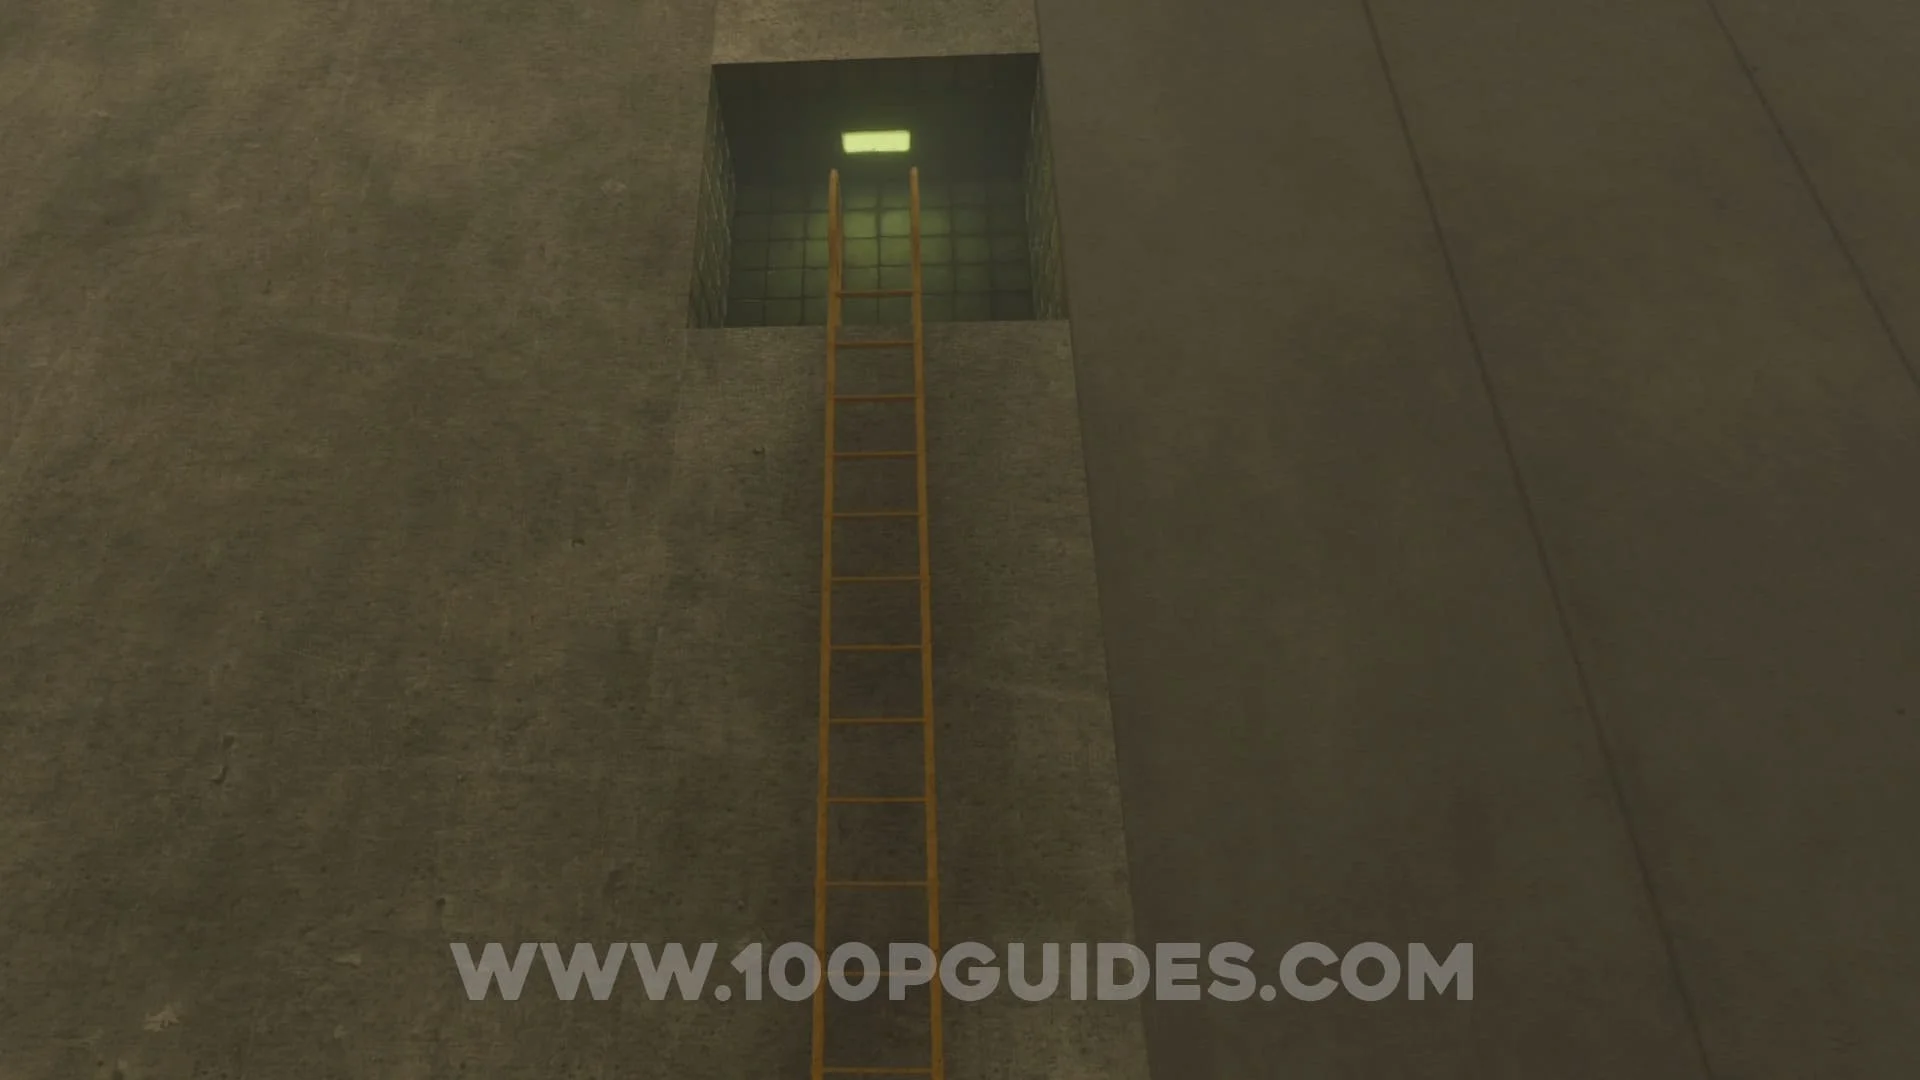
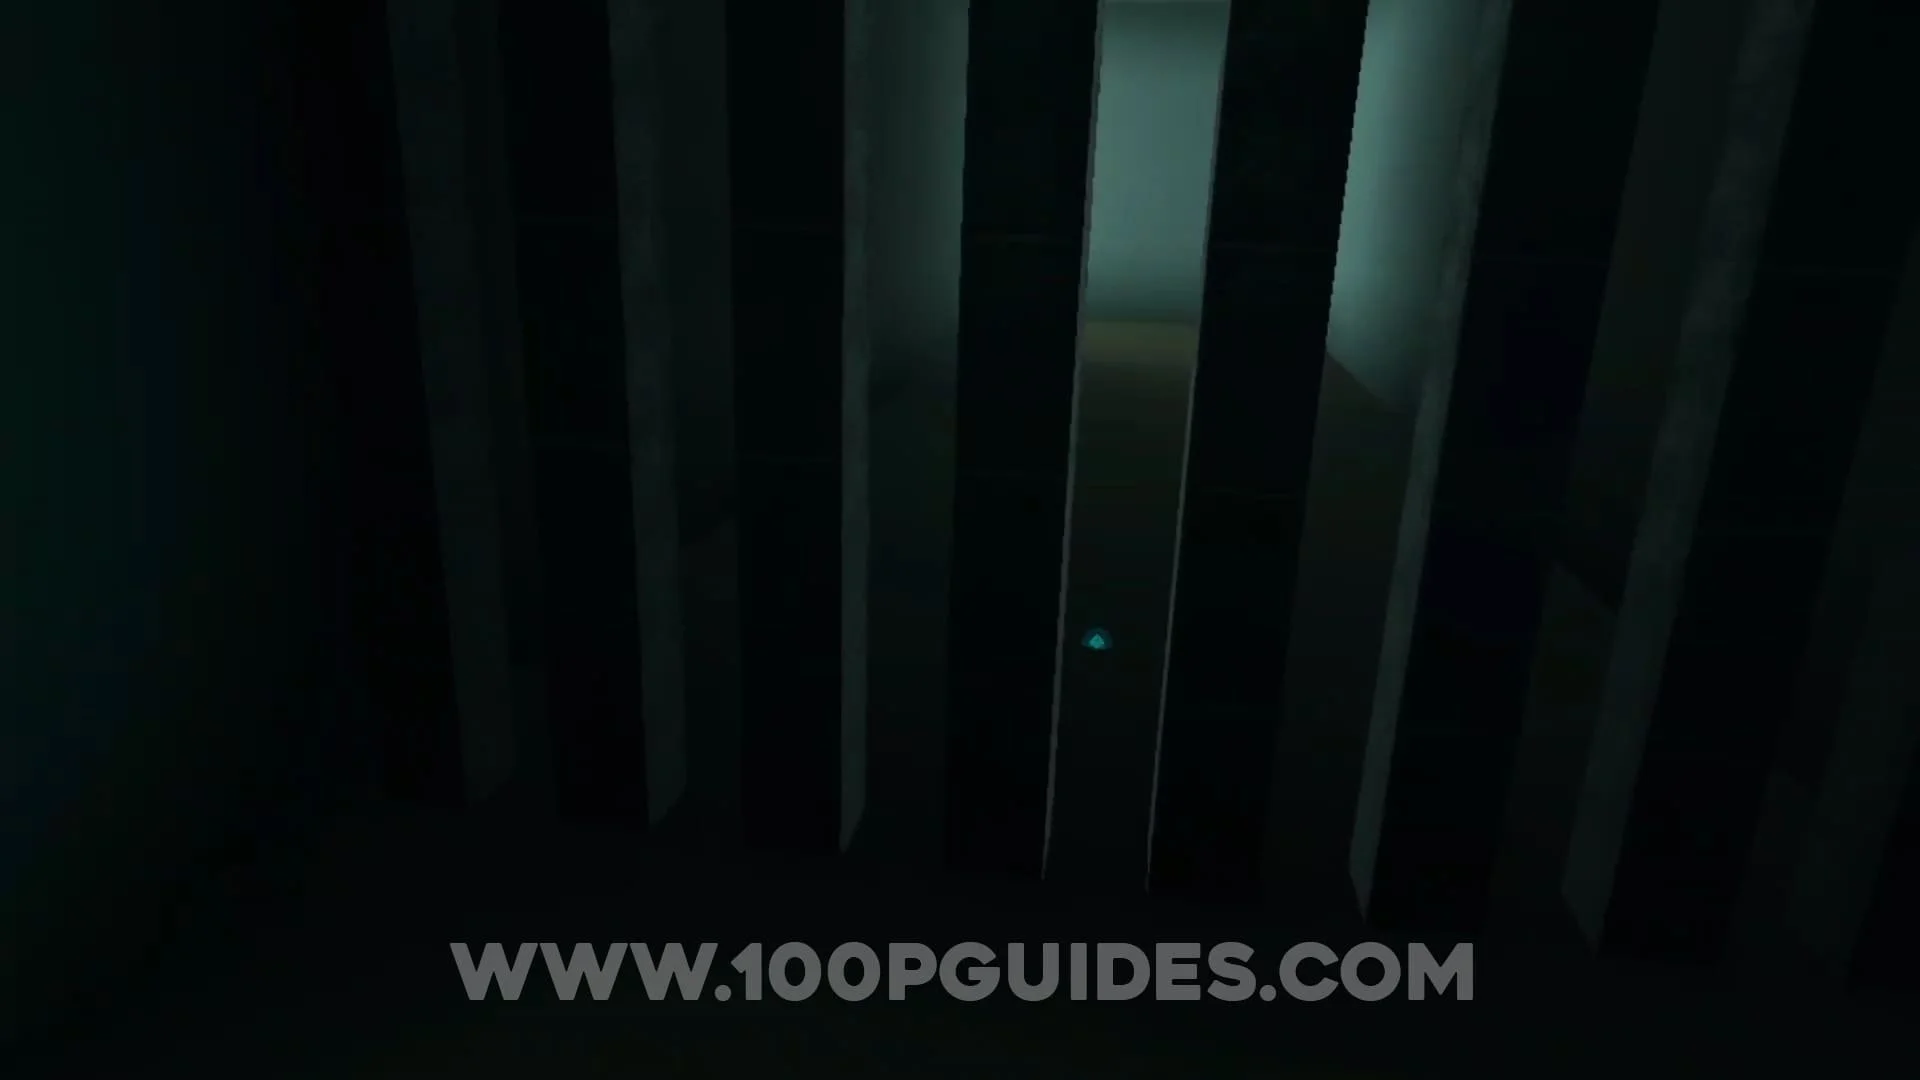
Prop: Cardboard Box Monogon. After you go through the quarantine door, you will go through some vents with fans. After that you will get to a lift that you have to use to go up. Before you get on the lift, drop down to the area below to find the collectible behind a yellow pipe.


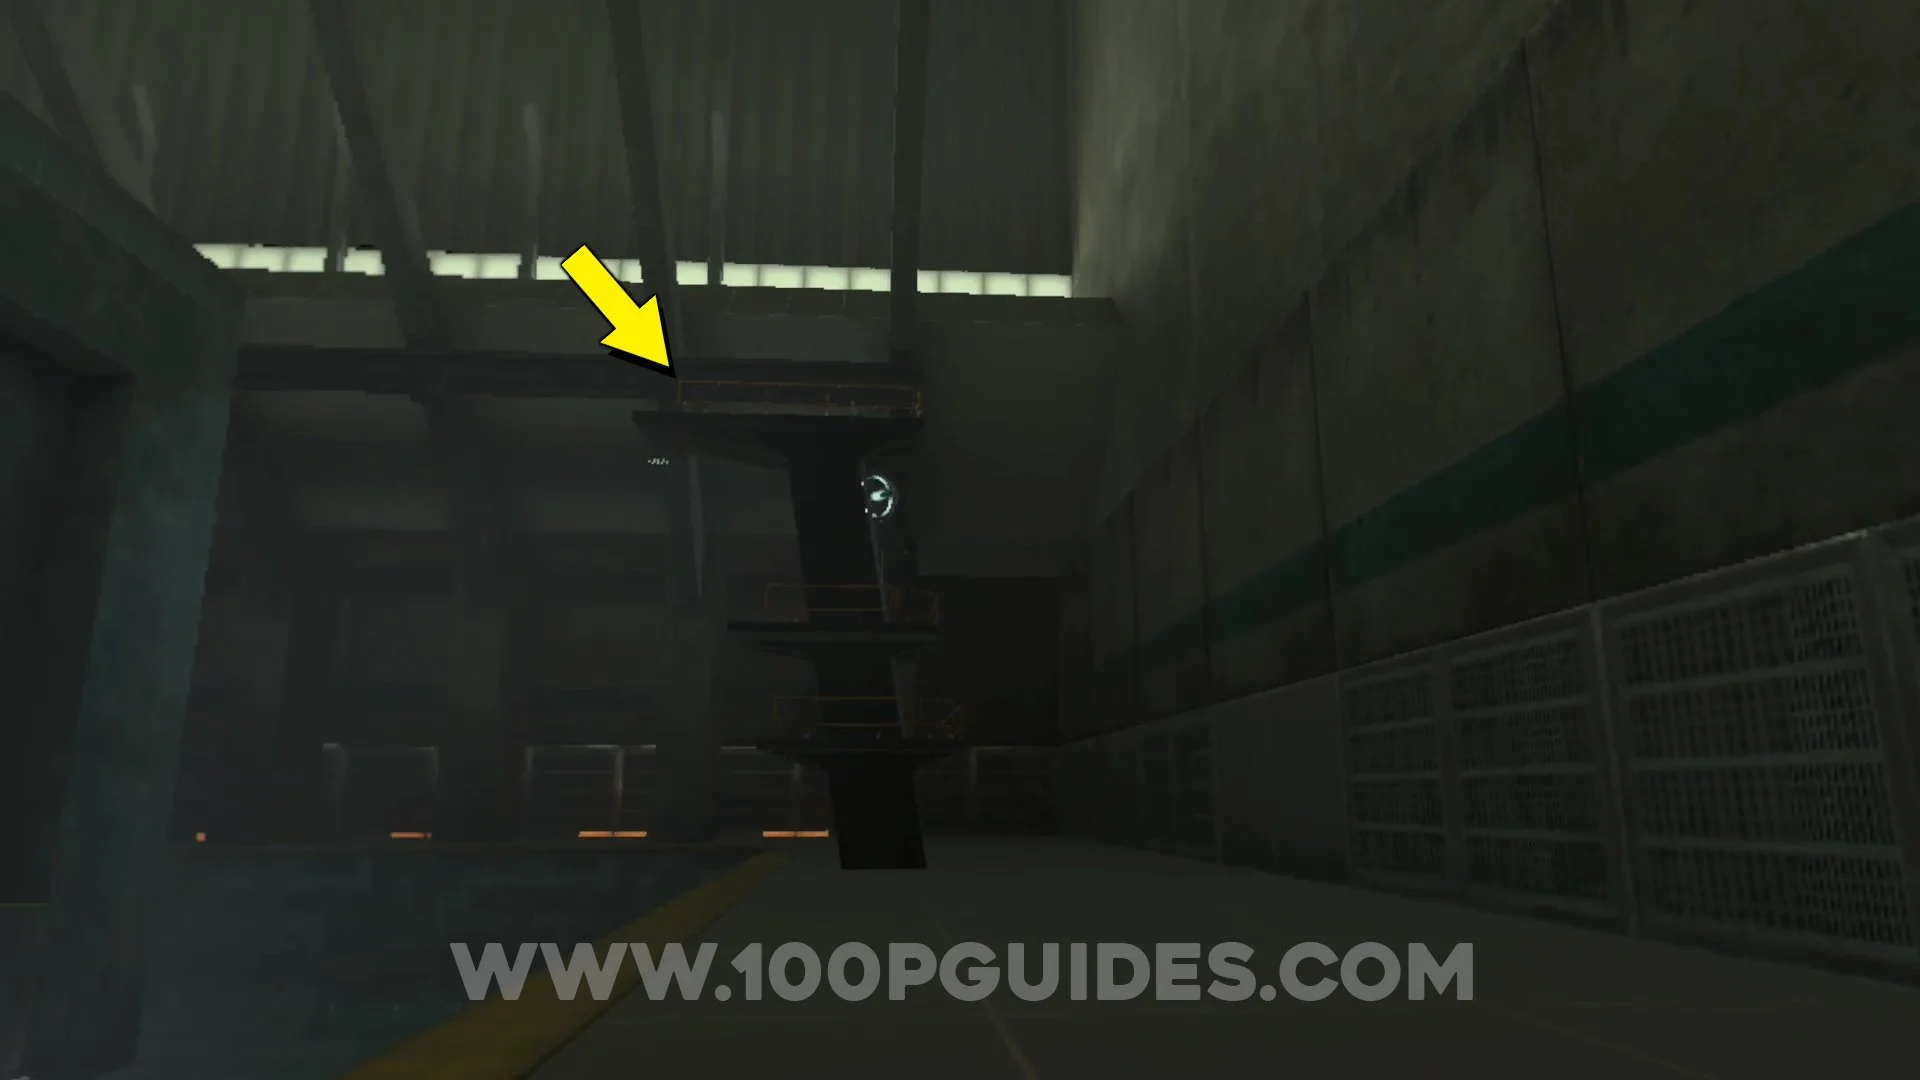
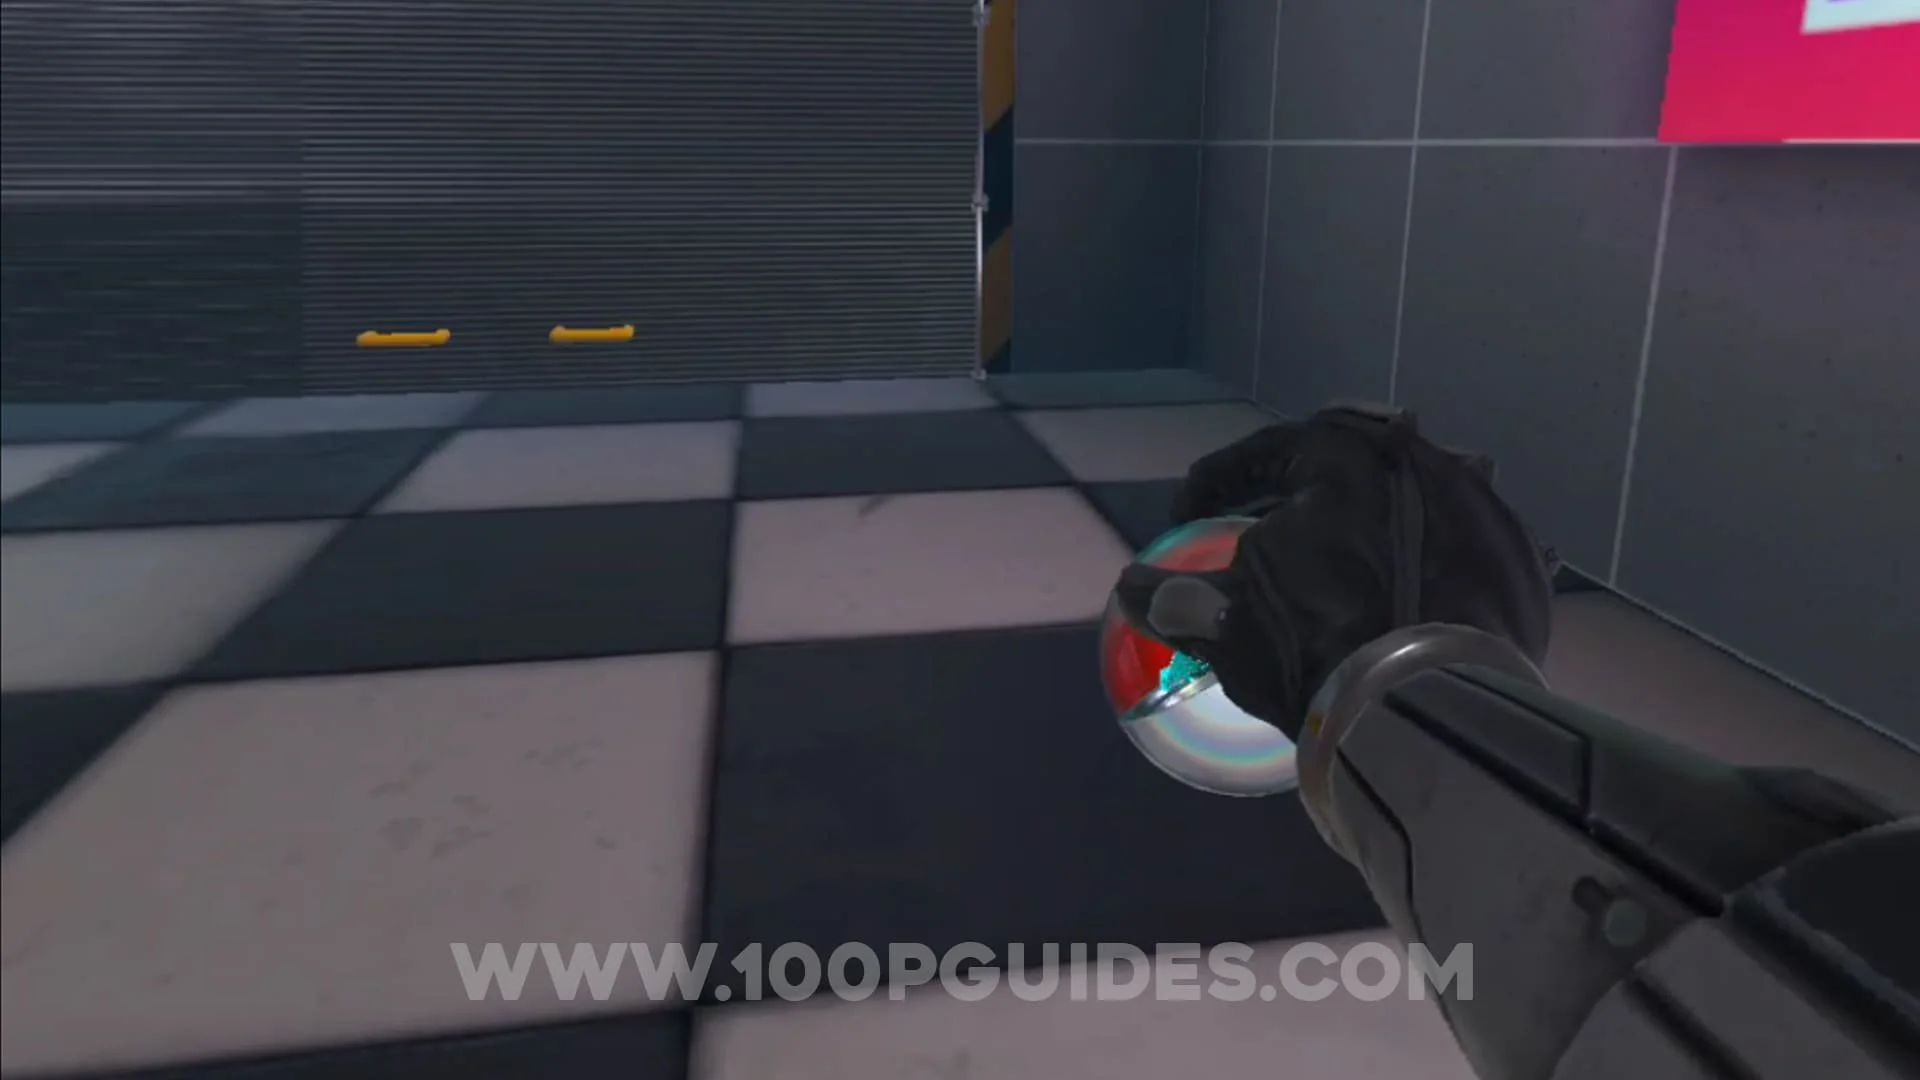
Weapon: UMP. After you use the lift that was mentioned in the previous collectible, you will be in an area with a massive empty pool with a building in the middle. Before you cross to the building, go around the side of the pool and climb the diving tower to find the collectible at the top.
Avatar: Dog - Duck Season. From the previous collectible, jump on to the yellow railing and then cross the top of the beam holding up the bridge to the other side of the area to find the collectible next to a column near the “windows”.


Prop: Coffee Cup. Once you enter the building in the empty pool, the collectible can be found on the tables in the middle.


HUB Video Guide
LONGRUN (STORY)
Prop: Gym Medicine Ball. At the very start, just before you go through the hole in to the room where the enemies are shooting you from. Look down to the right to find the collectible behind some pipes.


Prop: Concetre Barrier. On the wall to the left in the first room with enemies.
Weapon: MK18 Naked. As soon as you leave the room with the first enemies. Look to the right and climb over the metal box to find the collectible.
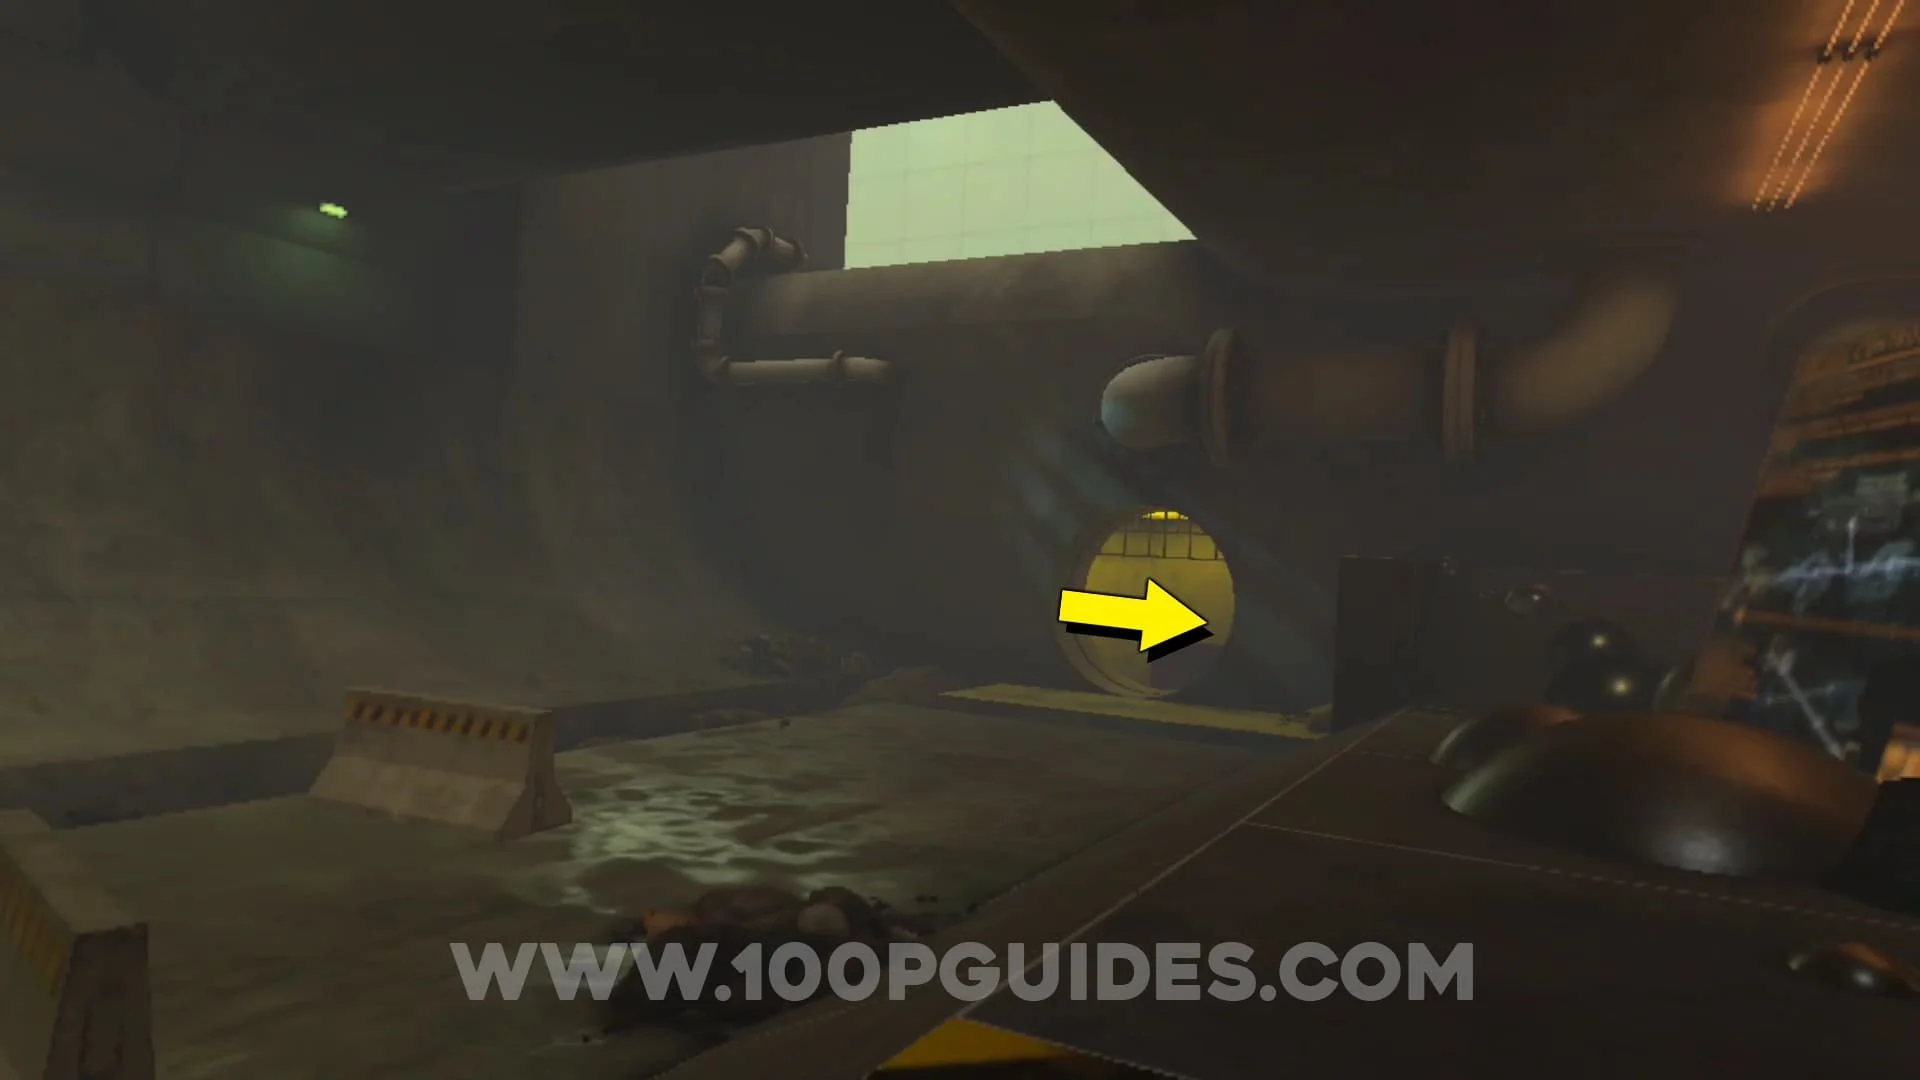
NPC: Null Rat. Soon after a room with loads of ammo and another pistol in it, you will fall down to another area. You will see a sign with "Sewage System" on it. Look to the roght of the sign to find the collectible on the ground near some rocks.


Weapon: Trashcan Lid. In the same area as the previous collectible. On the wall to the right, behind where the turrets where.
Prop: Roll Ball 100KG. In the area where you get the M4. Push the ball mechanism to the left. Then climb up to it and climb the ladder to find the collectible.


Prop: Gym Torus. Just after the part where the hole fills up with waster. In a gap in the wall just before the train area.
Prop: Gym Cone B. Under the train. You will be able to get it once you move the train.
Prop: Gym Cube 1x1. After climbing to the higher levels by moving the train you will get to an area with a bit of corruption on the ground (just past here the music will end). In the area with the corruption, enter the hole in the wall to the left, jump and grab the collectible from the platform.


LongRun Video Guide
MINE DIVE (STORY)
Prop: Gym Trapazoid E. Shoot the hidden target at the back of the shooting range at the start of the level.
Weapon: Pick Axe. About a third of the way in to the mine cart ride, you will see a round target on the left as you go up a hill. Hit it to get the collectible.


Weapon: Stapler Gun. Shoot the round target to the left in te Motel area when riding the cart.

Mine Dive Video Guide
BIG ANOMALY (STORY)
Prop: Gym D12. At the end of the first hall with enemies you will go in to a small room on the right (main path). The collectible will be on the table in this room.


Gadget: Gravity Plate. After making your way through a load of enemies in the halls after getting the shotgun, you will come to some stairs. Go down these stairs to find the collectible below them.


Weapon: Electric Guitar. Shoot the boxes right next to the previous collectible to reveal a secret path. The collectible can be found in a bin in the room on the other side of the secret vent.


Prop: Gym Cylinder Half A. From the previous collectible, return to the stairs and go all the way to the top to find this colelctible.
Weapon: MK 18 Sabrelake. Jump to the platform where the previous collectible was. Then jump to the pipe to climb to the platform above to get the collectible.
Prop: Gym Cone A. In the room with the yellow key and the first purple enemies, go to the end and look to the left to find the collectible to the left of the vending machines.


Prop: Gym D4. In the room after you look out to the giant human you will drop down a hole. As soon as you land, turn around to see the collectible through the bars.

Prop: Gym Trapazoid C. Just after the previous collectible, you will go up a slope with enemies. At the corner after the first hill you will find the collectible under a table to your right.


Prop: Baseball. Soon after the previous collectible, you will go through a room with purple enemies and then drop down a hole. After you land, go through to the room you can see with the giant screen. The collectible will be on the table in this room.
Weapon: Vector. Now go back to where you landed from the fall and go down the other path. As soon as you go up teh stairs, turn around to find the collectible at the end to the left.


Big Anomaly Video Guide
STREET PUNCHER (STORY/TAC TRIAL)
Prop: Gym Cylinder Small. In the second cubicle on your left at the very start of the level.
Pro: Gym Disc A. In the area where the first enemies are, once you go around the first corner a garage door will open at the end with an enemy inside. The collectible will be next to the boxes.
Prop: Brick. Inside the rubish bin straight after the previous collectible.
Weapon: Lead Pipe. Just before the first gate where you have to defeat 7 enemies for it to open, climb the container. Then climb the yellow pipe to get to a higher platform. From here jump to the platform on the right where you will find the collectible in the corner to the right at the end on a barrel.


Prop: Gym Trapazoid B. Just before the end of the first section of enemies (where the quarantine door is), take a left and head up the spiral stairs to find the collectible behind the metal box at the end.


Weapon: Baton. Soon after you go through the door that opens after killing the first 7 enemies, you will come to an large straight open street. The collectible is in the garage at the end to your left.


Prop: Gym D8. At the start of the same street as the porevious collectible, take the stairs up to the right. After defeting a turret you will have to push a bridge in to place. After the bridge go past the vending machine and look to the right to find the collectible behind some monitors on the floor.


Gadged: Power Puncher. From the previous collectible, turn back around and stand in front of the vending machine, now jump across the the ledge in front of you and then jump across the the fire escape stairs. From here look for a blue pipe to the left that will allow you to get to the next roof. Here push over the plank of wood to get to the next roof. Here go right and look down to see a hidden gape where you can find the collectible.


Weapon: Katana. Soon after the previous area, you will get to a hall with a load of enemies and a katana on the wall. The collectible can be found in the bin at the end of the hall.


NPC: Security Guard. Just after the previous collectible you will use a jumper. As soon as you kill the guard at the top, break the boxes to find the collectible.
Avatar: Strong. Obtained automatically at the end of the level.
Street Puncher Video Guide
SPRINT BRIDGE (STORY/PARKOUR)
Weapon: PDRC. Close to the start you will see a yellow generator to your left, the collectible is behind it.
Prop: Sword Noodledog. Behind the buildign where you have to press the red button.


Weapon: UZI. On the second bridge, as soon as you jump to the wooden platform that makes a bridge, turn left to find it next to the column on your left.


Weapon: MP5K Sabrelake. Continue all the way to the entrance of the final building where the level ends, instead of entering the building by pressing the red button on the door, jump up the wall on the left and then go back across the bridge (this time on top) to find the collectible half way across.


Avatar: Fast. Automatically unlocked at the end of the level.
Sprint Bridge Video Guide
MAGMA GATE (STORY/ARENA)
Weapon: Morningstar. Behind the radio at the start of the level.
NPC: Skeleto Fire Mage. Go past the main objectivo on the bridge. Then at the other end go down the stairs to the right and find the collectible below you behind the stairs.


Weapon: Bastard Sword. On the area above the previous collectible you will find a jump pad. Use the jump pad to get to the area above where the collectible is.


Avatar: Heavy. Obtained automatically at the end of the level.
Magma Gate Video Guide
MOONBASE (STORY/SANDBOX)
Prop: Gym Cube Small. On one of the small towers around the tallest tower. Make sure you are playing on “Sandbox” mode and have the Nimbus Gun to get up there.
Weapon: Gruber. On the tallest tower, just above the previous collectible.
Prop: Crate 2M Indestructable. On the tall tower with the "ropes" on the sides, climb the ropes to get to the top.


Avatar: Short. This is the collectible you will need to get to finish the level. You can find it on top of the round building in a crater


MoonBase Video Guide
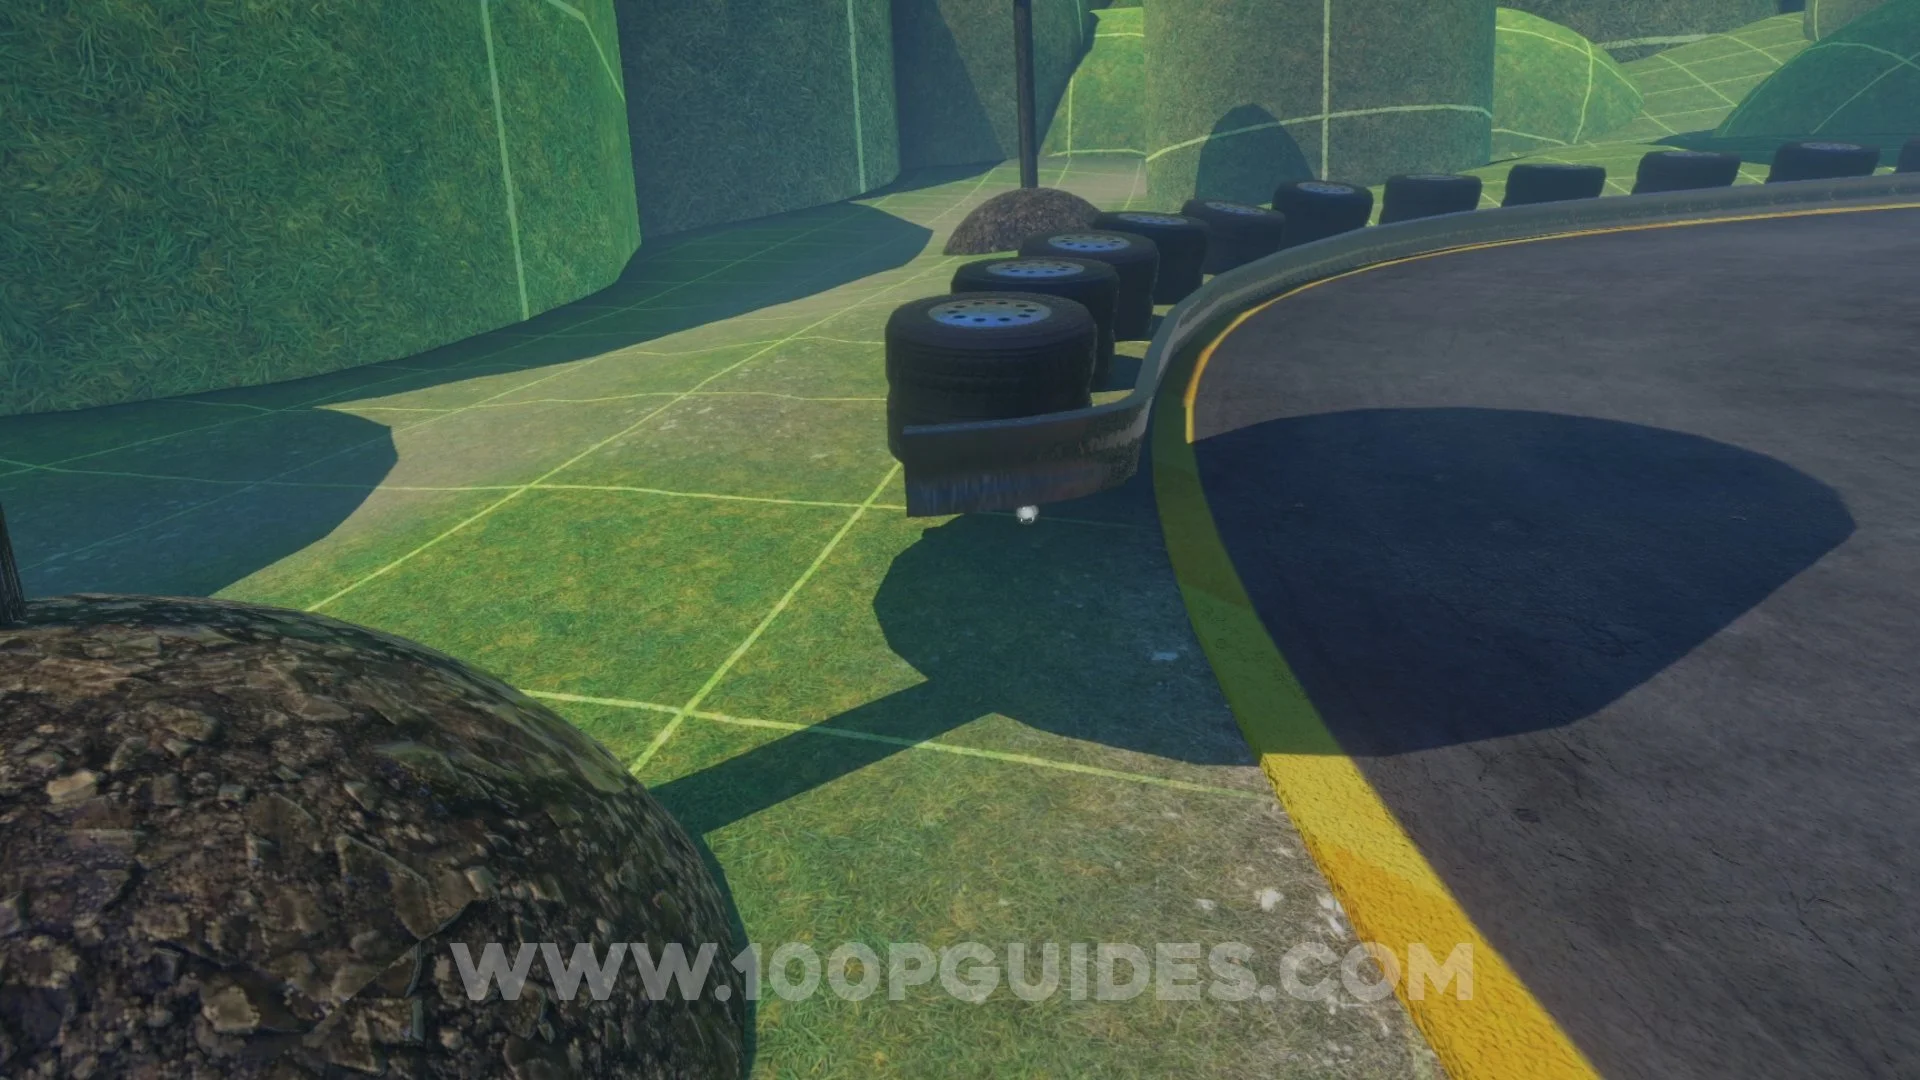
MONOGON RACEWAY (STORY/MODS)
Vehicle: GOKART. At the very start of the level.
Gadget: Toy Ballon Gun. As soon as you leave the first building, go around the left side of the building and look for a path to the right of the "reset" button. This will take you to the 2nd floor of the buildign where the collectible is found.


Prop: Gym Cube 2x2. Can be found anywhere in the area around the second corner of the track. This collectible will roll down the hill at the start so have a good look around.
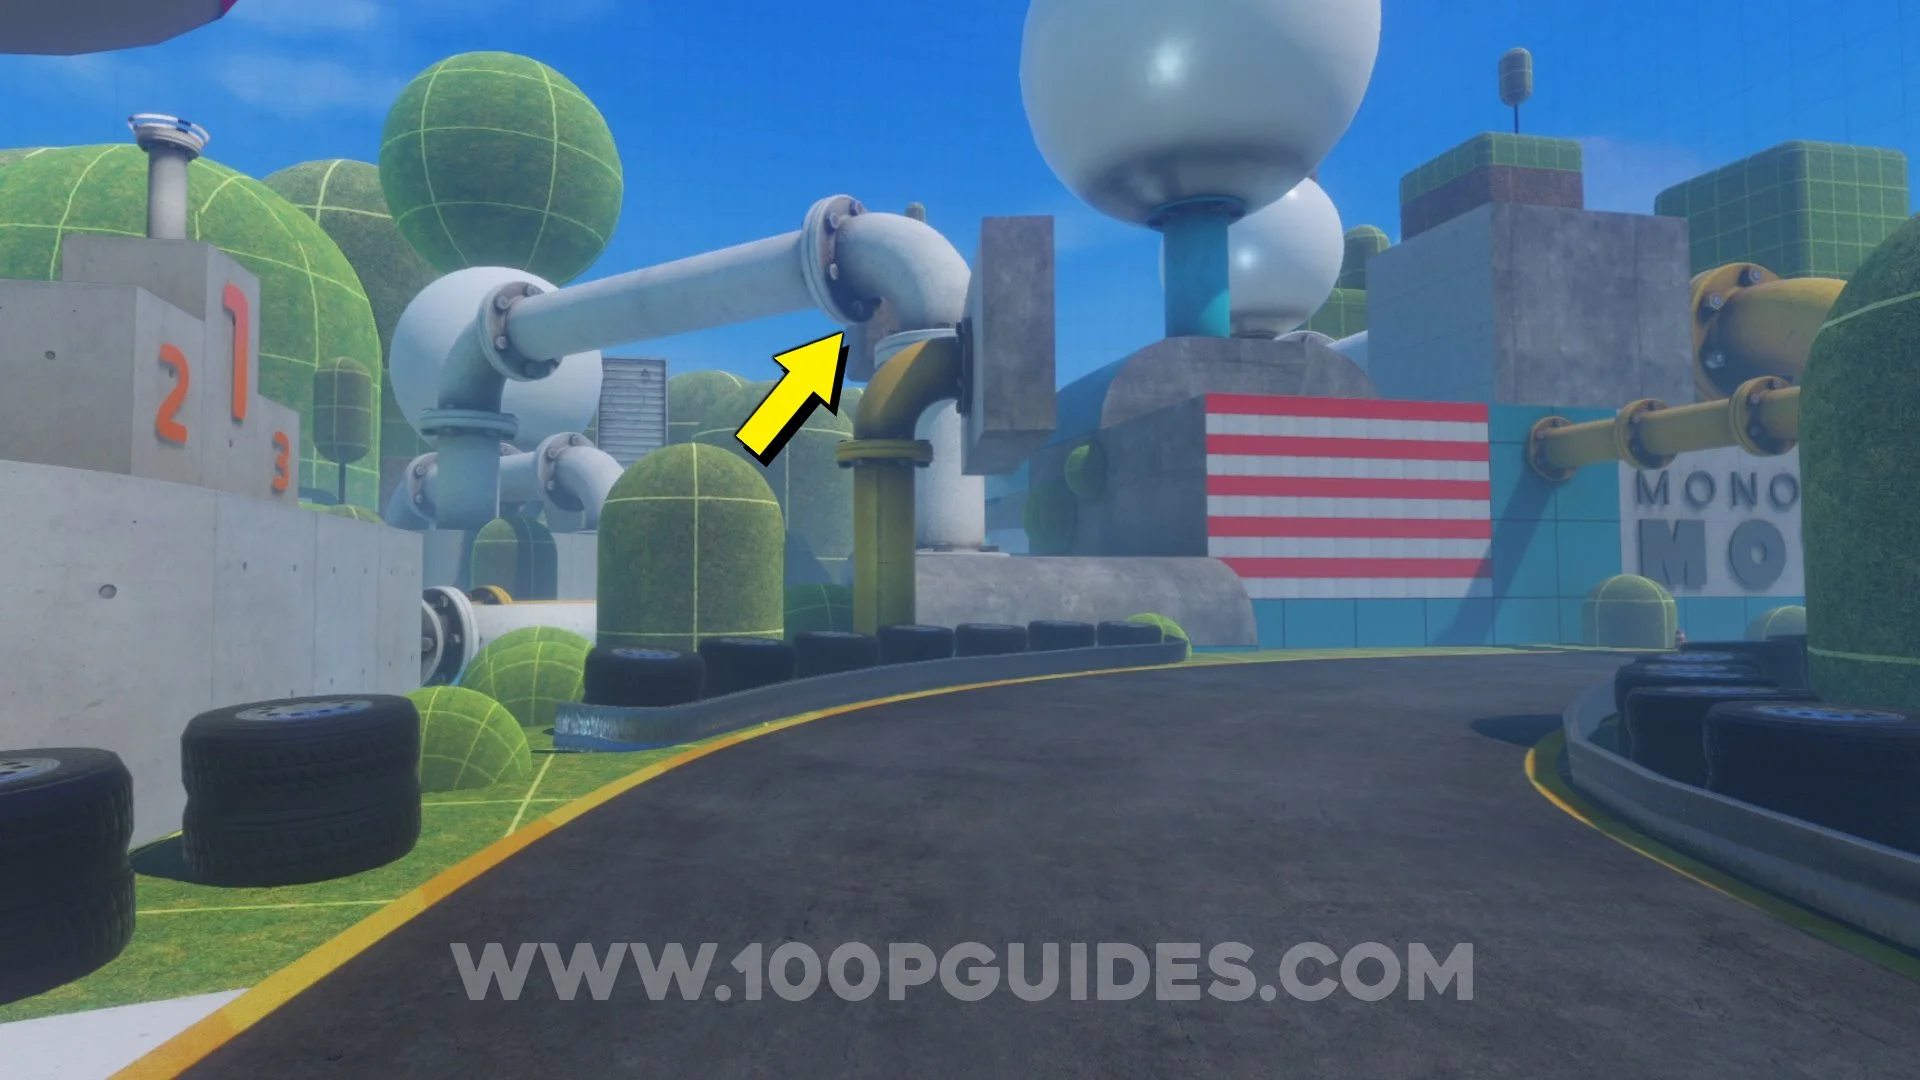
Weapon: ACOG. Can be found on top of the time board. You can climb up there by jumping on to the tires, then to the green “hill” and then to the yellow pipe.
Prop: Gym Disc B. Go around the track until you see a vertical container on the outside of the track. The collectible will be behind it.


Weapon: FAB. You will need the Nimbus Gun for this one. It can be found on top of a hight green platform to the right as soon as you exit the first building.
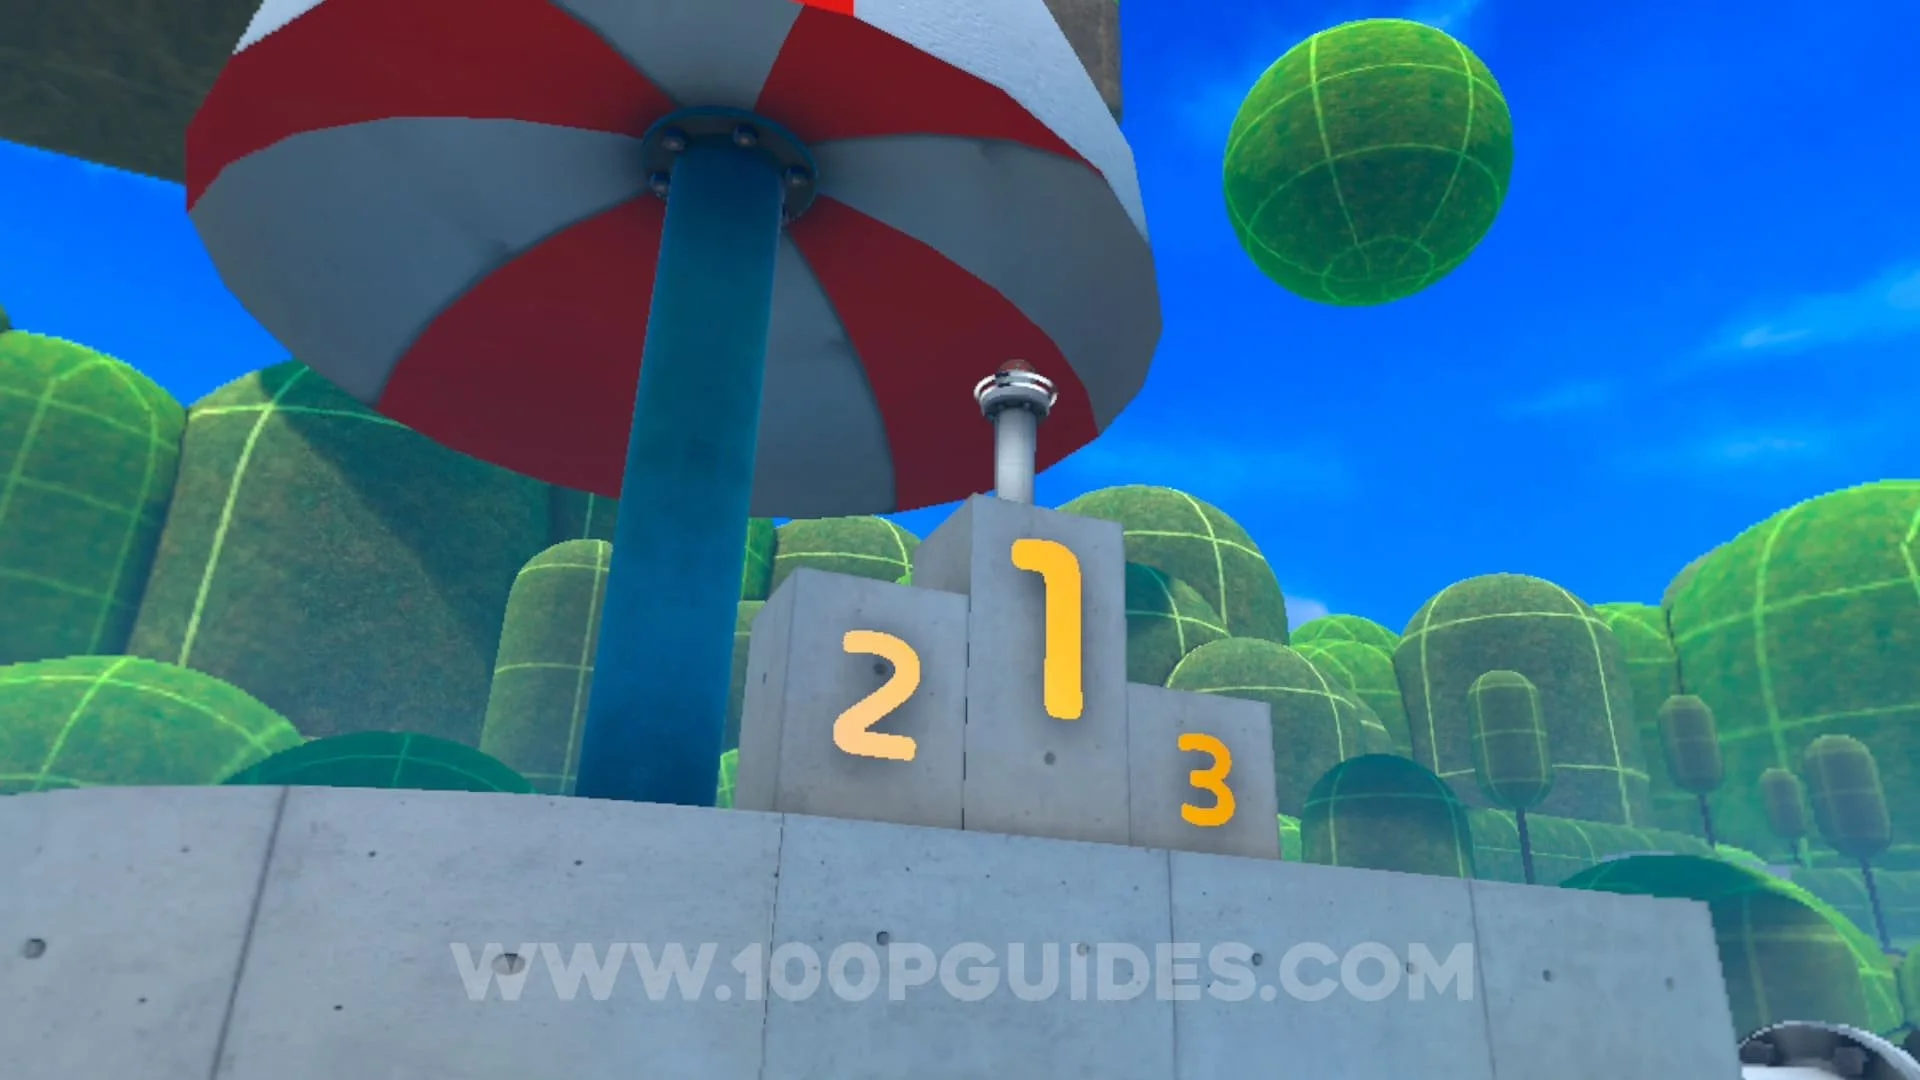
Avatar: Light. Unlocked at the end of the level once you have completed 3 laps around the track.
Monogon Motorway Video Guide
PILLAR CLIMB (STORY/EXPERIMENTAL)
Weapon: Chef Knife. Behind the small wall on your right after getting out of the hole section.
Weapon: Cleaver. Before you cross the wooden plank to get to the end of the level, go to the left side of the buildigs and comntinue climbing to find the collectible.

Weapon: AKM. Past the finish podium on a rock below.


Avatar: Tall. Obtained at the end of the level.
Pillar Climb Video Guide
ASCENT (STORY)
Prop: Plant. In the room with the floating tea set, on the ground to the right.
Prop: Gym Block D. After you place the boulder in the hole in the room with the floating tea set you will unlock the door and have access to another room. In this room drop down the hole to the right to get the collectible.
Weapon: Katar. In the room with loads of Null enemies with grass areas and circular lights, you can find the collectible on the top of the left lights. Use the Tall avatar to reach it.
NPC: Void Turret. Once you get to the area with loads of tall trees covered with grass, head to the opposite corner from where you enter to find the collectible in the corner.


Prop: Gym D20. In the same area as the previous collectible. Once you start climbing up, you will push over a wooden plank to continue. Jump to the platform on the "tree" to the right once you are on the wooden plank to find the collectible.


Prop: Gym Octogon. In the same area as the previous collectibles. Once you get to the jump pad at the top, use the "Tall" avatar to get up to the platform on the right where the collectible can be found.


Prop: Gym Tall Ramp. Look around as soon as you use the jump pad.
Weapon: MP5K Holosight. After you open a door with a key next to a small camp with a skeleton, you will be in an area with some lockers and enemies. After getting the ammo from the lockers, go left to find the collectible at the end.
Prop: Gym Block E. In the corner to the left in the room where you have to cross the toxic pool by swinging on ropes.
NPC: Craplet Plus. After going through the first pipe as "Short" you will come to a small room before entering another pipe. The collectible is in the small metal box on the wall on the right.


NPC: Null Body Corrupted. In the area just after the pipes, where the boxes are bouncing up from below, drop down to the bottom to find the collectible.


Weapon: Sledgehammer. In the small room to the right after you go up some stairs that circle around a small square room with enemies in it.


NPC: Omni Turret. In the room after the previous collectible, go to the left to enter a small area with a turret in it. The collectible will be on a shelf.


Weapon: MP5K Flashlight. In the area where you are running throught the active subway tunnels dodging the train, go all the way to the last safe area on the left found very close to the end of the subway tunnels (the one with the pool of corruption). Here you will be able to find a key in a bag. Now continue throught the level by taking the escalator. Soon you will have to climb over a pool of corrpution. After you do that you will be in a room with enemies and a locked door. Use the key to open the door that will allow you to enter the room where the collectible is found in the orange locker.


Empty?: After the "mines" area you will come to a room with some green grass and a sign on the wall for "Fantasy Land". The collectible in under the stairs in this room (this capsule was empty, this may be a glitch).
NPC: Peasant Null. In the room with the big square lif that ends the level, use the Tall avatar to climb in to the small room to the left of the lift. The collectible will be behind the "Monogon" poster.


Ascent Video Guide
HOME (STORY)
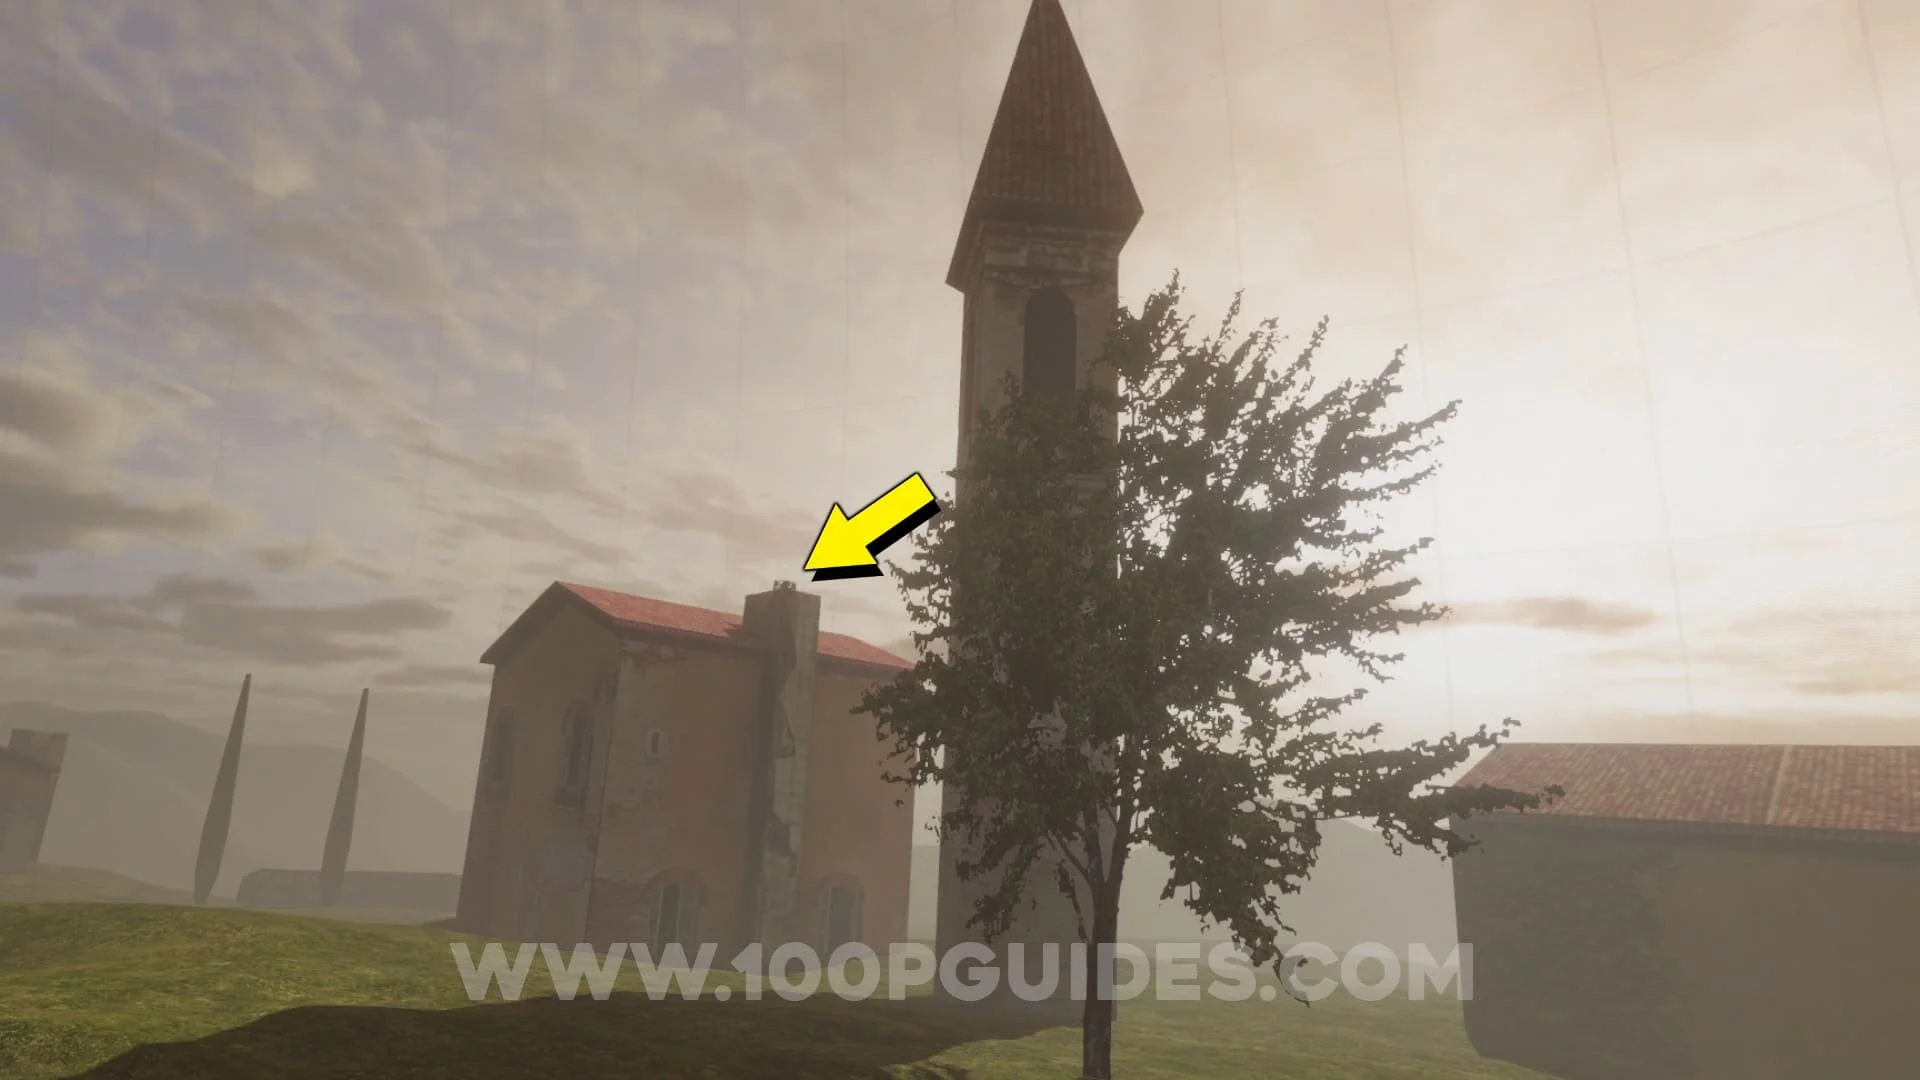
NPC: Peasant Male A. Climb on to the roof to the left at the start. Then climb up to the chimney to your right to find the capsule.


NPC: Peasant Female B. In the 2nd area just after the previous collectible, go behind the tower in the far left corner.
NPC: Peasant Male B. On a rock to the left of the noose.


NPC: Peasant Female A. In the area just after the noose, on the side of a tower. Use the tall avatar to reach it.


NPC: Peasant Female C. Behind the metal container to the right of the entrance to the tavern.
NPC: Peasant Male C. Inside the small room on the second floor of the tavern.
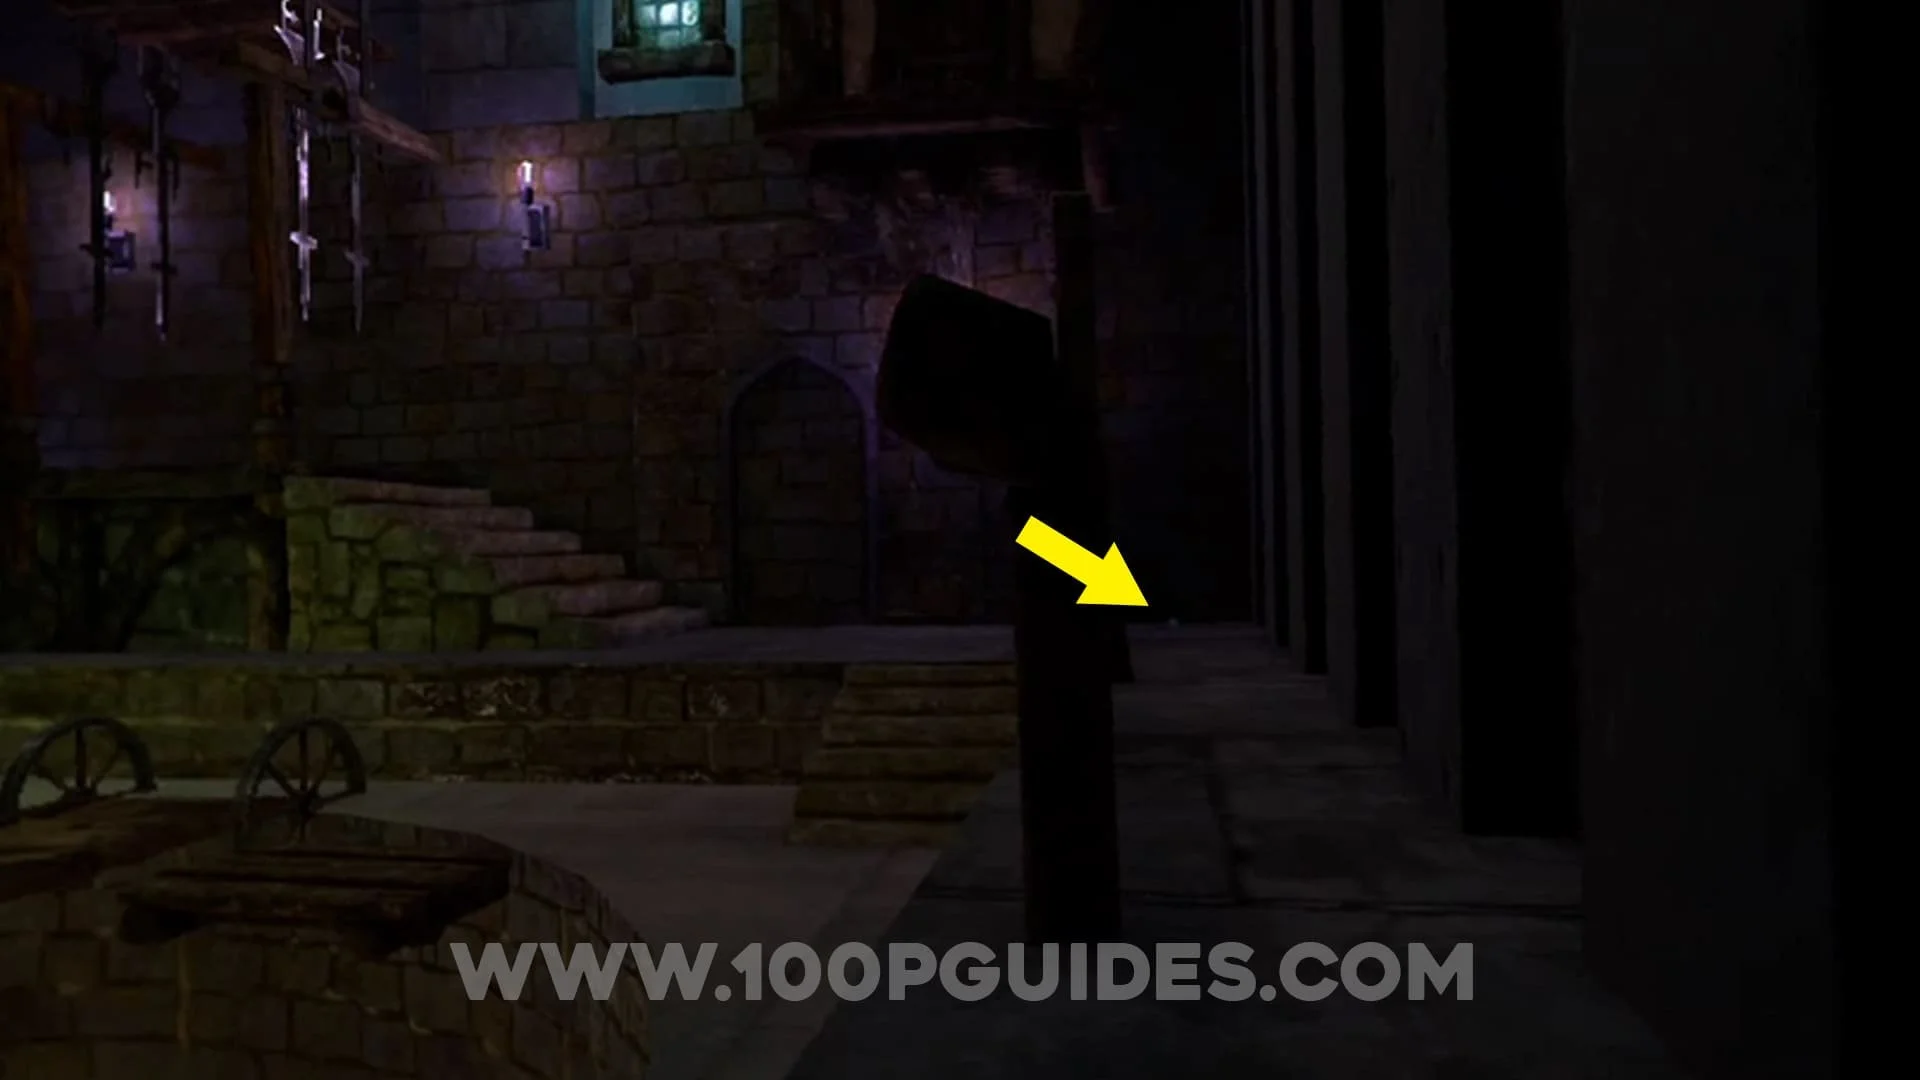
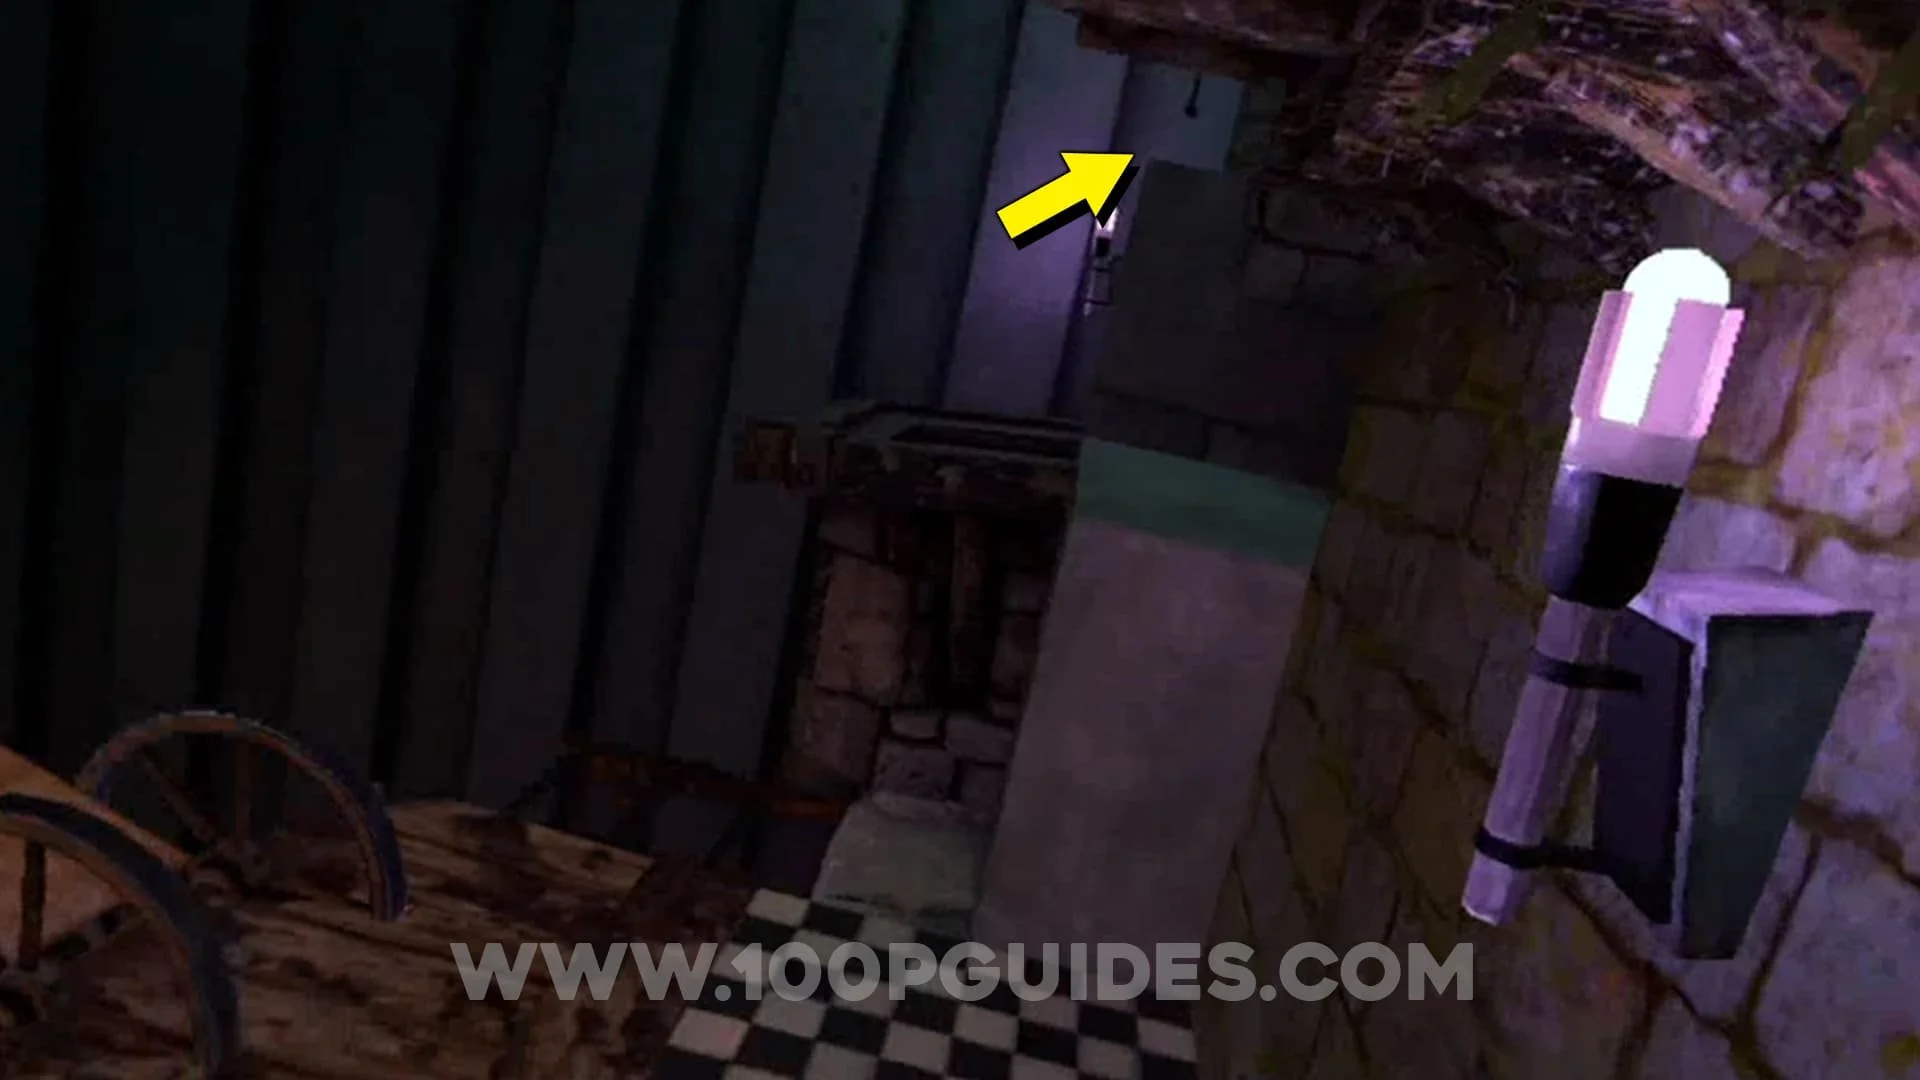
NPC: Cultist. As soon as you leave the tavern you will be in a dark area with a door in front of you. Before you enter the door, go right to find the collectible next to a piece of "glass" that is standing against the wall.


Home Video Guide
DROP PIT (TAC TRIAL)
Prop: Gym Shallow Ramp. In the big bottom room after opening the first door from killing enemies. Use the tall avatar to climb to the horizontal metal bar near the back of the room to find the capsule.
Weapon: PT8 Alaris. After selecting a pistol from the room, enter the next room with enemies and climb to the platform to the left as soon as you enter. Then open the ventilation grill and enter the air vent to find the collectible at the end.
Prop: Plunger. In the same air vent as the previous collectible you will have another grill below you. Open it to find the collectible below you.


Prop: Gym D6. In the last room with the enemies that you have to kill with the pistol (where the counter is on the wall), use the tall avatar to climb up the the ledge on the ledge to find the collectible.


Drop Pit Video Guide
NEON DISTRICT (TAC TRIAL)
Weapon: MK18 Ironsights. As soon as you leave the weapon room, climb up to the left with the tall avatar to find the collectible on the blue platform to the left.
Prop: Gym Block C. Use the tall avatar to climb to the platform near the middle wiith the half-circles on top. Now jump to the orange platforms to the right to find the collectible on one of them.


Weapon: P350. Go to the area that is directly opposite the starting room. Here jump up to the platform above and find the capsule in the dead end.


Prop: Gym Trapazoid D. From the previous capsule, go to the right to enter the area that has red lights. The capsule will be in the corner behind the stairs.
Neon District Video Guide
CONTAINER YARD (ARENA)
Prop: Gym Beam. In the second locker to the left in the starting room.
Prop: Flashlight. In the same locker as the previous collectible.
NPC: Skeleton Steel. Exit the first room through the door in front of the locker. Now go to the area to the left and use the tall avatar to climb to the container above the lasers.


Weapon: Machete. In the same area as the previous collectible, on top of the other container near the middle of the area.
Weapon: Axe Horror. In the long blue container in the middle area close to the building you start in.
Gadget: Boardgun. In the corner of the area where the gravity plate is. This can be found in the opposite corner of the level from where you got the 3rd capsule.
Weapon: Barbed Bat. On top of the building with the corruption inside.
Container Yard Video Guide
FANTASY ARENA (ARENA)
Weapon: Sword Claymore. At the start look through the left gate that is behind you to find it on a barrel.
Prop: Gym D10. Once you enter the arena use the tall avatar to climb up to the area above the entrance.


Weapon: Half Sword. From the previous collectible, stay on the higher part of the arena and go around to find the capsule on the highest part of the opposite side.
Fantasy Arena Video Guide
TUNNEL TIPPER (ARENA)
Weapon: Hand Hammer. In the first room (after the starting room) above you on the door you just used to exit the starting room.
Weapon: E-HG Blaster. In the same room as the previous collectible, use the jump pad on the right. Then use the zipline. Now jump up to the platform on your left and look behind the fan to find the capsule.


Weapon: M16 Holosight. From the previous collectible, jump to the platform on the right to find the capsule.
NPC: Early Exit Zombie. From the previous capsule, look towards the zipline. Then shoot the little box with a capsule in it that can be seen just above the left side of the zipline. Then drop down and get it.
Prop: Glowstick. From the metal platform below the zipline, look towards the area where you first got on the zipline. Now drop down to the platform below and use the jump pad on the left. This should take you to an area with a massive hole in the ground. Drop down the hole and find the capsule under some boxes.


Tunnel Tipper Video Guide
DUNGEON WARRIOR (PARKOUR)
Weapon: Kunai. After pushing the GO button, jump to the first platform and then use the tall avatar to jump to the area to the right. Here look right to find the capsule.


Weapon: Norse Axe. After dodging the axes you will be in a big room with lava down way below. Here jump down on to the floating platforms. Then use them to get to the other side where you will find the capsule.
Prop: Gym Cylinder Half B. After you clear the area where the previous collectible was. Find the collectible on the table in the corner to the left.
Prop: Gym Block B. In the rubish bin in the far left corner in the final area where you end the level.


Dungeon Warrior Video Guide
ROOFTOPS (PARKOUR)
NPC: Null Body Agent. As soon as you leave the first room, take a right to find the capsule in the elevator.
Weapon: Wrench. After leaving the very first room, go to the left and then jump over the junk on your left to find the capsule next to the door at the end.
Prop: Gym Trapazoid A. Once you get up to the first room area. Go straight to the end and then go right behind the containers. Then use the tall avatar to climb the small building to find the collectible.


Weapon: Combat Knife. After jumping over to the 2nd roof, continue straight until the gap that you would jump over to get to the next building. Just before the gap, look right and jump down to the fire escape stairs to find the capsule.


Prop: Gym Prism. Once you reach the 4th rooftop, use the tall avatar to get the capsule on top of the small ramped roof in front of you (the one with the white arrow on it).
Prop: Crate 1M Indestructable. As soon as you jump to the next roof, the collectible can be found inside the blue container to your right.
Weapon: MP5K Laser. Climb the tower to the right just before the final jump pad. Then push the plank of wood to get to the other tower where you will find the capsule in a bucket.


Gadget: Gravity Cup. From the previous collectible, look to your right to see a roof with a massive hologram on it. Jump across to this building to find the capsule.
Rooftops Video Guide
BIG BONE BOWLING (EXPERIMENTAL)
Prop: Bowling Ball Big. Above the button you can press to get a bowling ball to spawn.
Weapon: Warhammer. Behind the pins, on top of the "Bowling" sign.
Big Bone Bowling Video Guide
MIRROR (EXPERIMENTAL)
Prop: Gym Arch. In the mirror area, use the tall avatar to climb up to the roof area. The capsule will be on one of the benches.


Prop: Gym Cylinder Large A. On the same roof in plain sight.
Mirror Video Guide
GUN RANGE (SANDBOX)
Weapon: 590A1. On top of the vending machine to your left as soon as you start.

Weapon: M4. In the targets area. Go to the 3rd target range (the one with the bushes and rats) to find the collectible behind one of the targets.
NPC: Omni Projector Hazmat. Go through the door to the second group of target ranges. Then go to the last one and climb up to the second floor of the wooden structure to find the capsule.

Gun Range Video Guide
HALFWAY PARK (SANDBOX)
Prop: Gym Cylinder Large B. From the start, head in to the building to your left and head up the ladder inside to get to the roof. The collectible will be on the roof in plain sight.


Prop: Gym Cube 3x3. Continue around the park anticlockwise to the next building. Now climb on to the roof to find the capsule on top of the middle platform.
Weapon: M9. The next capsule can be found inside the container close to the middle of the park.
Gadget: Constrainer. On the roof of the right building of the 2 remaining buildings. You can get up there by climbing the yellow pipe.


Halfway Park Video Guide
MUSEUM BASEMENT (SANDBOX)
Gadget: Dev Manipulator. On top of the back left tower of the "castle" in the first area.
Weapon: Golf Club. After getting the battery from one of the towers of the castle in the first area and opening the door to the basement. Continue through until you get to a room that is surrounded with "green grass". The capsule will be on the desk here.

Prop: Gym Soccer Ball. Continue through the level from the previous collectible by moving the vending machines. Once you get to a room where you can go left or right, take the door on the right side. Then find the collectible under the stairs.


Prop: Basketball. Continue up the stairs and through the level until you get to a room with a massive manikin after falling down a hole. Here you will find the capsule on the desk.


Museum Basement Video Guide
TUSCANY (SANDBOX)
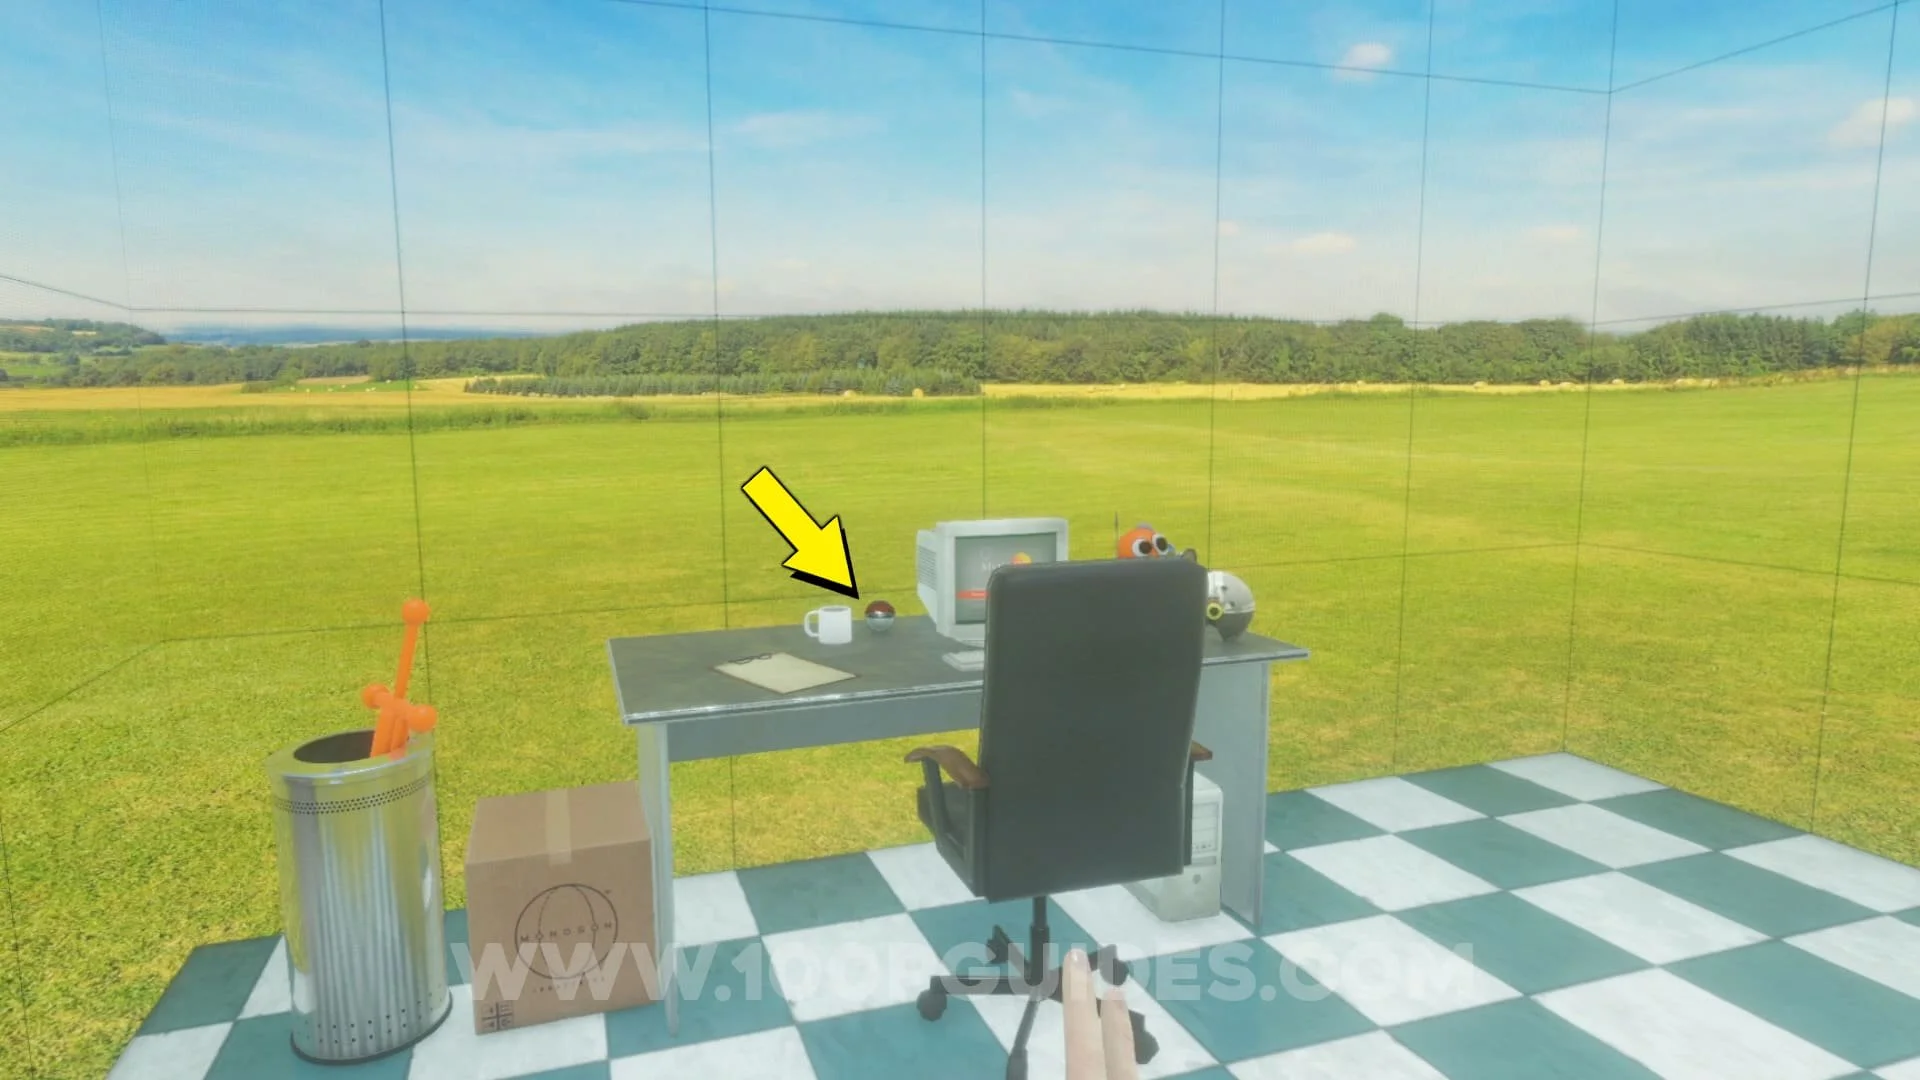
Prop: Soup Can. Inside the building on the bottom floor on a table.
Prop: Watermelon. Go upstairs in the building to find the capsule on the balcony.
Weapon: Frying Pan. Jump off the balcony to find the capsule on one of the tables with weapons on them.
Prop: Shopping Cart. Go to the fountain outside the entrance of the building and turn around 180º. Then jump over the the wall and head to the tower in the distance. Here use the Nimbus Gun to get on to the roof where you can find the capsule.

Tuscany Video Guide